It’s time to delve into a topic that adds shape and structure to our creations – sewing darts. They are essential to our fabric toolbox, breathing life and contour into our flat pieces of fabric. Darts are a must when you learn to sew. Without them, we may just as well be tossing shapeless burlap bags over our bodies!
We’ll learn what darts are, their purpose, how to sew them, whether or not we need to sew them in lining, and the different types of darts out there. We’ll also talk about sewing curved darts and offer some handy tips for easy dart sewing. So, grab your needle and thread, and let’s get started!
What are Darts & What is Their Purpose?
At the heart of sewing, darts are folds (tucks coming to a point) skillfully sewn into the fabric to help provide a three-dimensional shape to a garment. Darts is an easy sewing definition to misunderstand. Simply put, they are a tailoring technique that gives flat pieces of cloth a specific form. This is particularly important in clothing design, where the fabric must contour to the human body’s unique and curvilinear dimensions.
Just imagine a blouse without darts. It would hang straight and loose without conforming to the curves of the bust and waist, giving it a baggy and unflattering look. Now, introduce darts to this same blouse. With strategically placed folds sewn into the fabric around the bust and waist areas, the blouse suddenly takes on a form-fitting shape that complements the wearer’s figure. The transformation is remarkable, and it all hinges on the subtle but powerful art of sewing darts.
Darts primarily serve two purposes: shaping and fitting.
Shaping: Darts help create a three-dimensional form out of a flat piece of fabric. They’re strategically placed and sewn based on the pattern design, adding volume where needed. This could be in areas like the bust, waist, and hips, adding structure and contour to the garment.
Fitting: Darts also enable the garment to fit the wearer’s shape better. Everyone’s body is unique, and one-size-fits-all rarely works. By adjusting the size and positioning of the darts, you can customize the fit of a garment to match the wearer’s figure better.
Moreover, darts are not limited to clothing. They’re also used in home décor sewing projects, such as custom slipcovers for chairs or throw pillows for a sofa. Here, darts help to shape the fabric around the curves and corners of the furniture, creating a snug and tailored look.
Fortunately, sewing darts isn’t a significant challenge. As a beginner, you can accomplish this maneuver easily. Once you achieve this sewing skill, you can’t help but feel like your work looks super polished!
How to Sew Darts: A Detailed Guide
Like any sewing technique, sewing darts requires precision and patience, but the results are incredibly rewarding. This process might seem intimidating, but once you understand the process, it’s pretty simple.
Step 1: Mark the Dart
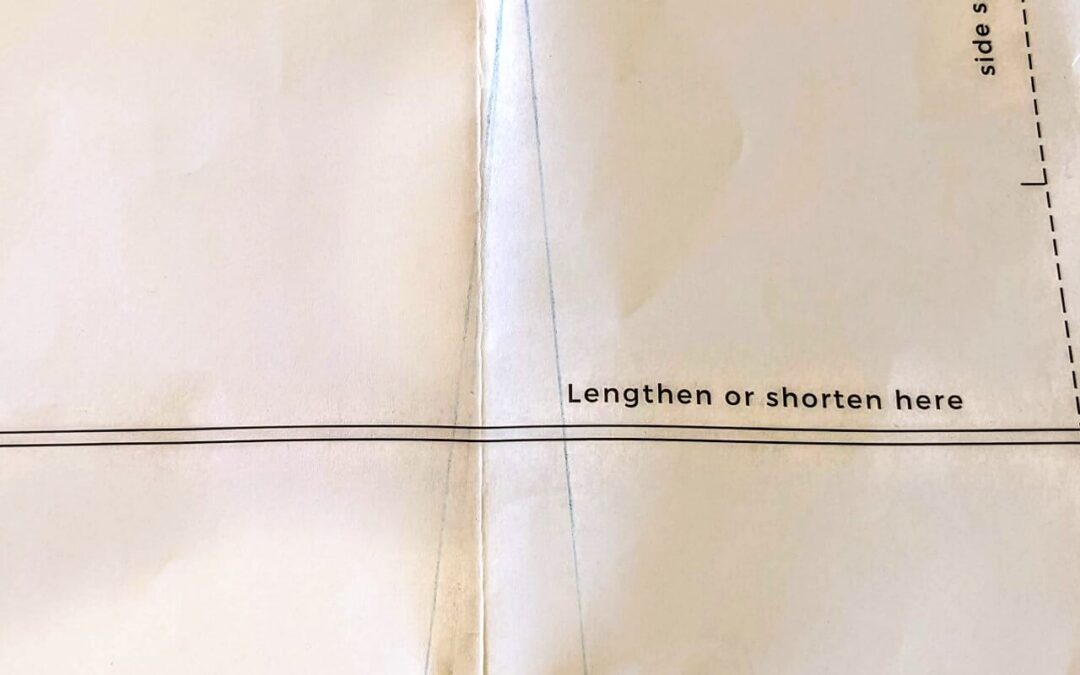
Your pattern will indicate where the dart should be placed. (Check out my guide on how to read sewing patterns if you need help!) These markings need to be transferred onto your fabric. You can do this using a fabric marker or tailor’s chalk, which allows you to clearly see where your stitches need to go.
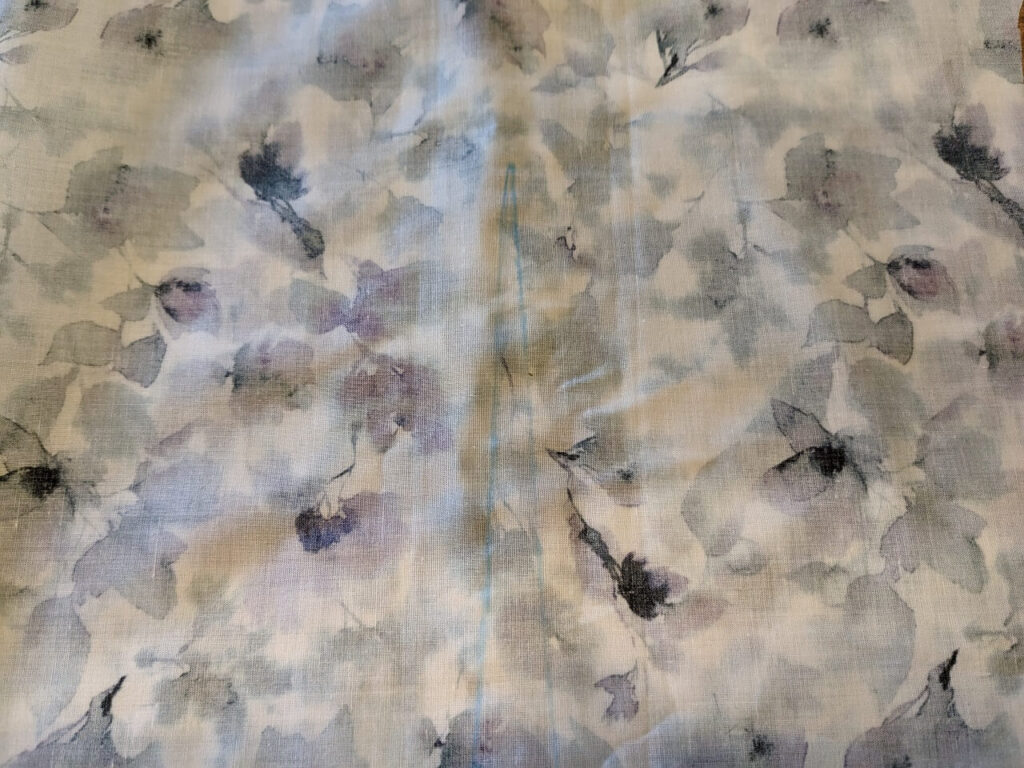
Typically, a dart is represented as a V shape, with the point of the V indicating the dart’s point (or apex) and the open end marking the base (or legs). Always ensure the marks are visible on the wrong side of your fabric since this is where you will be sewing. And don’t forget — if you need to make two darts on a folded pattern piece, you’ll need to draw two darts. You’ll have darts on each side of the cloth!
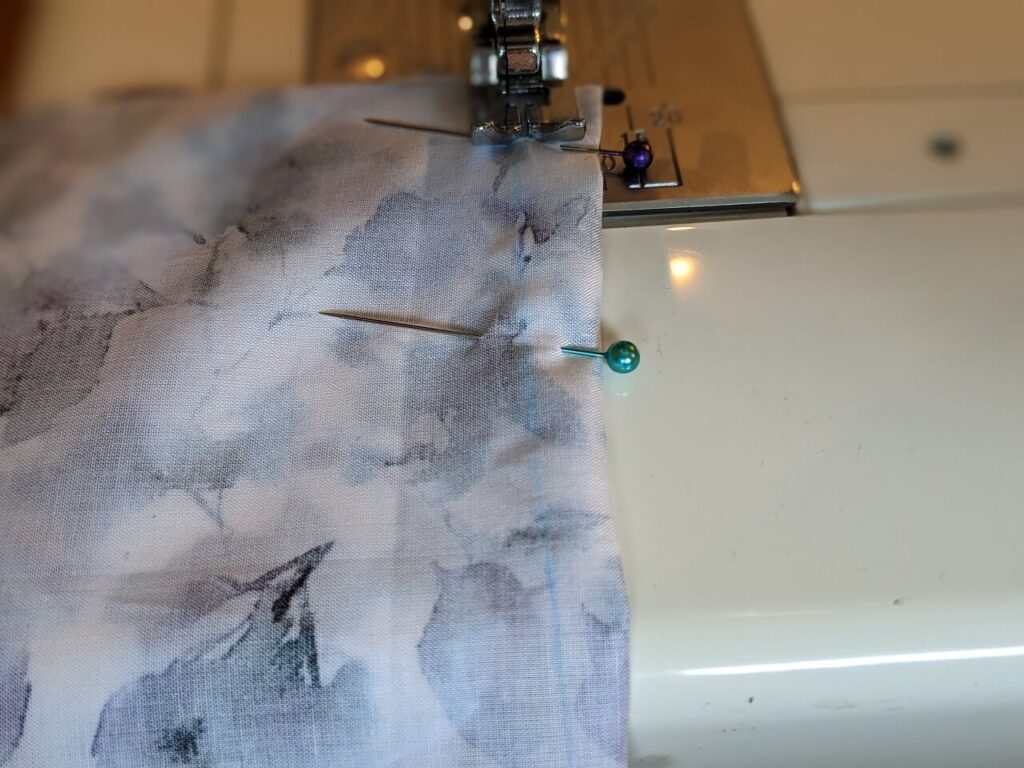
Step 2: Fold and Pin
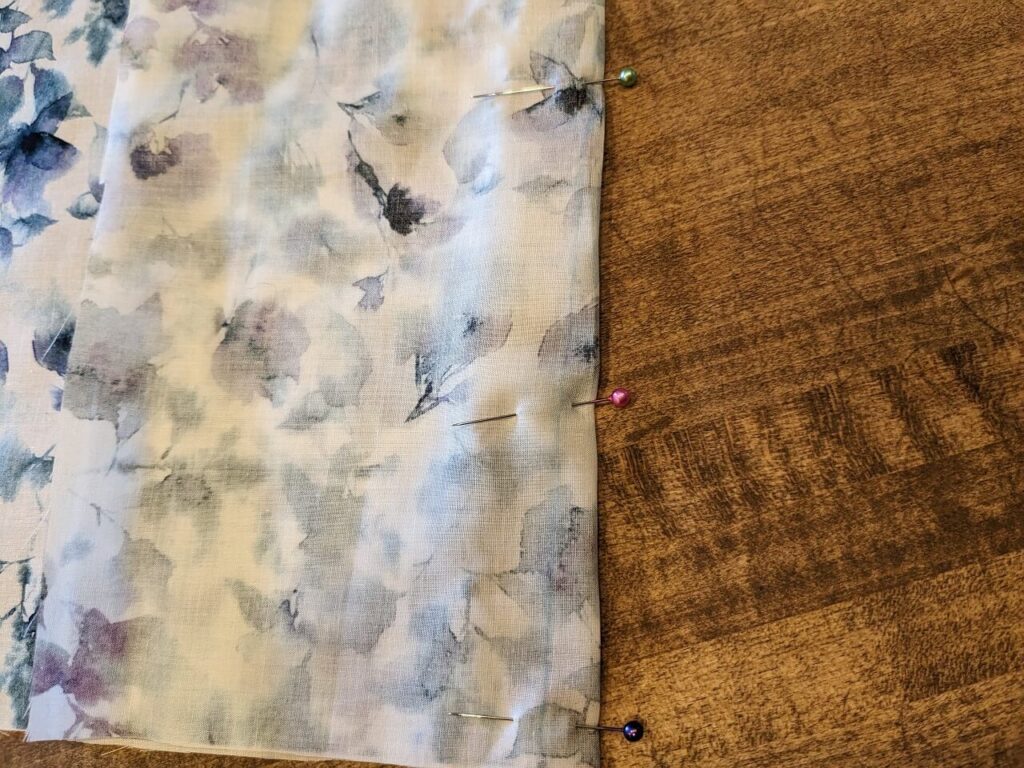
Next, fold the fabric along the center of the dart, making sure to align the marked lines from the legs of the dart. The outside of the material should be on the inside because you’ll be sewing on the wrong side of the fabric. Once you’ve accurately aligned your marks, pin along the line to secure the fold. It’s critical to make sure the material doesn’t shift as you sew; choosing the right fabric type will also help cut down on that.
For better accuracy, pin at the broadest part of the dart (the legs) and at the dart point. You might also find it helpful to pin in the middle. Again, the goal is to secure the fabric so it stays perfectly folded as you sew.
Step 3: Sew the Dart
Now it’s time to start sewing. Although they aren’t usually large, you don’t want to sew by hand here, so head to your sewing machine.
Begin at the widest part of the dart, backstitching to secure your thread. Continue sewing along the marked line, removing the pins as you go.
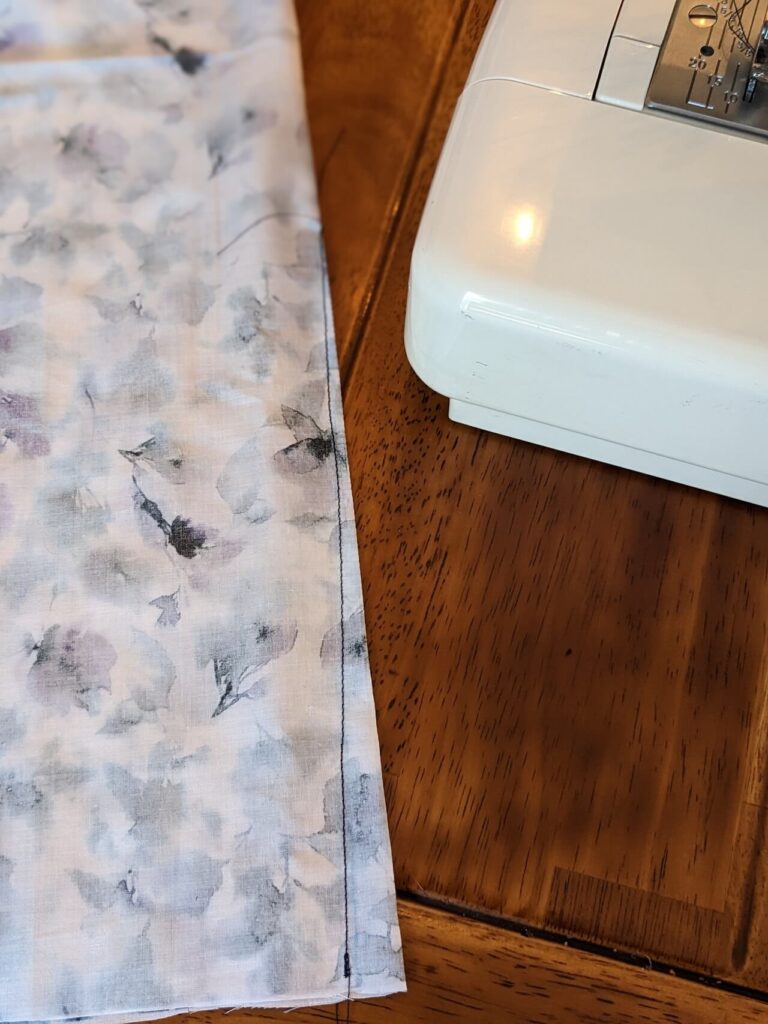
As you approach the dart point, reduce your stitch length. This helps to strengthen the point and makes it less likely to unravel. Rather than backstitching at the point (which can cause unsightly bunching), sew right off the edge of the fabric, then tie off the thread manually. This gives you a smooth and tidy dart point.
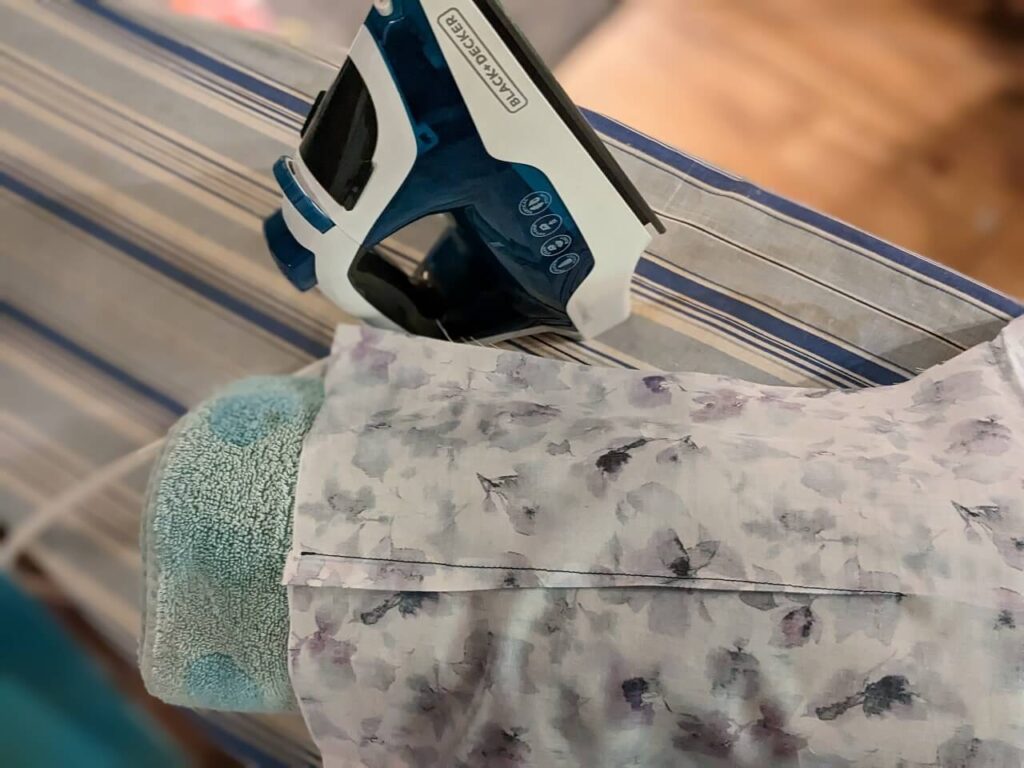
Step 4: Press for Perfection
Pressing is often an overlooked step in sewing, but it’s critical for professional-looking darts. The direction in which you press the dart depends on the type of garment and the location of the dart.
- Vertical darts (like those in a blouse or dress) are typically pressed toward the center of the garment.
- Horizontal darts (like bust darts) are usually pressed downwards.
Use a pressing ham or a rolled-up towel to maintain the dart’s shape as you press. This curved surface allows the dart to maintain its shape and prevents unwanted creases.
Finally, don’t forget to admire your handiwork! Congratulations, you’ve just successfully sewn a dart!
Do You Sew Darts in Lining?
The simple answer to this question is yes, you do sew darts in the lining. But let’s dig a little deeper into why this is done and how you can go about it.
The purpose of the lining in a garment is to give it a more finished appearance, help it hang better on the body, and even extend its life by reducing friction between the garment and the body or other layers of clothing. The lining also mirrors the shape and structure of the outer garment. So, if the main fabric calls for darts for shaping, the lining will, too.
When you sew darts into the lining, you ensure that the lining matches the same form as the main garment, which helps keep the overall shape and fit consistent. If darts are present in the main garment but omitted in the lining, the garment could appear distorted, with the lining potentially pulling against the darts in the main fabric, leading to an unflattering and awkward fit.
The process of sewing darts in the lining is essentially the same as sewing darts in the main fabric.
Types of Darts
You might encounter several types of darts while sewing, each serving a specific purpose. Here are eight common types:
- Single Pointed Dart: The most basic and common type, typically found around the waist and bust area.
- Double Pointed Dart: Also known as a fisheye dart, used to provide shape on both sides.
- Curved Dart: As the name suggests, these are curved to better fit the body contours.
- Contour Dart: Similar to the curved dart, but has a more dramatic curve.
- French Dart: A longer dart starting at the side seam and ending at the bust point.
- Dior Dart: This is a combination of the waist and French darts.
- Neckline Dart: Found at the back or front neckline, providing shape to this area.
- Armhole Dart: Placed around the armhole to provide a better fit.
How to Sew a Curved Dart
Curved darts, common in vintage patterns, are a wonderful way to add a sculpted look to your garment. They follow the natural curvature of the body more organically, providing a snug and more personalized fit. However, they can be a bit tricky to master. Here’s a detailed, step-by-step guide to help you.
Step 1: Mark the Dart
As with straight darts, you’ll begin by transferring the dart markings from your pattern to your fabric. Again, it’s essential to ensure the curve is marked clearly and accurately, as you’ll follow this line closely while sewing. A good tip is to use a tracing wheel and tracing paper for transferring curved darts, as they can handle the curves more smoothly.
Step 2: Pin the Dart
Fold your fabric along the center line of the dart, aligning the markings on either side. Pin your fabric along the marked line, making sure to place the pins perpendicular to the line of sewing. Placing your pins this way will allow you to remove them while sewing without disturbing the fabric. You can break your sewing machine’s needle if you accidentally hit a pin, so be sure to take them out as they get close to your machine’s foot. This is a common sewing mistake for beginners.
Step 3: Sew the Dart
Now, it’s time to sew. Start at the widest part, backstitching to secure your thread. As you sew along the curved line, you’ll need to slowly and carefully maneuver your fabric to follow the curve. Ensure your needle is down in the fabric when you need to adjust your fabric’s position. This prevents your fabric from shifting.
One tip for sewing curved darts is to keep your eye a few stitches ahead of where you’re sewing, similar to how you’d look a few feet ahead while driving. This allows you to anticipate the direction of the curve and guide your fabric accordingly. Watch your line, not your needle.
As you approach the dart point, reduce your stitch length for added strength, and sew off the fabric’s edge. Just as with straight darts, you’ll want to tie off the thread manually at the end, ensuring a smooth and clean dart point.
Step 4: Press the Dart
Pressing is a crucial step for any dart, and curved darts are no exception. Depending on the dart’s location, you’ll want to press in the direction that gives the smoothest finish. Typically, vertical curved darts are pressed towards the center of the garment, and horizontal ones are pressed downwards.
Using a pressing ham will be particularly beneficial for curved darts, as it provides a curved surface that can accommodate the shape of the dart better.
Tips for Easy Darts
Darts might seem daunting when you’re first learning to sew but don’t worry – with these handy tips and a bit of practice, you’ll soon master this essential sewing skill.
Tip 1: Use a Good Marking Tool
When marking darts on your fabric, using a tool that provides a clear, precise line and doesn’t permanently stain the fabric is crucial. Tailor’s chalk or a fabric marker are usually the best options. A tracing wheel and tracing paper can make the job easier for curved darts.
Tip 2: Align and Pin Carefully
Take your time when aligning the dart markings and pinning the fabric. Ensuring the marks line up perfectly will lead to more precise and professional-looking darts.
Tip 3: Start from the Widest Part
When you begin sewing, always start from the widest part of the dart (the base) and sew toward the point. This direction of sewing prevents the fabric from puckering at the point, resulting in a smoother dart.
Tip 4: Secure the Dart Point Properly
Instead of backstitching at the dart point, which can lead to an unsightly bump, sew right off the fabric and then tie the threads manually. This ensures a more polished and neat-looking dart point.
Tip 5: Use the Right Stitch Length
The right stitch length can significantly affect the strength and appearance of your dart. A smaller stitch length (around 2.0) is usually recommended for most fabrics. As you approach the dart point, reduce the stitch length further to strengthen the tip.
Tip 6: Press with Care
Never underestimate the importance of pressing when sewing darts. Proper pressing sets the stitches and gives the dart a professional finish. Use a pressing ham for curved darts and better results overall.
Tip 7: Practice, Practice, Practice!
Like any sewing technique, mastering darts takes practice. Start by sewing darts on scrap fabric before moving on to your actual project. The more you practice, the more confident and skilled you’ll become.
Remember, sewing is not just about following steps; it’s an art form where every stitch contributes to the overall beauty of the finished item. By understanding and mastering techniques like sewing darts, you can create garments and home decor that are not only functional but also exquisitely tailored and a joy to create. With practice, it can become a comfortable part of your sewing repertoire. So, get your sewing machine ready and give it a go – and remember, every skilled tailor once was a beginner.