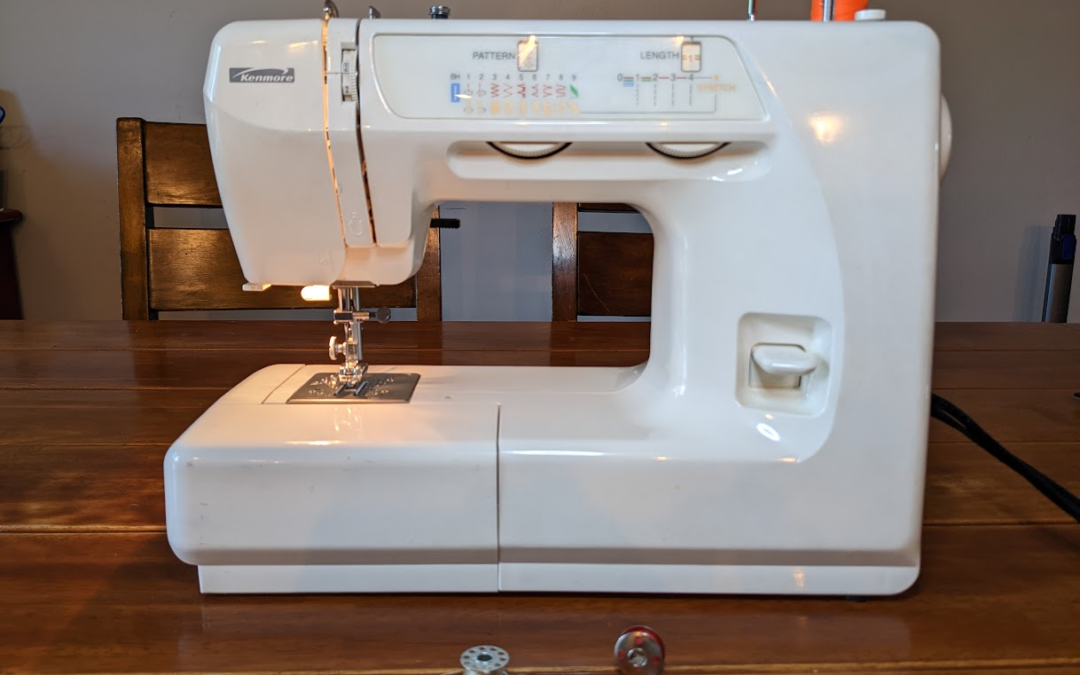
Learning the basic parts of the sewing machine is one way to become more comfortable with your sewing machine. When you’re first starting to learn to sew, all these knobs and levers may feel intimidating, but they shouldn’t scare you away. Instead, become comfortable with what each part does, and you’ll soon conquer them like a sewing champ.
Sewing Machine Parts and What They Do
Not all sewing machines are built the same. Depending on your machine style, you may find you have different parts of the sewing machine than some others. For example, a mechanical sewing machine does almost all the same things that a computerized sewing machine does, but some of these parts may differ in how you operate them. And a beginner’s sewing machine might not have all the advanced features of some more expensive models.
Power Switch
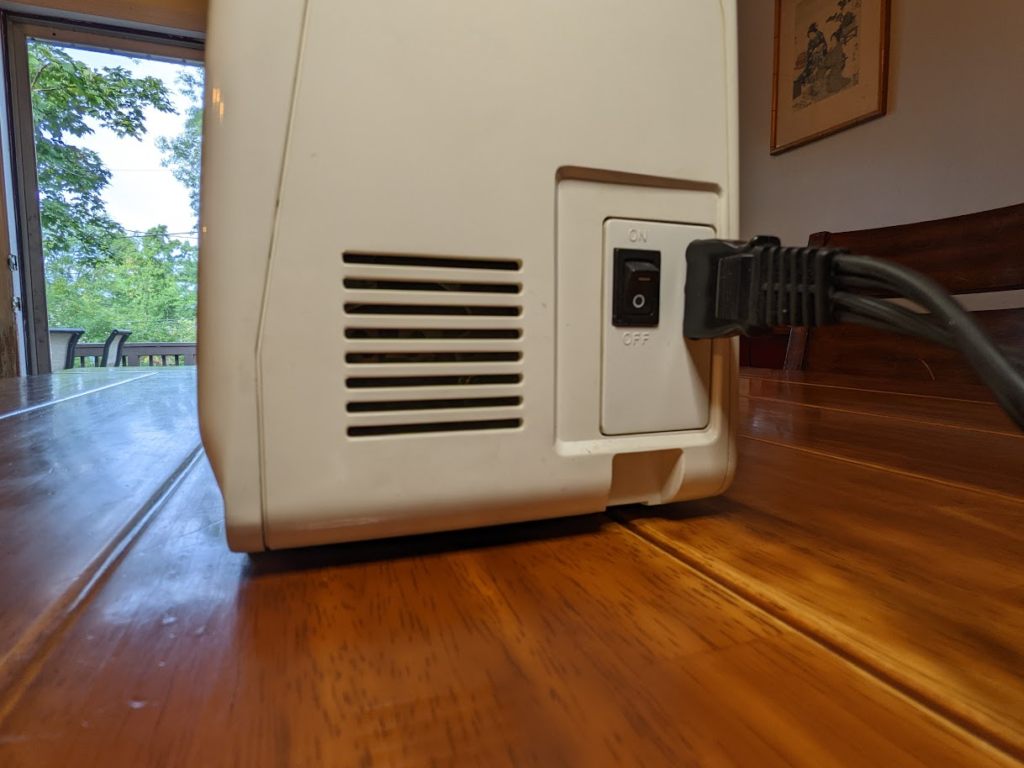
At the end of your power cord, you have the power switch to turn your sewing machine off and on. Naturally, this is one of the most essential parts of your sewing machine because you can’t operate it without power!
Of course, don’t forget to plug your power cord into the wall first!
Feed Dogs
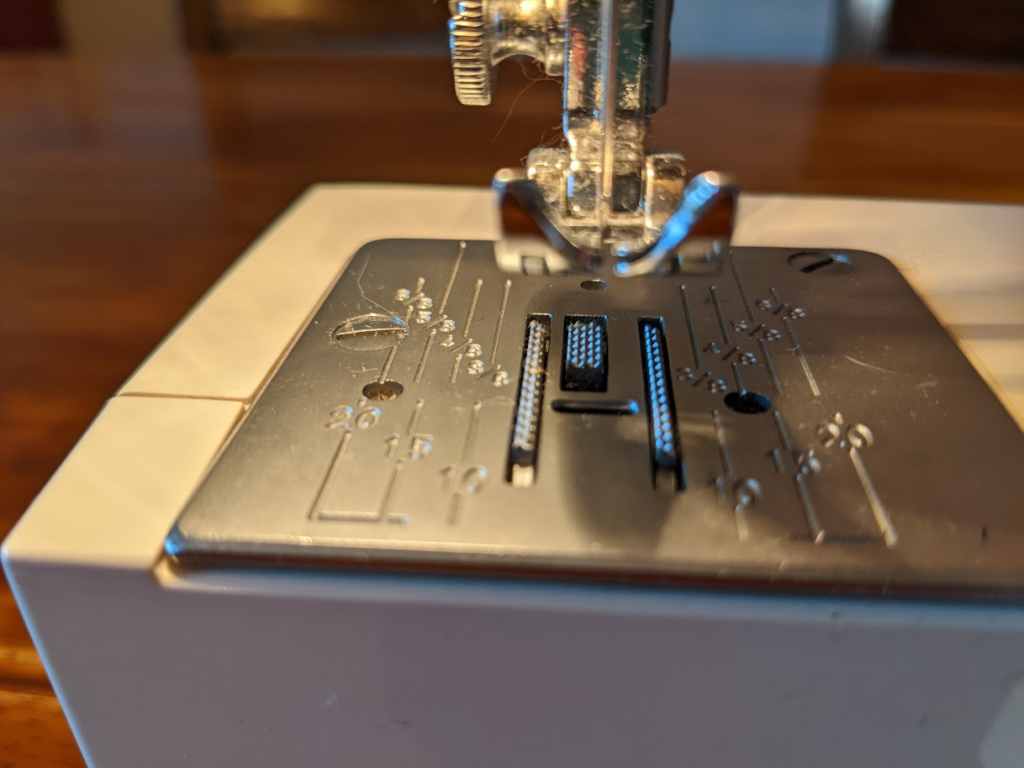
Did you know this part of your sewing machine has a name? The feed dogs are tiny ridges located directly under your sewing machine’s needle. They resemble little metal teeth on a metal base plate. Their function is to feed your fabric through the machine with their movement. Thanks to your feed dogs, you don’t need to pull your fabric through; you only guide the cloth as the feed dogs take care of movement.
The feed dog’s movement can be adjusted to move more or less, determining your stitch length.
Presser Foot
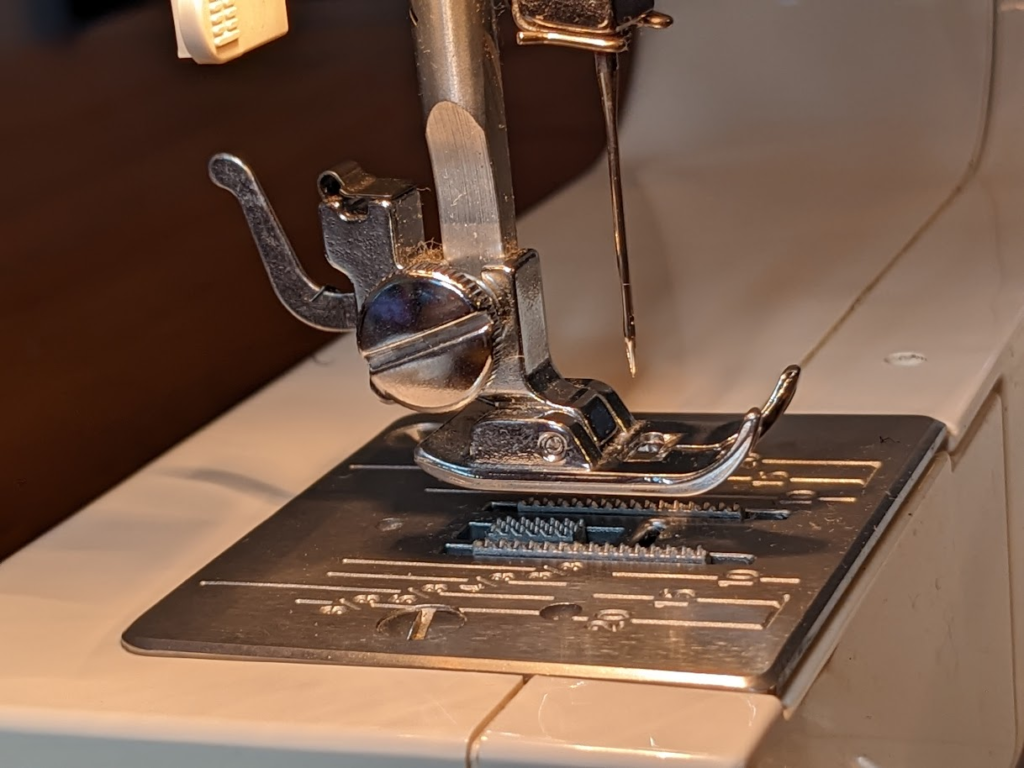
The presser foot holds your fabric down on the sewing machine with slight pressure and keeps it in place as you sew. This piece is used to counter the movement of the feed dogs under your material. Together, these two parts of the sewing machine prevent your fabric from going wild all over the place.
You’ll notice a lever in the back of your presser foot; it lifts the foot up and down to allow you to place your fabric underneath. You can even pull slightly up on the lever to raise the foot a bit higher, ensuring you can fit thicker material under the foot.
Your machine should come equipped with a couple of different types of presser feet. They can be changed out for various functions, such as sewing on a zipper or specific edging.
Needle
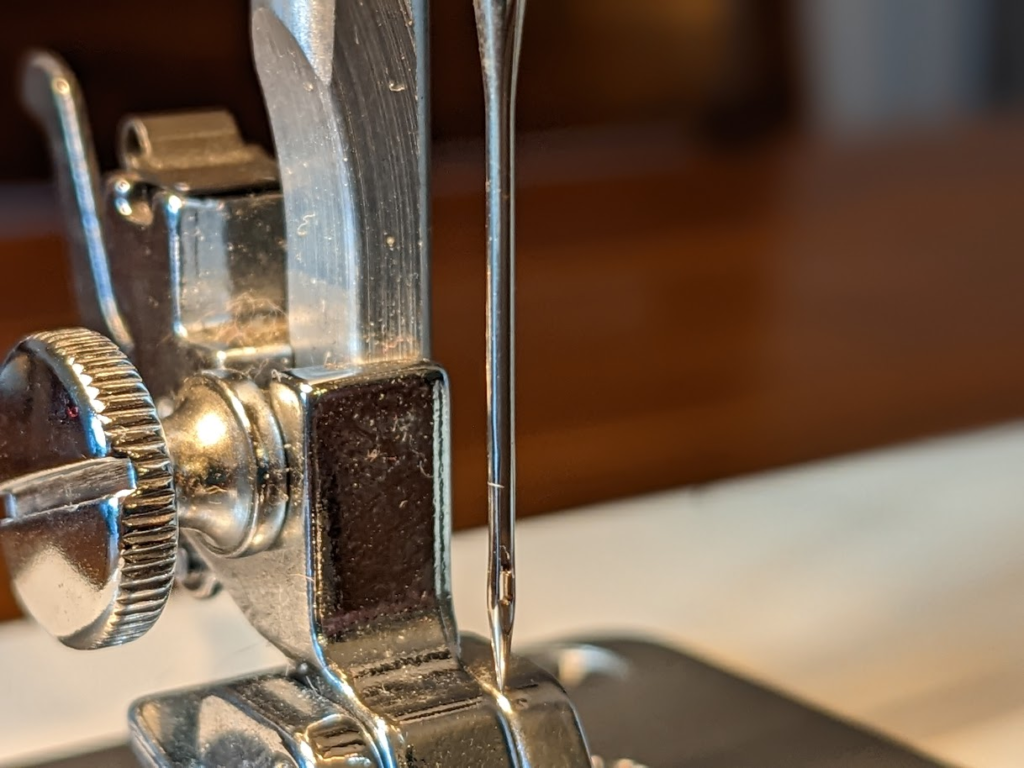
Ah, and here we have the star of the show: your sewing machine needle.
The sewing machine needles are the central parts of any sewing machine. You can’t sew without them.
Fortunately, you can remove and replace your needles if they break or if you need to use a different thickness.
Needle Clamp and Needle Bar
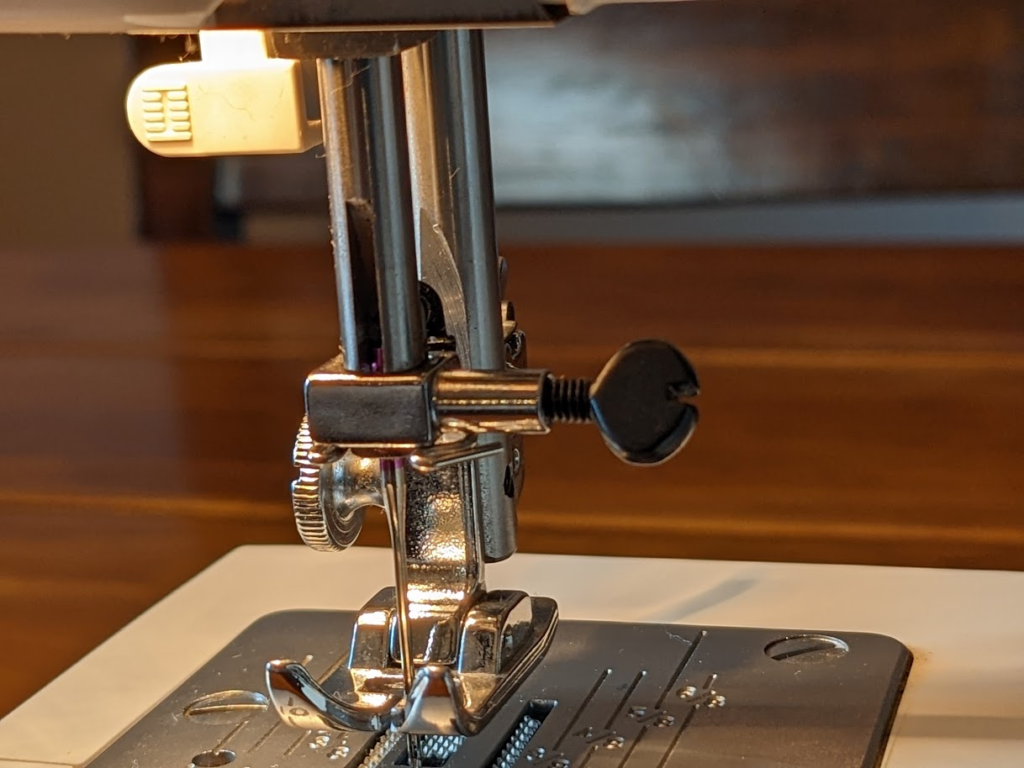
If you do need to replace your sewing machine needles, this is where the magic happens.
The needle bar encases the top of your needle to help hold it in the machine. To insert it, you slide the top of the needle (the thick, blunt end) into the hollow bar.
The needle clamp secures the needle in the needle bar. You screw it to tighten the hold on the needle. The clamp must be firmly fastened so your needle doesn’t wobble as you sew. On the other hand, don’t screw the clamp too tightly; you might break your needle. So, find your Goldilocks tightness on your needle clamp.
These two parts of the sewing machine don’t vary whether you have a computerized or mechanical machine.
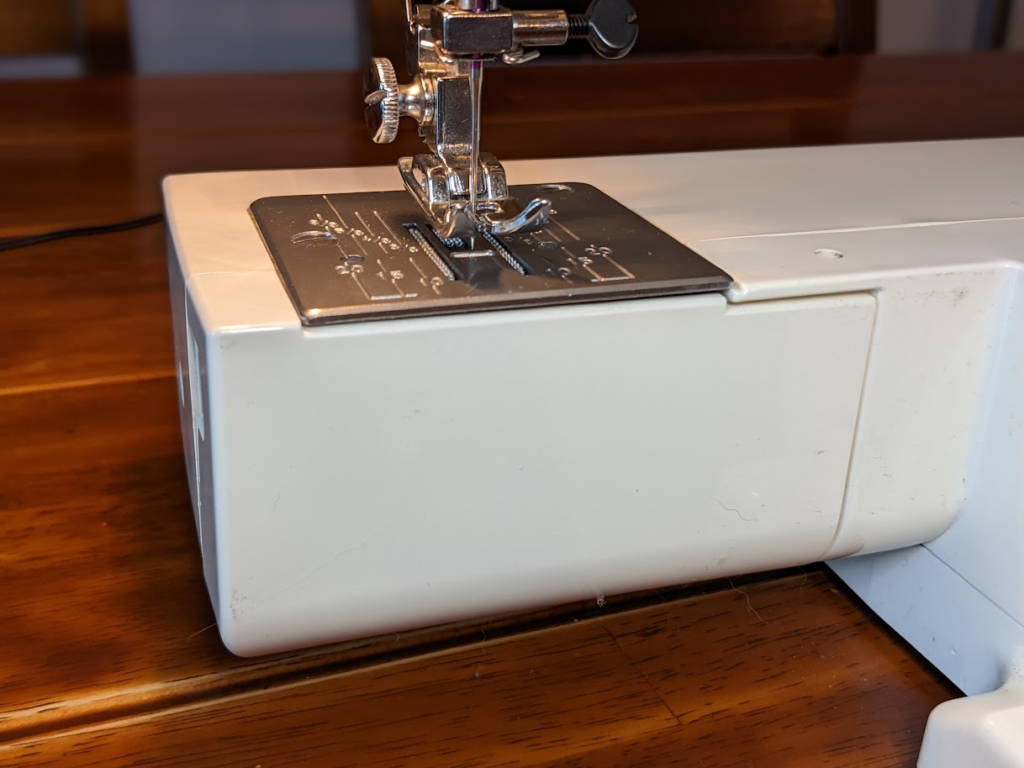
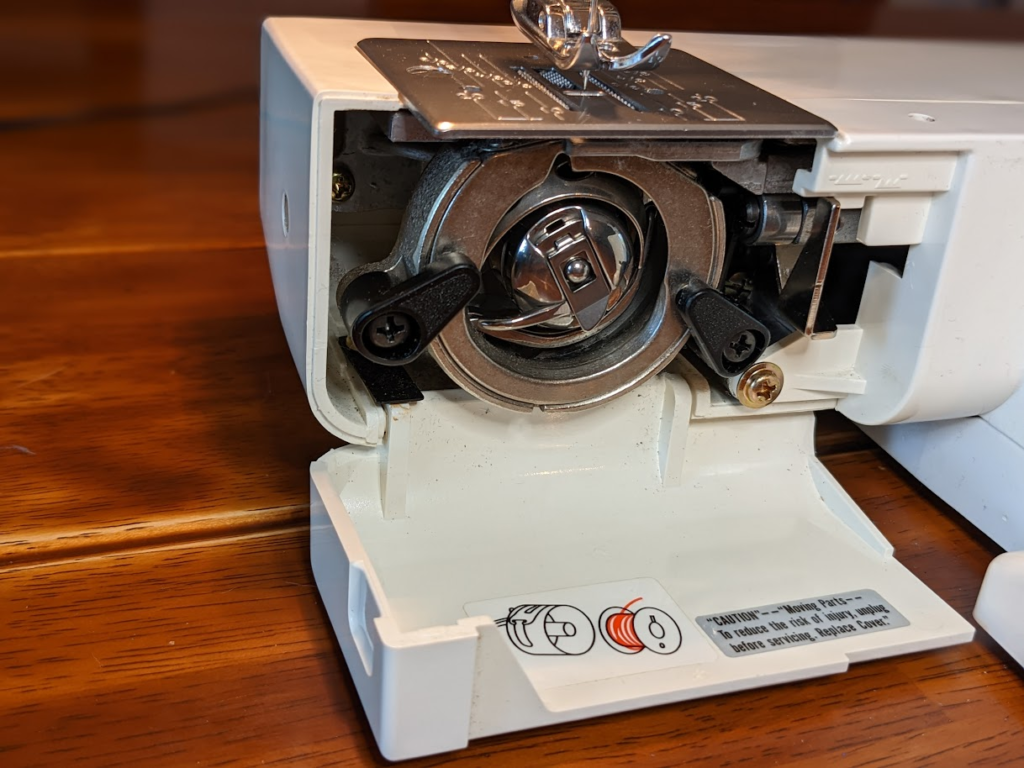
Throat Plate
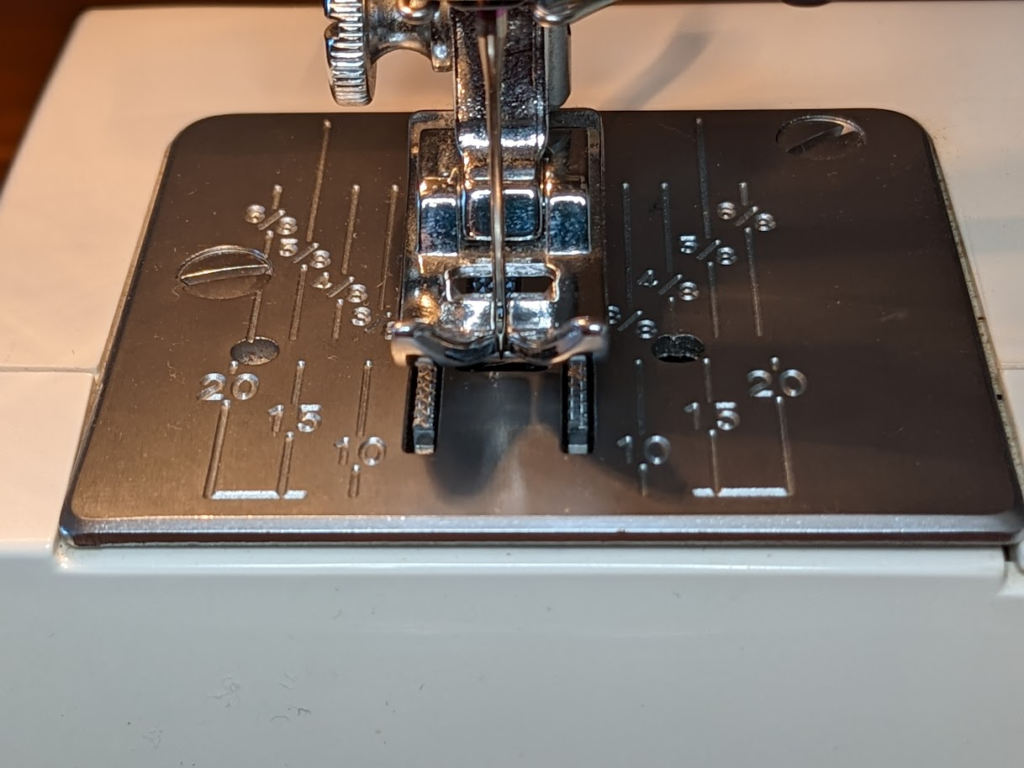
This part of the sewing machine is a removable metal plate on the base of your machine. It holds the feed dogs and has an opening in the center for your sewing needle to move all the way down through your cloth.
The throat plate covers your bobbin and includes a hole for the bobbin thread to come up through.
The sides of the plate include a handy stitching guide. These are the few lines etched in the plate to help you align the fabric and ensure you’re sewing in a straight line. They are also marked with measurements, so you know how wide your seam is.
Bed
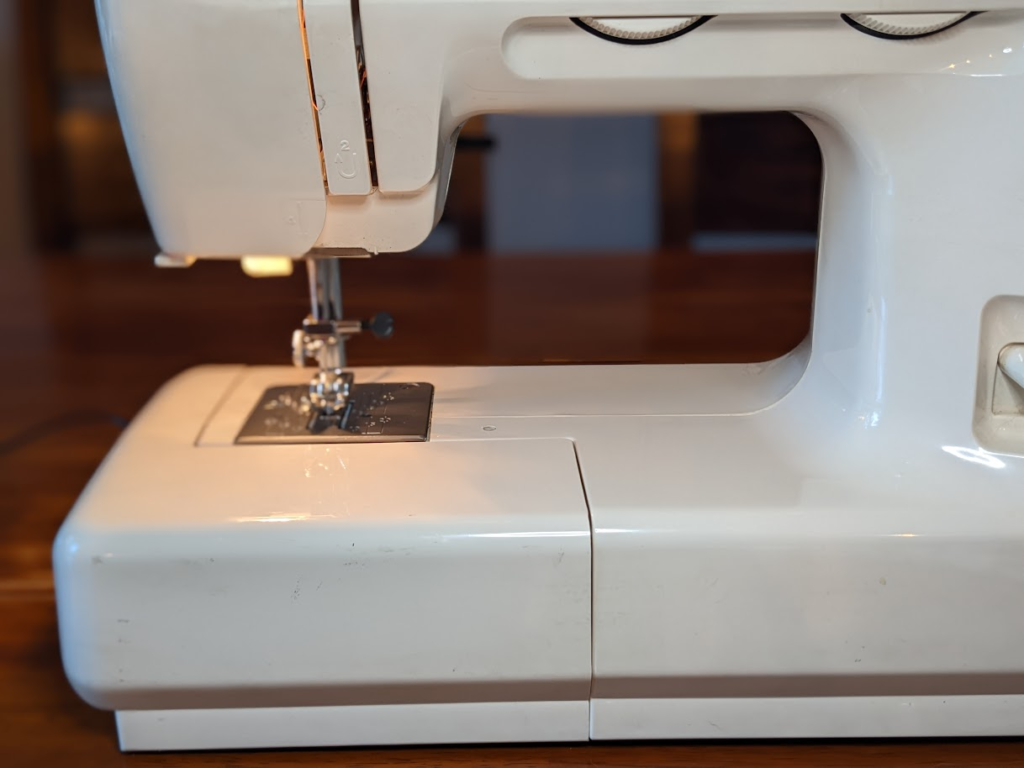
The bed is the base of your sewing machine. It’s where you’ll do the majority of your sewing.
This space is where you lay your cloth flat as you work.
Bobbin Winder
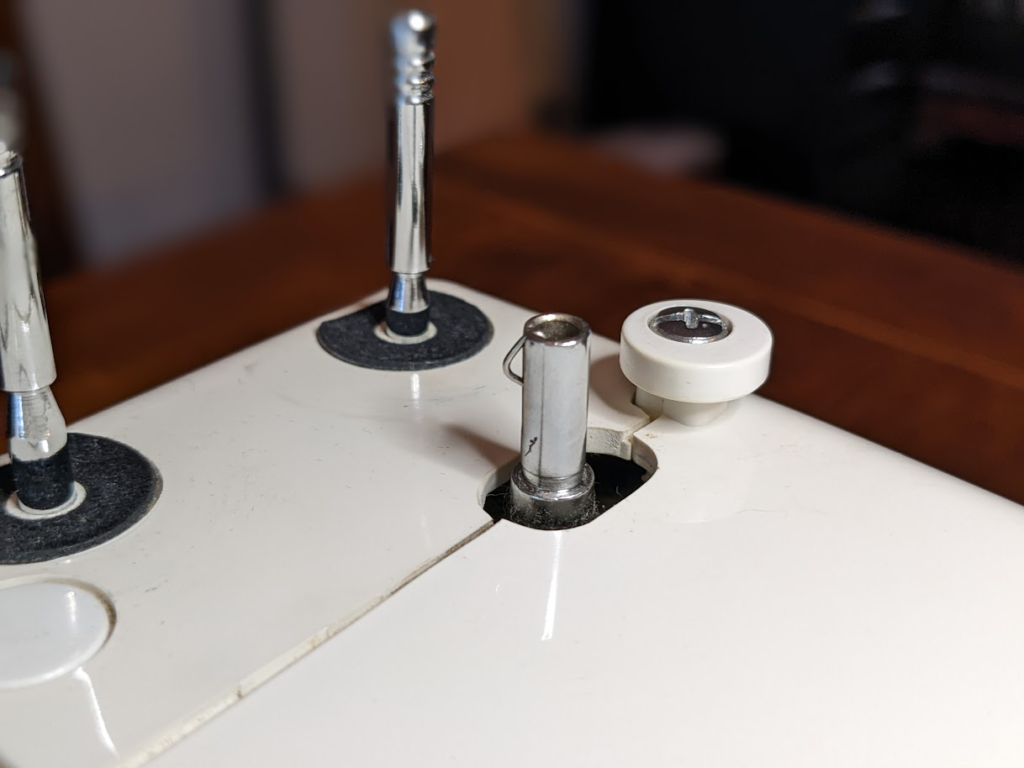
You will need to wind your thread onto your bobbins yourself. Fortunately, your sewing machine makes this easy for you to do.
Your machine has a small spoke on the top of the machine where you place your bobbin. (Some sewing machines place the spoke on the side.) Put the empty bobbin on the spoke, and the machine spins it around to wind the thread from your main spool onto it.
The bobbin winder stopper is the small plastic piece next to the bobbin spoke that prevents your sewing machine from winding too much thread onto your bobbin.
Bobbin and Case
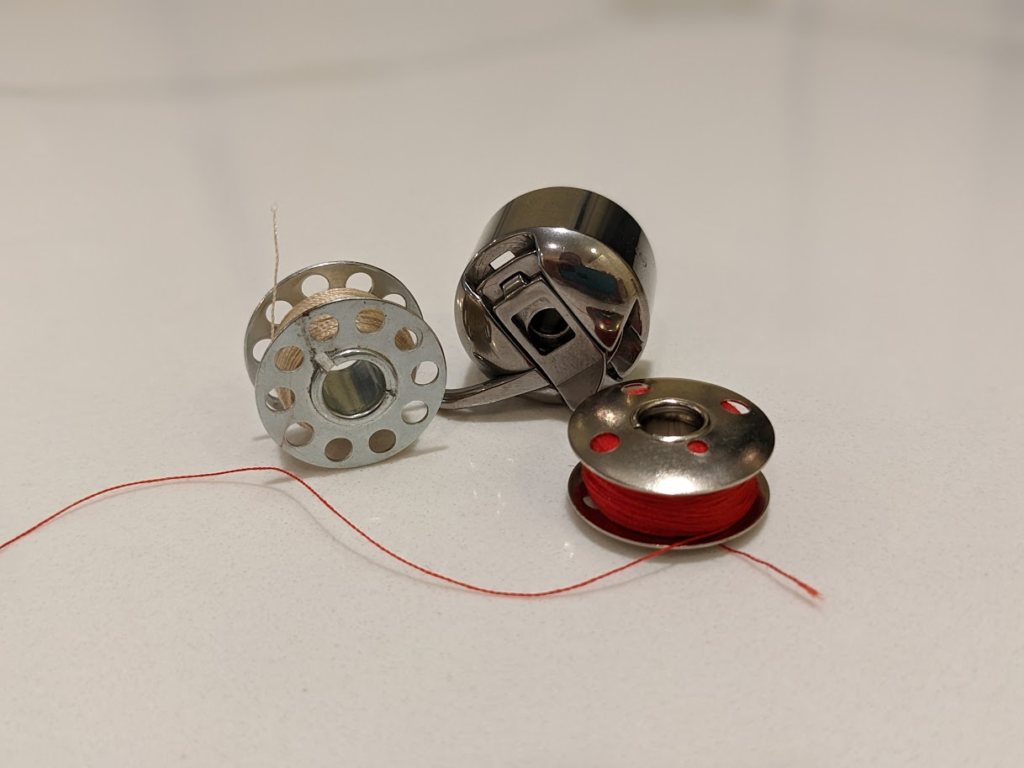
The bobbin is the tiny metal or plastic spool that holds the bottom thread. This bottom thread loops together with the top thread from the needle to form a complete stitch.
The bobbin case is the small holder for the bobbin to slip into place in the sewing machine. The case helps the lower thread get proper tension.
The thread from the bobbin winds up from the bottom of the machine through the throat plate.
Spool Holder
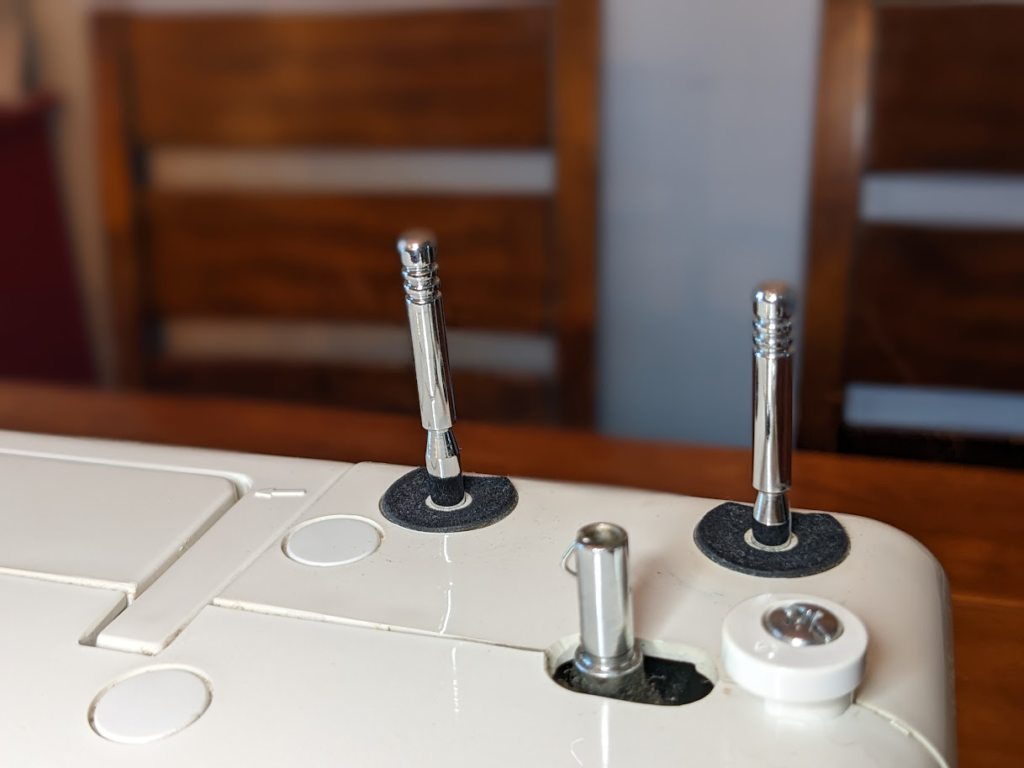
The spool holder is a metal or plastic dowel that holds the main spool of the sewing thread for the top thread. It keeps your spool steady, so it doesn’t move all over as your machine does its business.
It’s almost always located on the top of the machine, on the right.
Slide Plate or Bobbin Cover
This part of the sewing machine is how you access the bobbin. It gives you access to where to place your bobbin and protects the bobbin case, preventing dust from getting inside.
The slide plate can be metal or plastic.
Flywheel or Handwheel
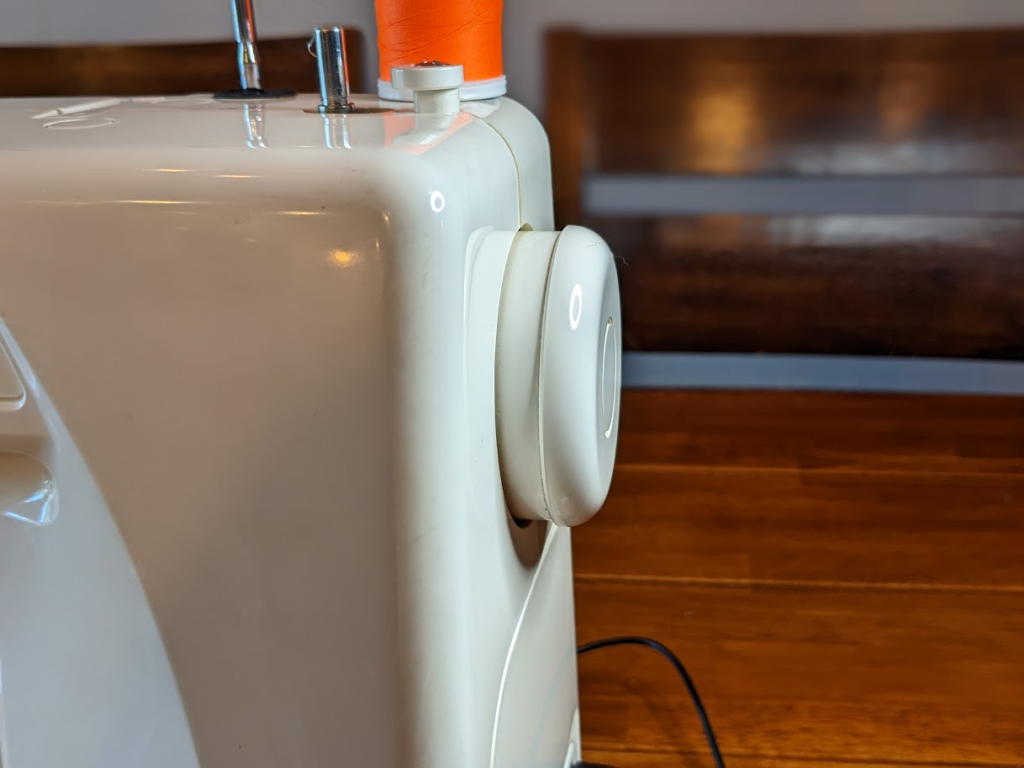
Some parts of the sewing machine are known by multiple names. This part may also be called the balance wheel.
This recognizable dial at the side of your machine moves the take-up lever for your sewing needle. Spinning it toward you makes the sewing needle move up and down.
You use this feature if you need to adjust your needle position manually. For example, it’s helpful when you need to move your needle slowly to adjust your cloth’s position. It gives you more control.
You can also pull out the handwheel to lock the needle in place. You’ll use this for winding your bobbin.
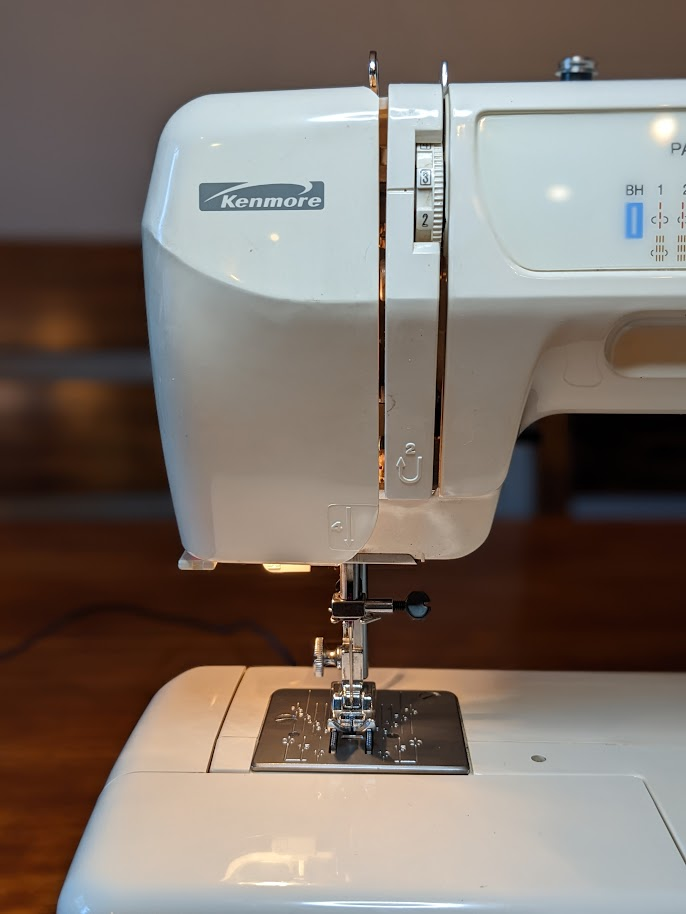
Pattern/Stitch Selector
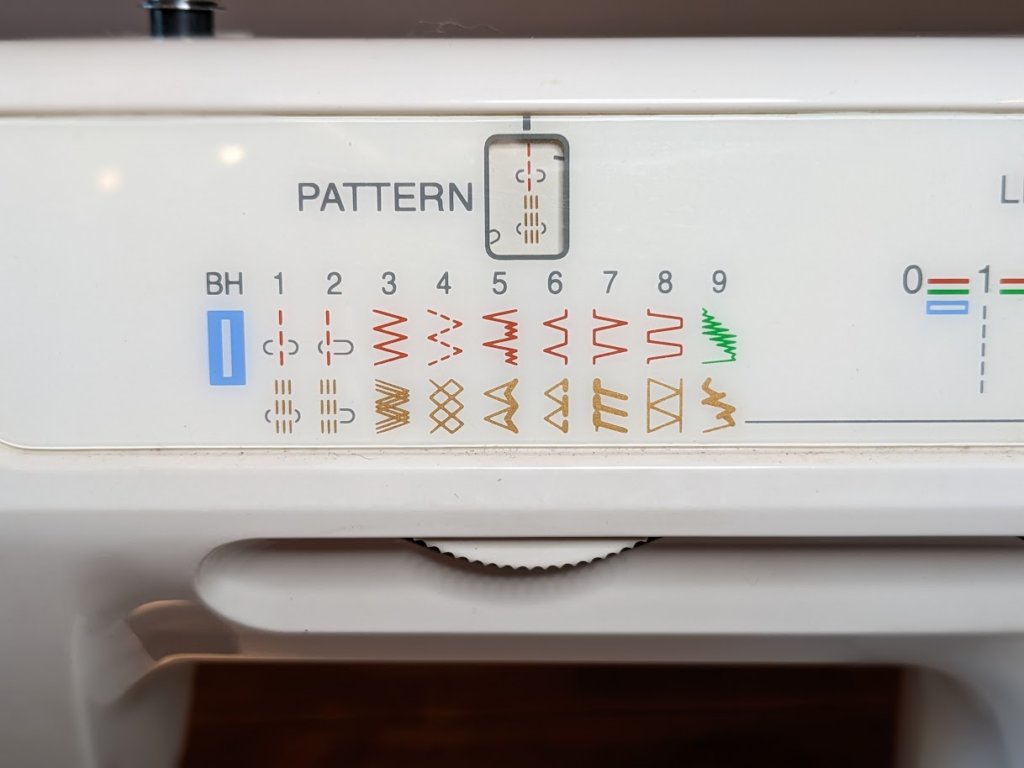
You aren’t confined to only one type of stitch on your sewing machine. You can use the stitch selector to determine which pattern style you want for your stitches.
Straight stitches aren’t your only choice. You don’t need to add on particular parts of the sewing machine to alter your stitch formation. Just choose the look you want on your dial. Most sewing machines have at least zig-zag or embroidery stitches as an alternative.
Reverse Lever
This small lever on the front of your machine makes your feed dogs move the fabric in the opposite direction.
It’s vital to press the reverse lever at the beginning and end of each piece of fabric you sew. It secures your thread by reinforcing it and preventing stitches from coming apart.
Tension Regulator

The tension regulator controls the thread tension of the upper thread on your garment. It affects how loose or firm your stitches are, ensuring they are uniform and smooth.
Turn the dial clockwise or down for more tension and counterclockwise or up to decrease tension.
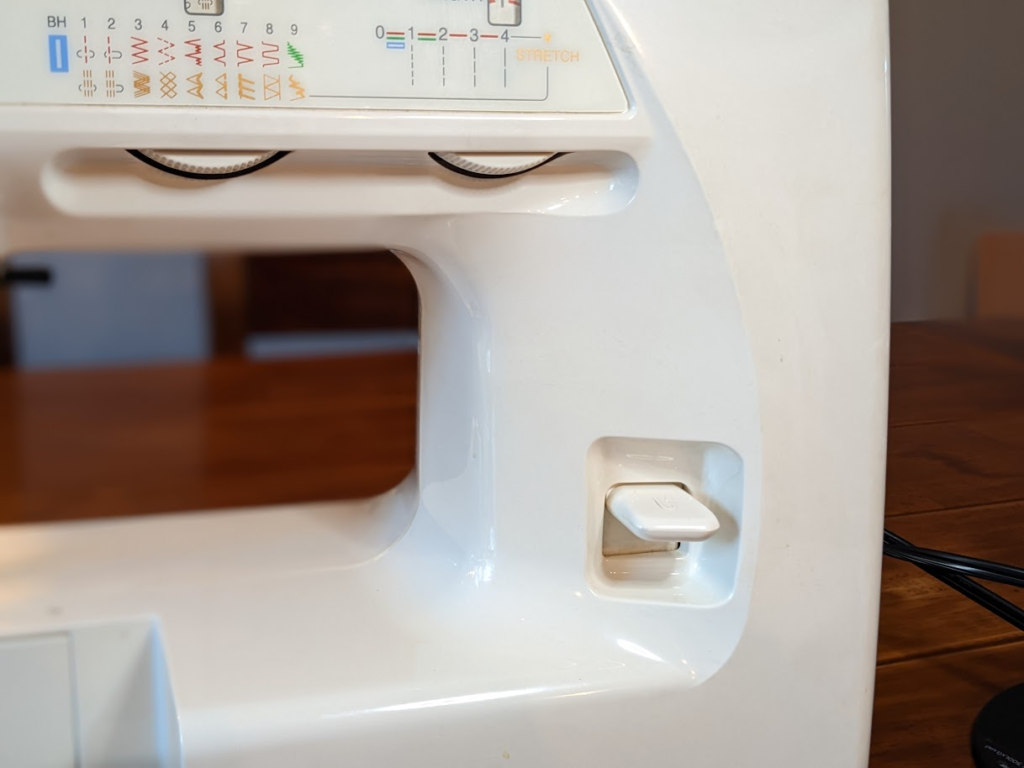
Foot Pedal
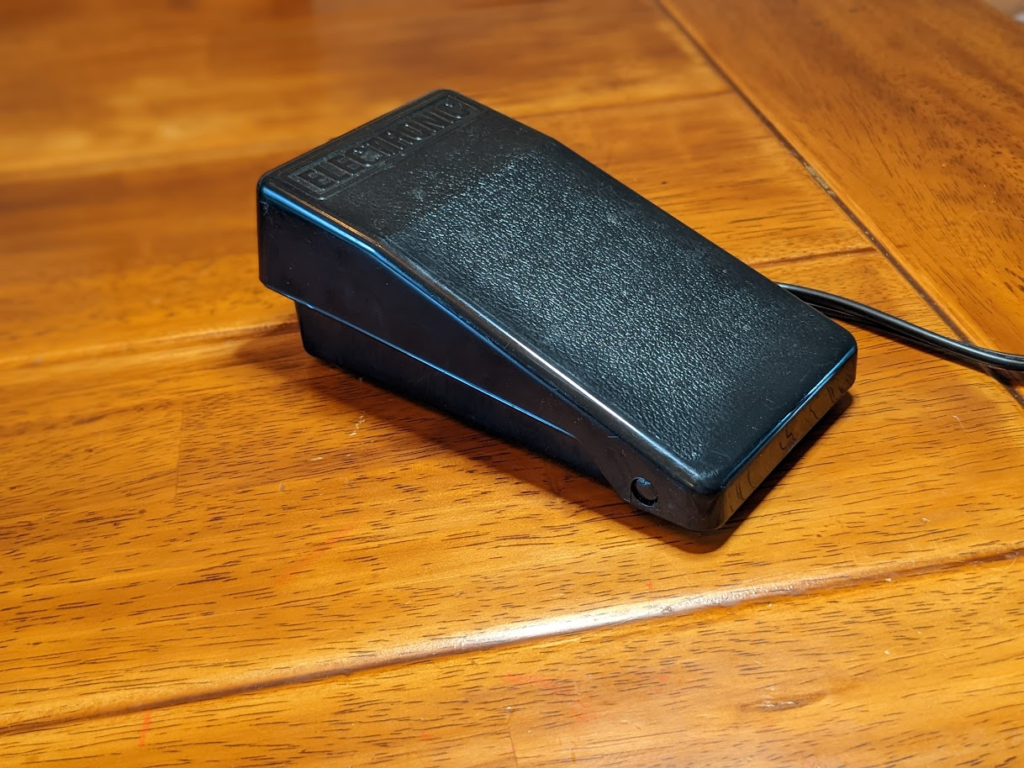
Your foot pedal gives you manual control over your sewing machine’s motor speed. It’s similar to a car’s gas pedal; pressure makes it go faster.
The foot pedal is one of the parts of the sewing machine that are unique only to mechanical machines. Computerized machines simply have a button on the front instead. You can use the button to control the speed.
Stitch Length Dial
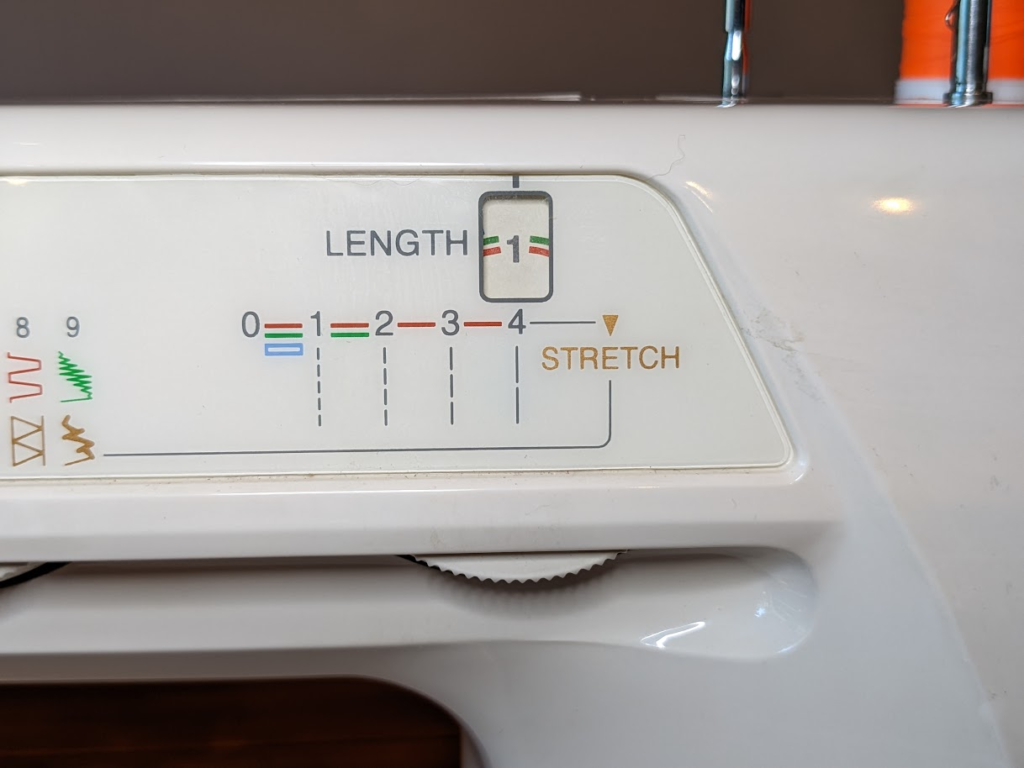
Your stitch length dial alters how your feed dogs move, affecting the length of your stitches. You can choose between 0-4 for your stitch length, with four being the longest stitches.
For shorter stitches, your machine moves your fabric less, and for longer stitches, it moves your cloth further in between each time the needle comes down.
Thread Take-Up Lever
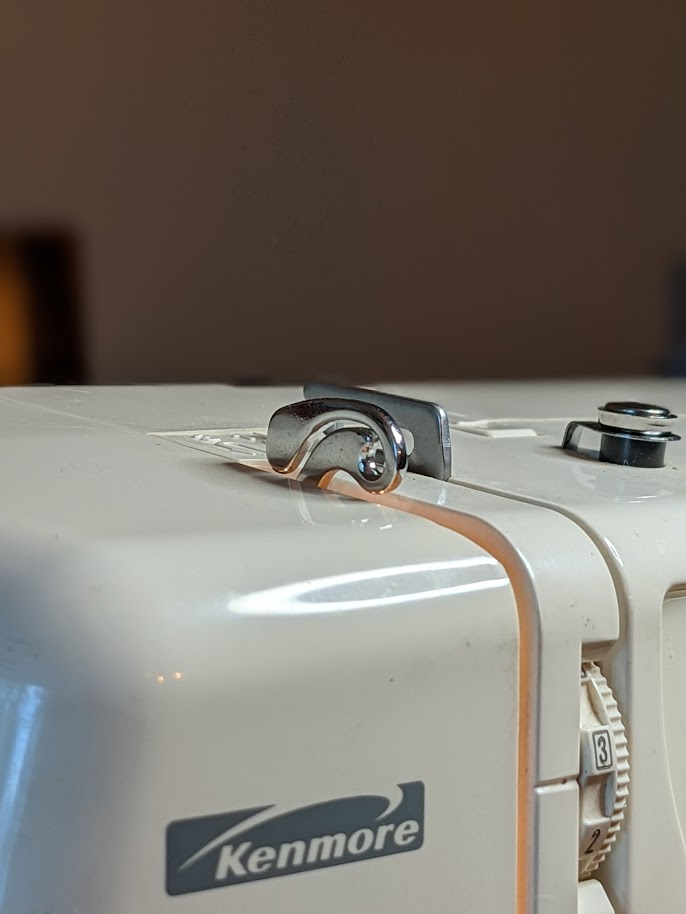
You’ll notice this small lever near the top of your machine, above the sewing needle; it regulates your thread slack. Your thread winds from the spool and through the take-up lever before it goes down through the sewing needle.
The take-up lever regulates your thread tension so that there’s enough slack for your sewing needle to form the loop of the stitch but then pulls the thread taught once the stitch has been placed.
Face Plate
On the front of your sewing machine, on the top left, you’ll locate a hinged covering that swings out to reveal the base of the needle bar, take-up lever, and presser bar.
The face plate protects these delicate points of the machinery and allows you access if you need to fix them or change your sewing machine’s light bulb.
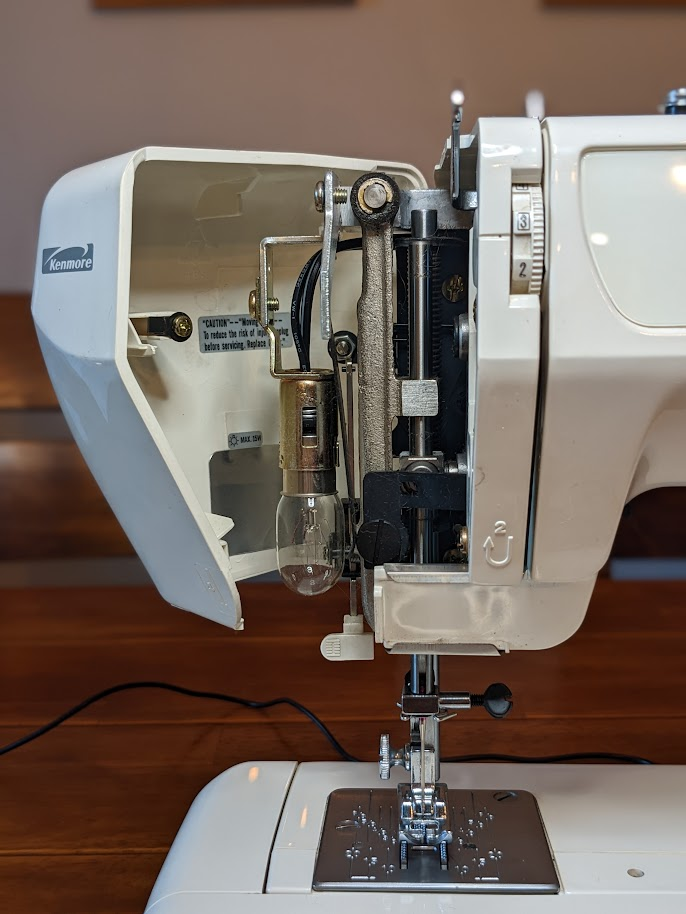
Thread Cutter
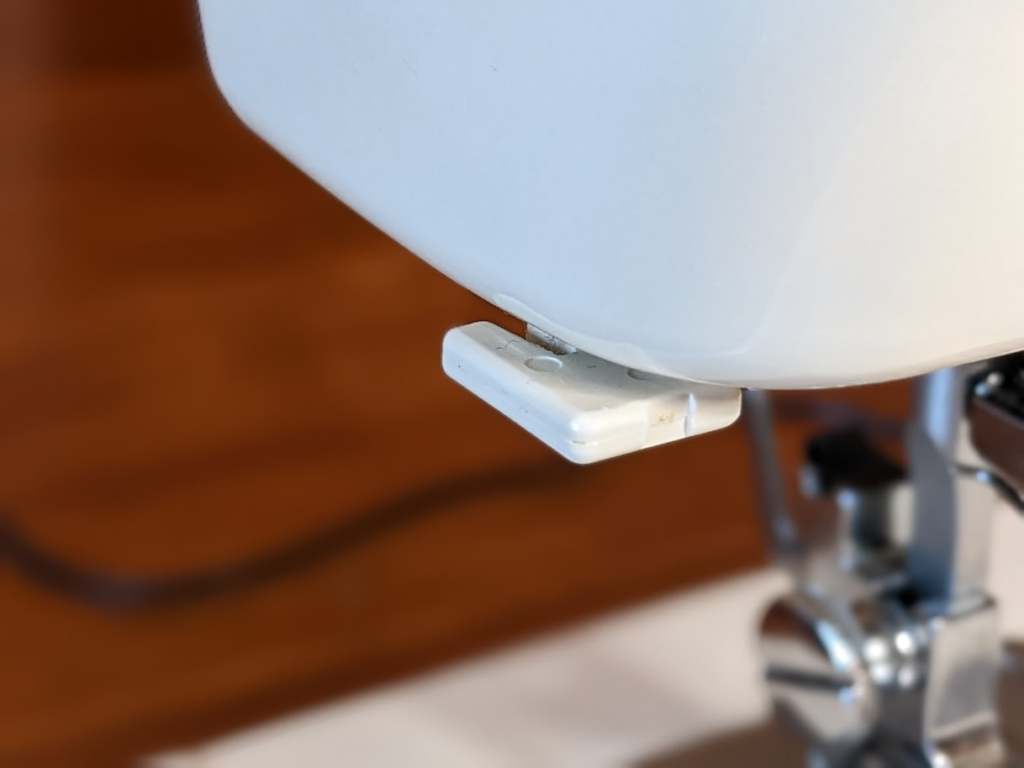
The side or back of the machine, near the bottom of the top half, has a concealed razor edge. Once you’ve finished sewing your piece and are ready to cut the thread, you slip it here and give it a quick snip.
The thread cutter isn’t a fancy piece of machinery, just a super convenient tool to have so close to hand!
Wrapping Up
Fortunately, you don’t need to memorize all these parts before you sit down at your sewing machine. It helps to know that they do, but even if you forget their exact function, you’ll still find your way around the machine just fine. As long as you don’t get the parts as confused as this diagram did, you’ll be in great shape!
Trackbacks/Pingbacks