A sewing machine can be a real lifesaver for big projects, but there are times it’s far easier to sew by hand. There are several different stitches you can use for each situation, so you can learn to sew them all and find out which ones work best for you.
I recommend practicing each of these on a scrap piece of fabric so you can perfect them before you need to use them. Then you can impress your friends and family with your endless knowledge of sewing stitches.
Just be careful; before too long, everybody will be begging you to hem their pants and sew their buttons!
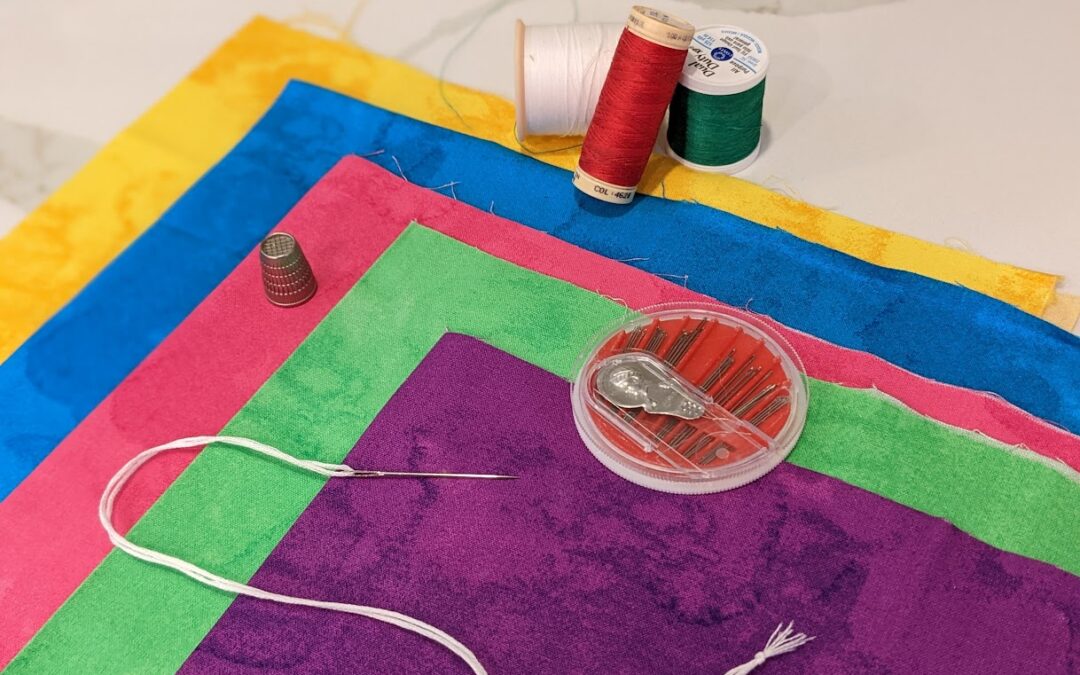
Supplies For Hand Sewing
Before beginning your hand-sewing project, make sure you have everything you’ll need. Whether you’re just practicing your stitches, mending, or crafting, there are some basic supplies you can’t sew by hand without.
- Sewing needle — Of course! There are different gauges for sewing needles, so match the thickness of your needle to your fabric. If you are working on thin material, you’ll also want a very thin needle. If it’s too thick, it can leave small holes in your fabric. Likewise, a dense fabric needs a thick needle; one that’s too thin may break in such heavy material.
- Thread — In most cases, you’ll want the same color thread as your fabric. The goal is usually to hide your stitching. However, there may be some instances when you want your thread to stand out!
- Sewing scissors — High-quality fabric scissors make your job much easier.
- Fabric — Or the garment you are crafting/mending.
- Needle threader — (optional) If threading a needle is challenging, there’s no shame in getting help!
Speaking of…
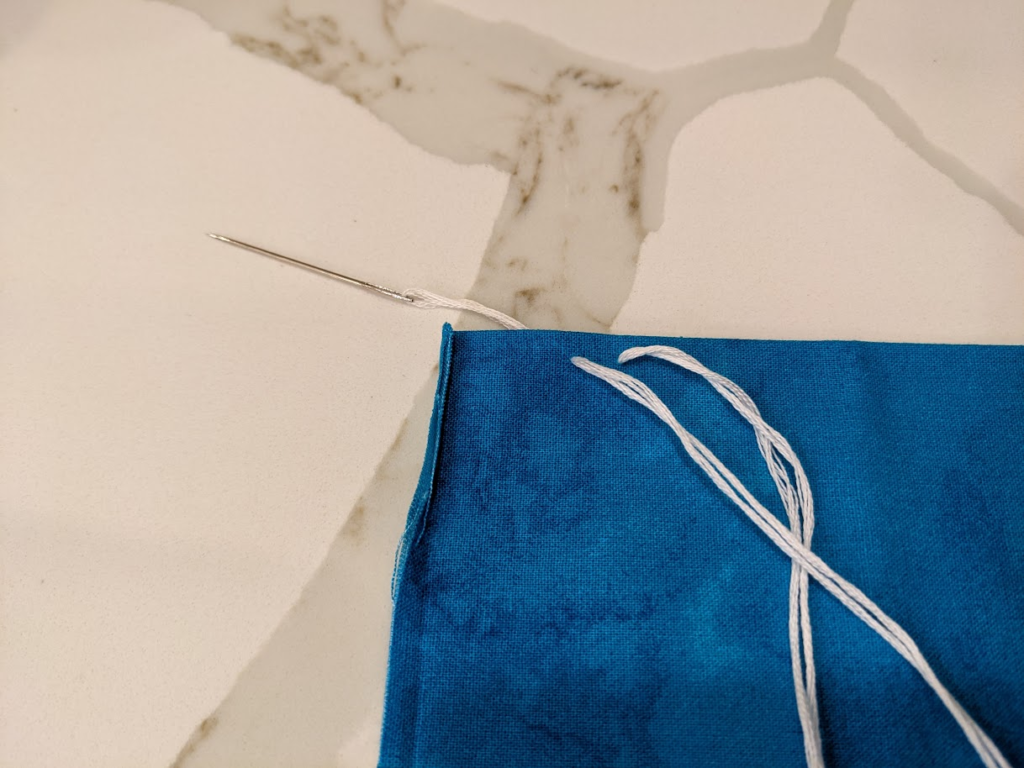
How to Thread a Needle to Sew by Hand
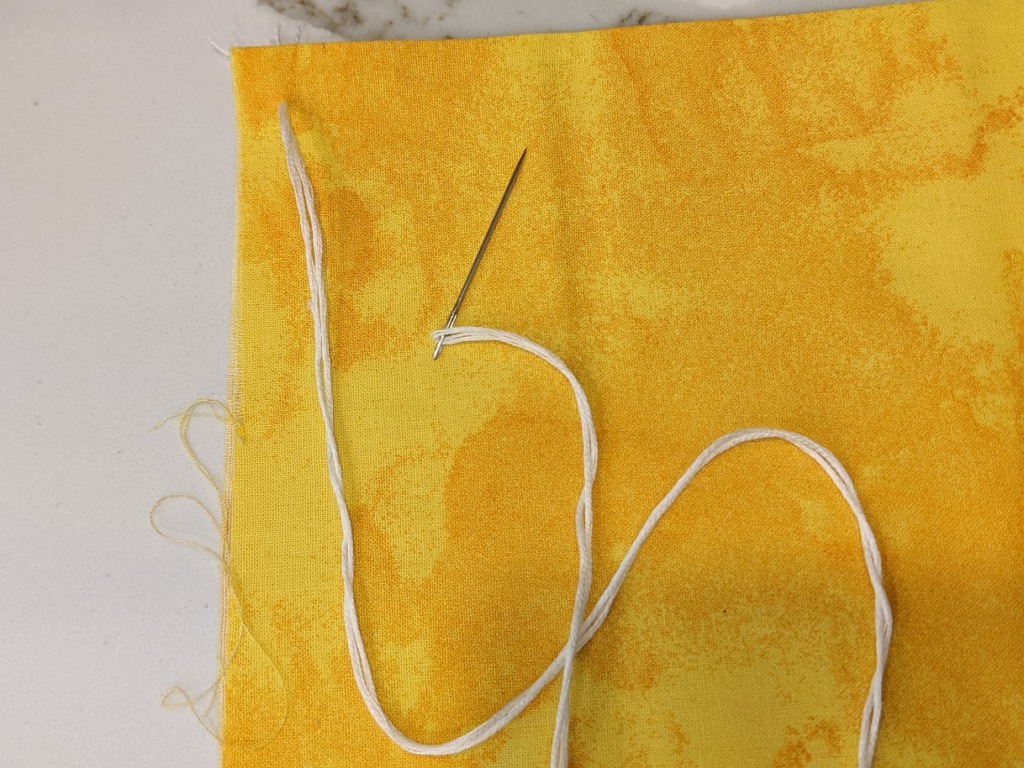
To begin your sew by hand project, unspool a length of thread. In most cases, you should have plenty of thread if you take 2.5 times the length of your sewing area. But it can be annoying if you have so much thread on your needle that it knots every time you make a stitch!
So, if you’re sewing a very large length, work in smaller segments so your thread doesn’t tangle as you work.
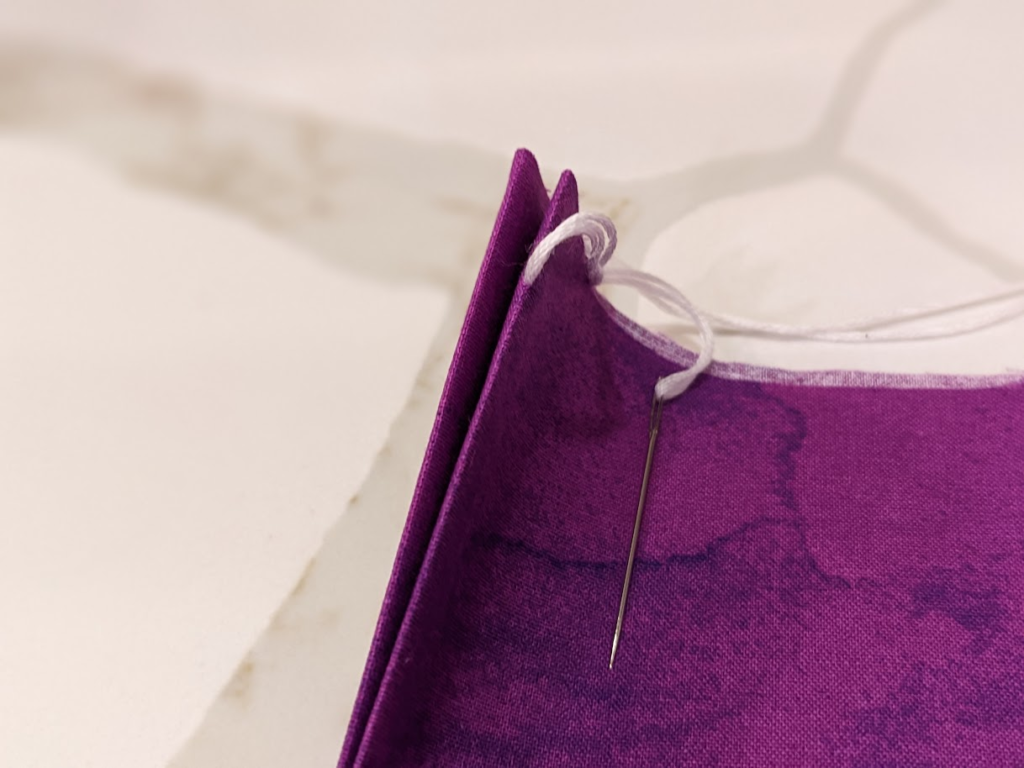
You have likely threaded a needle before, but here’s a pro tip to make it go a bit smoother: cut the thread at an angle. That will make it easier to fit through the eye of your needle because it prevents frayed edges and gives you a smaller tip to slide through!
Insert the end of your thread through the opening. And hey, no shame if you need your reading glasses to work that bad boy through! You can also moisten the end with a bit of saliva or simply roll the tip between your fingertips to make it easier.
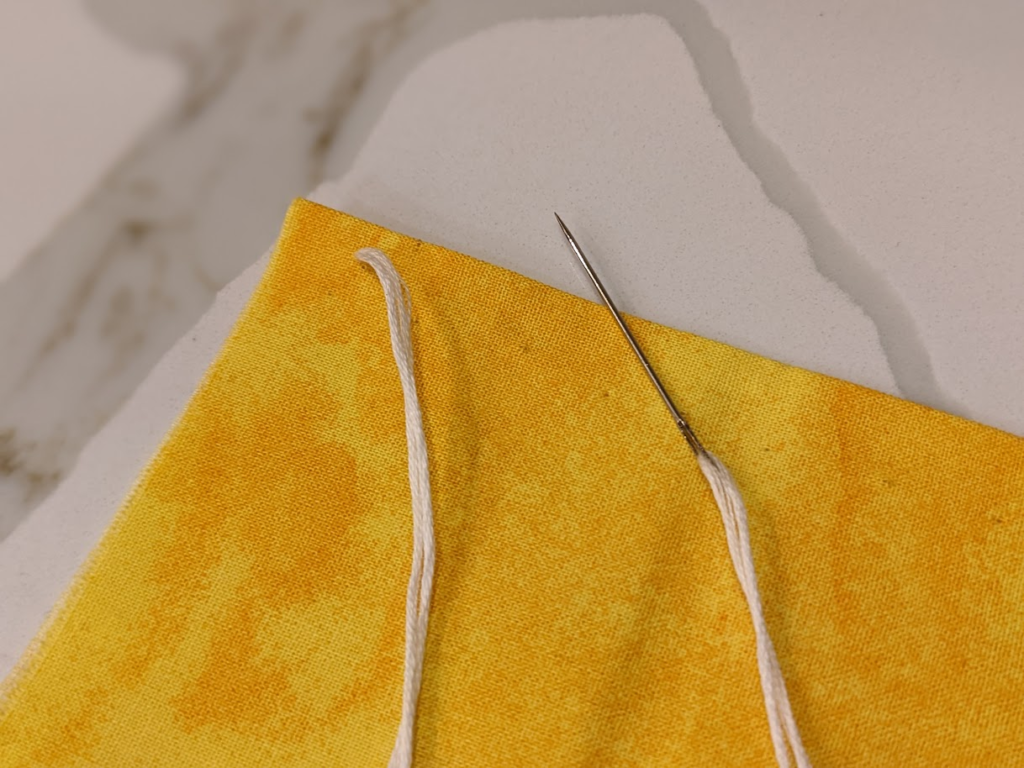
Once the thread is through the eye, knot the two ends together. There’s no wrong way to do this, but overhand is my choice.
Do at least a double knot, if not more. If the knot is smaller than the fabric’s weave, it will pull right through, so make sure you have as large a knot as your fabric needs. You can always reknot it if it doesn’t work the first time.
Sew by Hand: Basic Stitches
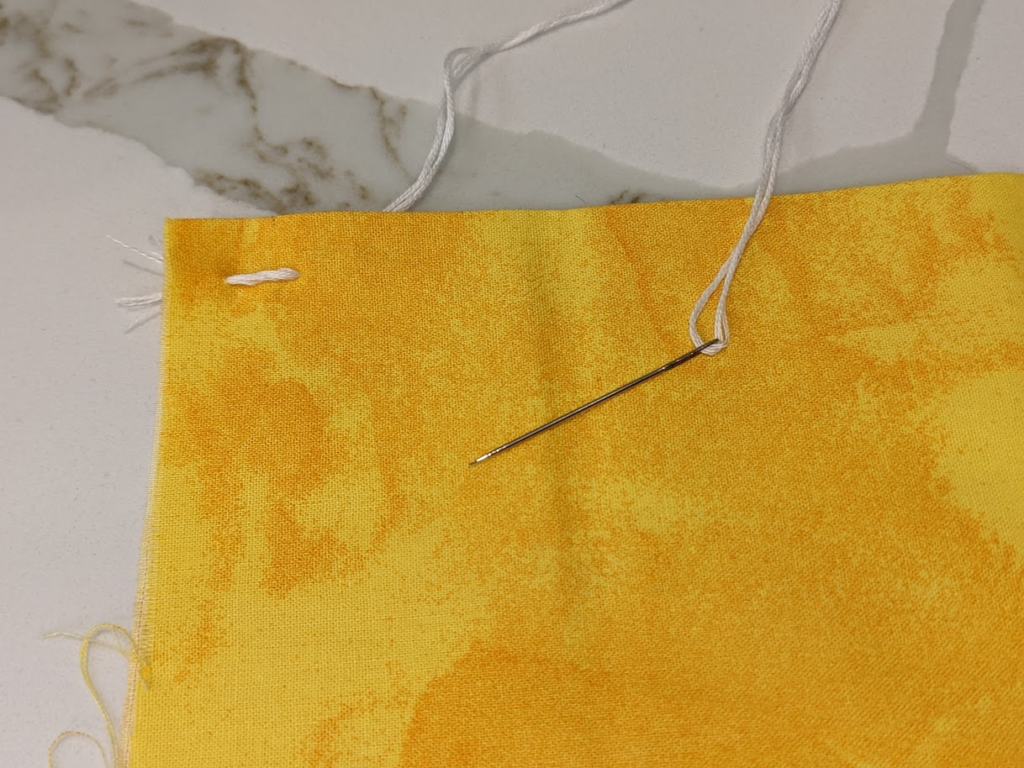
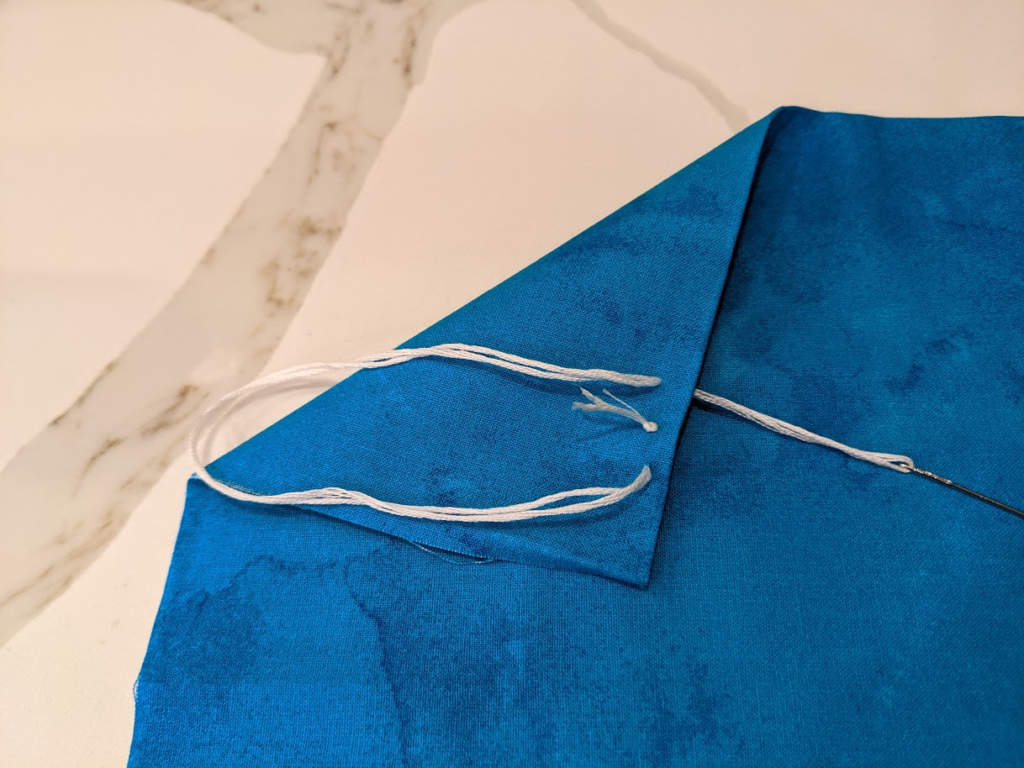
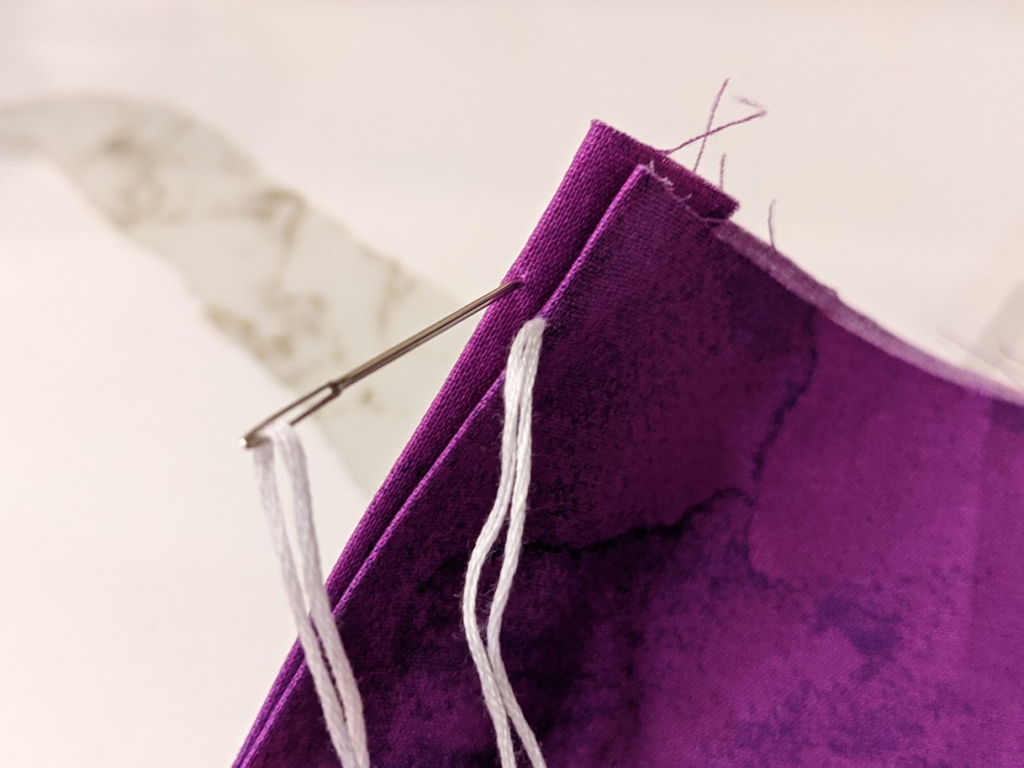
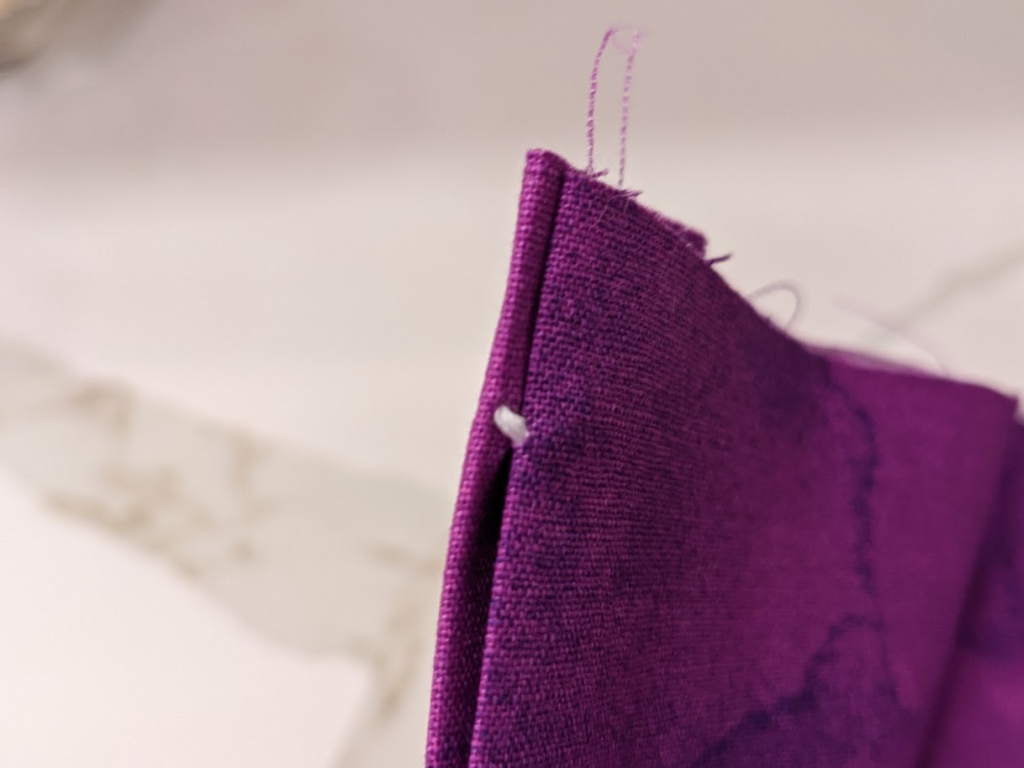
Begin your sewing by inserting your needle through the wrong side of your fabric. This will keep your knot and thread tail hidden.
Insert your needle approximately ¼ inch from the fabric’s edge. Pull it straight through until the knot hits the back of the material.
Ready to begin?
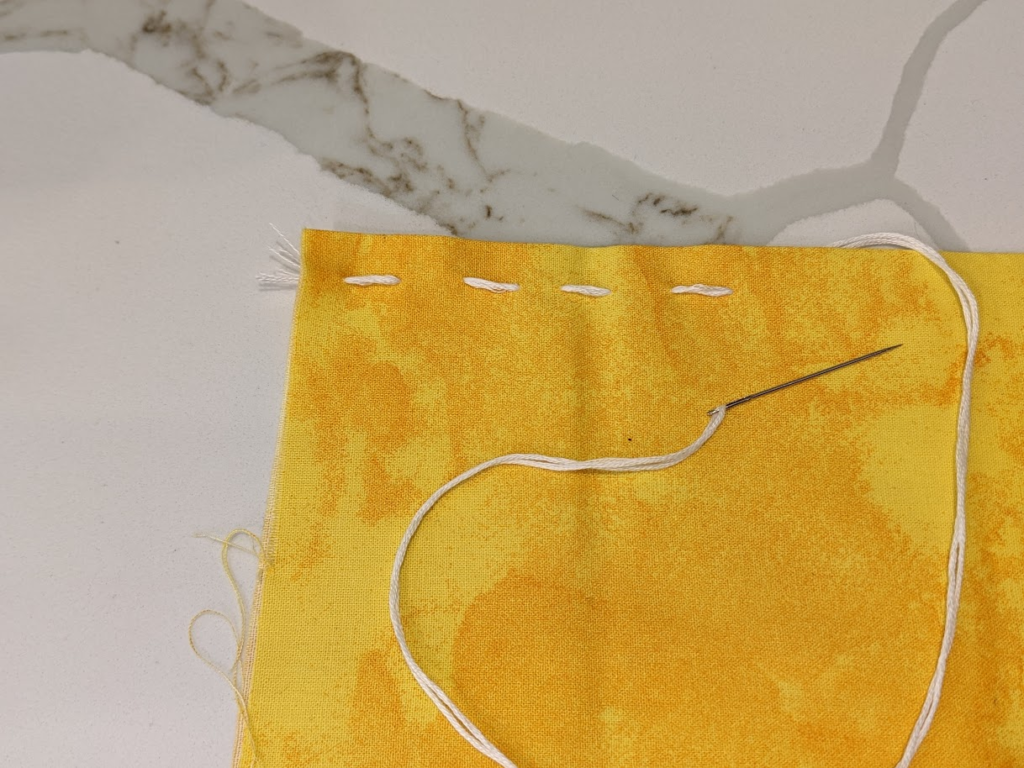
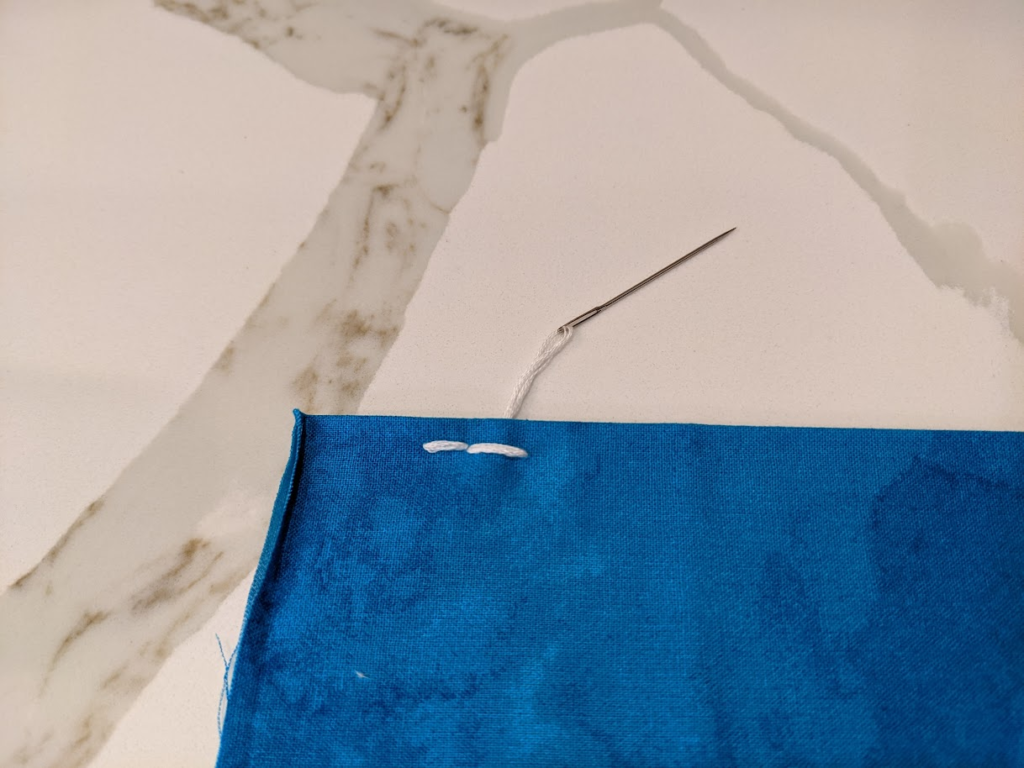
Running Stitch (Straight Stitch)
This stitch is best for when you need to sew by hand a basic seam. It will form a straight, broken line made up of short dashes.
The shorter your dashes are, the more secure your stitching will be. You can make them longer for a loose, temporary basting stitch. This is useful if you know you’ll need to pull the stitches out later.
- Push your needle into the fabric from back to front.
- Working in the direction you need to run your seam, bring the needle and thread about ½” over and poke the needle down to the back of the fabric. Pull the thread taut, but not tight.
- Repeat on the other side. Continue the full length of your seam, keeping your spacing even and your stitches all the same size.
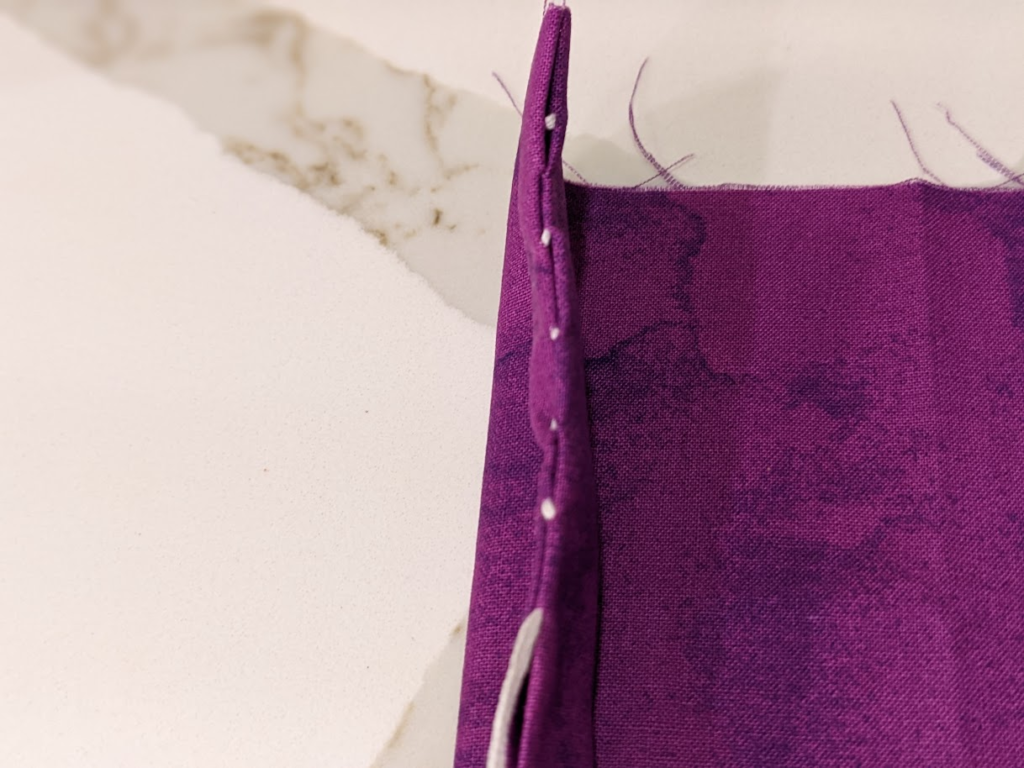
Backstitch
Similar to a running stitch, a backstitch forms a single, unbroken line. This is a strong stitching. Backstitches are used to hold a strong seam for two pieces of material or used for decorative embroidery.
- After you’ve poked your needle through, begin your stitch the opposite way of a straight stitch. Instead of moving forward, move your needle ½” in the reverse direction of how your seam will run. Trust me; this will make sense in a moment. Insert the needle into the front of your fabric and pull it through to the back, pulling the thread taut but not tight.
- Repeat this on the other side; this time, bring your needle in the direction you will run your seam – toward your end goal.

- When your needle and thread are on the right side of your fabric again, bring them backward and insert them at the edge of your first stitch.
- Continue in this way all the way toward the end of your seam. The result will be one solid line of thread.
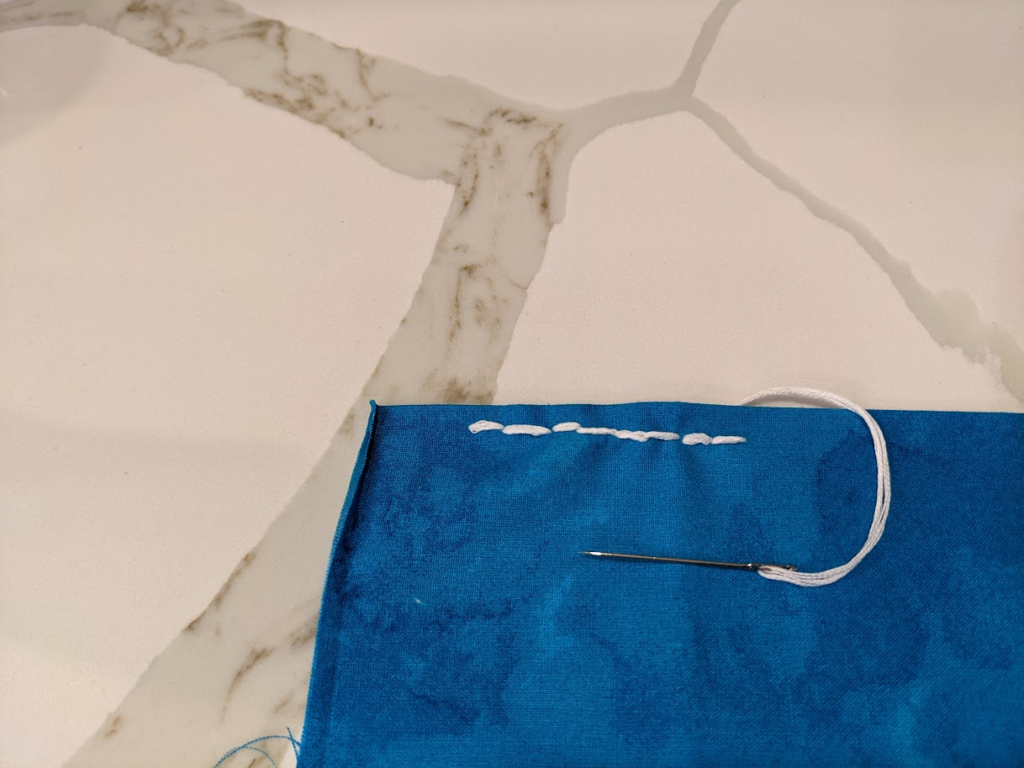
- Remember that on the front of the fabric, you work your needle backward and move it forward on the wrong side of the material.
Tip: You don’t need to pull the needle and thread taut with each stitch. You can save time by running your needle horizontally through the fabric when moving in the forward direction.
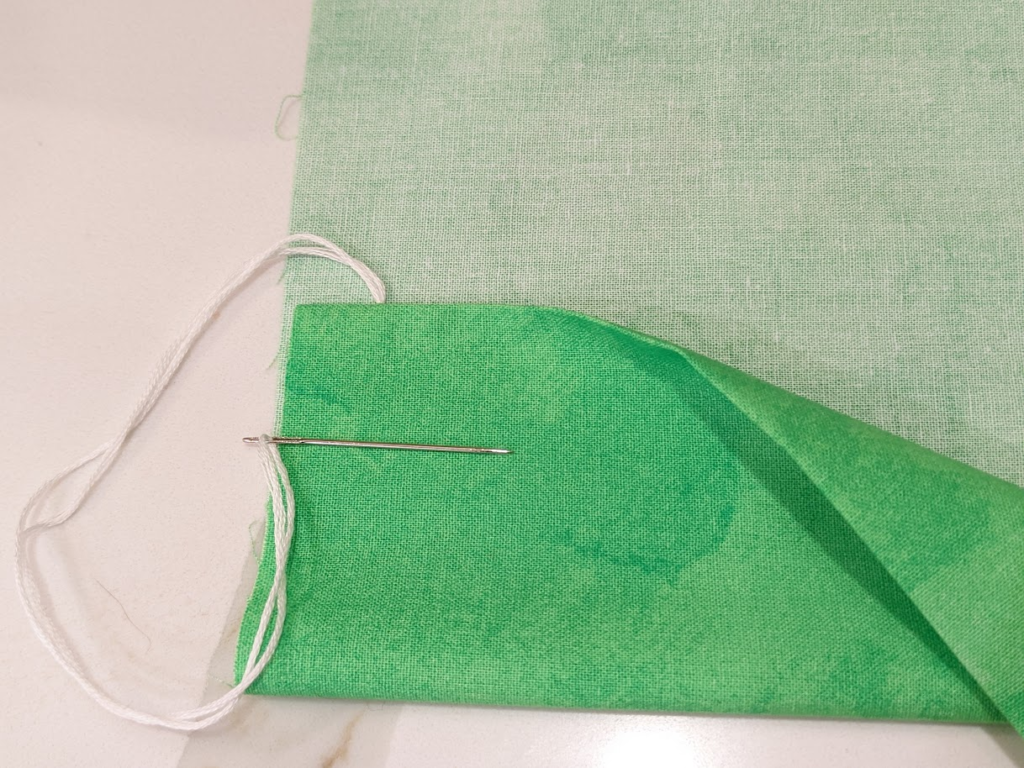
Slip Stitch
You may sometimes hear this one, also called a ladder stitch, and for a good reason. The end result resembles rungs on a ladder.
This is another good stitch for working seams, as it is mostly hidden. It’s ideal for closing holes along seams, like on a pillow or stuffed animal.
- Insert the needle from the back into the fold of your fabric if there is a fold. Pull the thread taut. Align both sides of your material together.
- Push the needle into the fabric on the opposite side, right across from where your thread currently is.
- Put the needle on the opposite side, again across from your thread’s exit point.
- Instead of pushing it completely through, slip the needle horizontally, about ¼” along the fabric, then push the tip back out. Pull taut.

- Put the needle on the opposite side, again across from your thread’s exit point.
- Repeat these steps until the end.
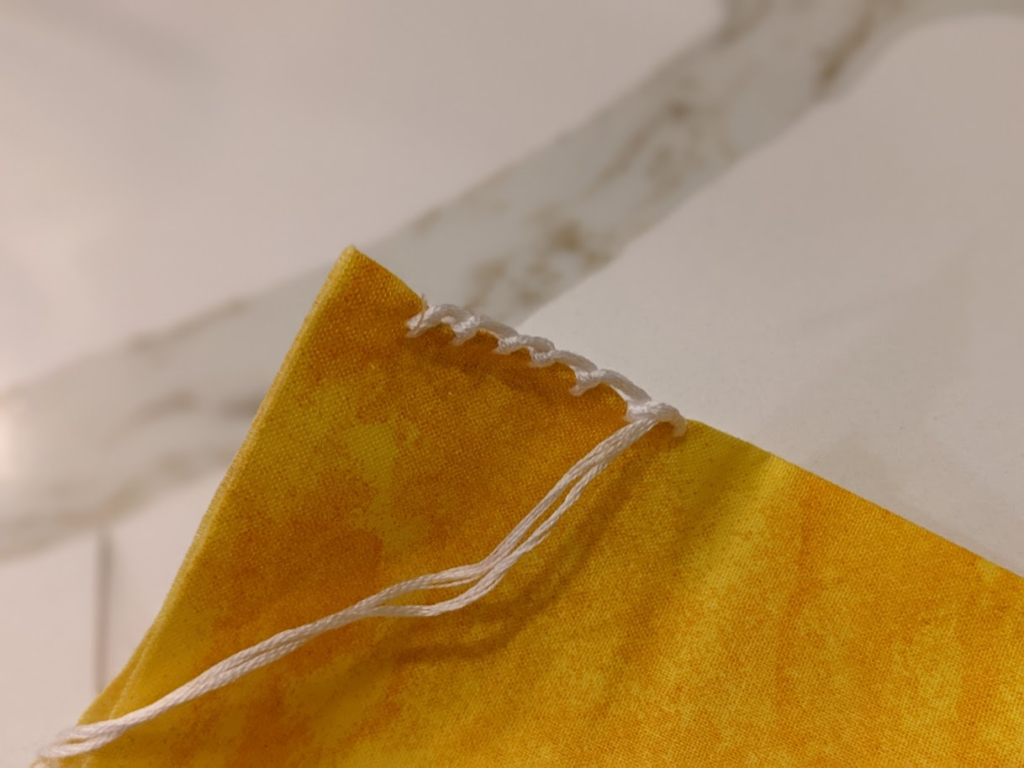
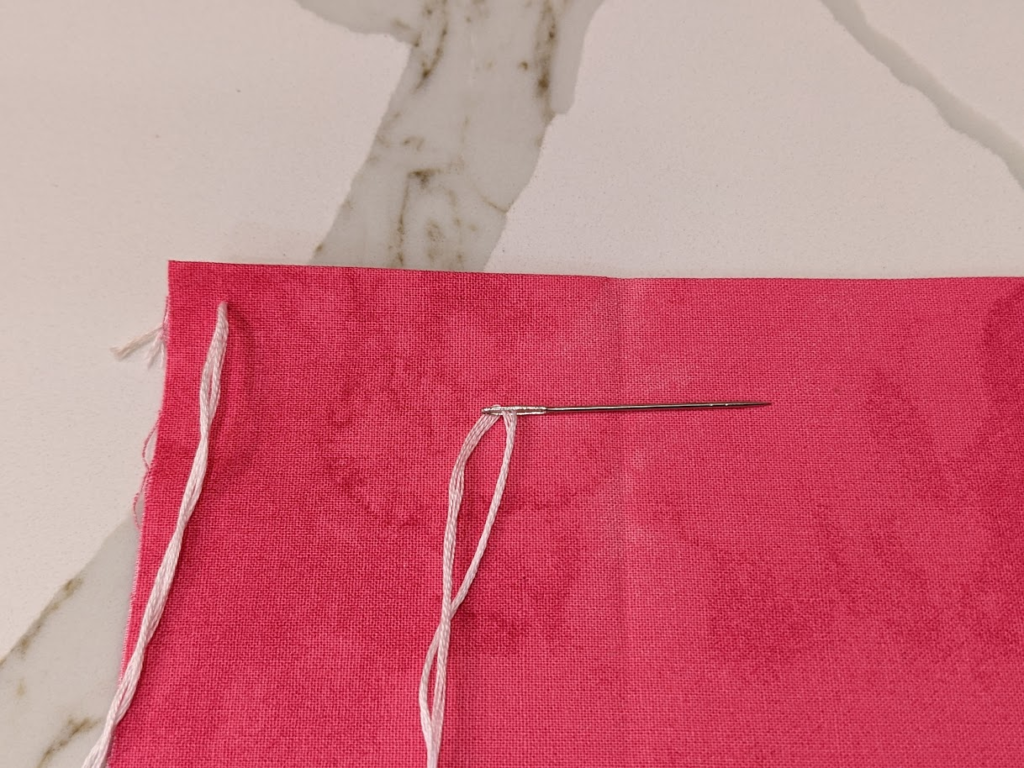
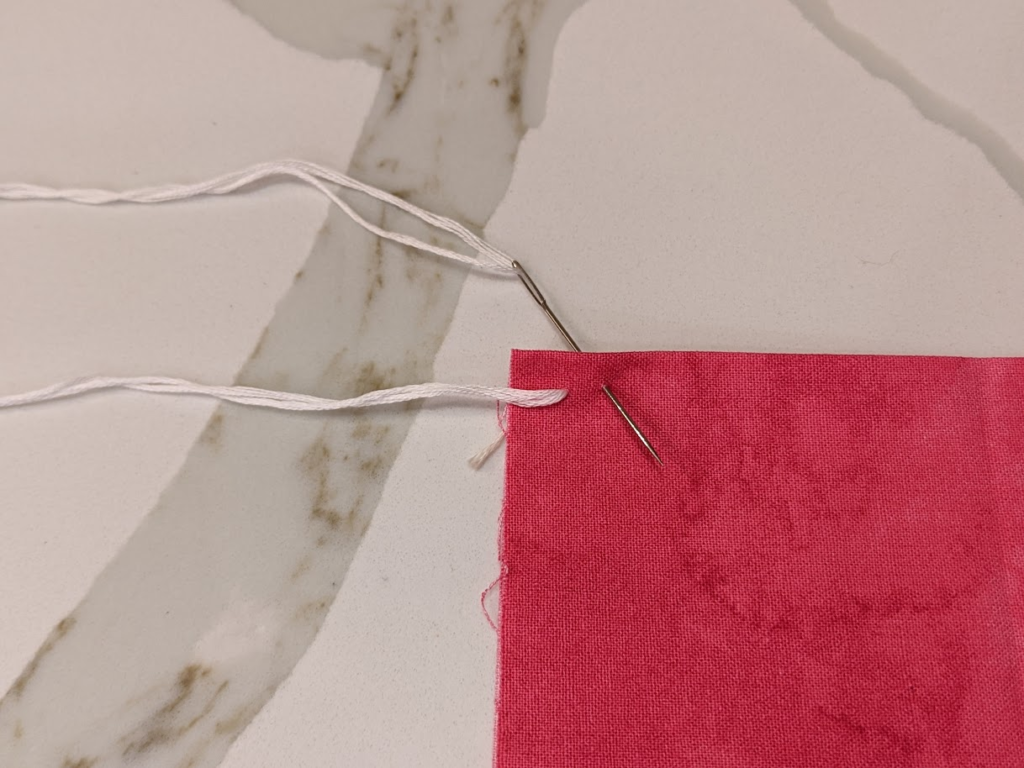
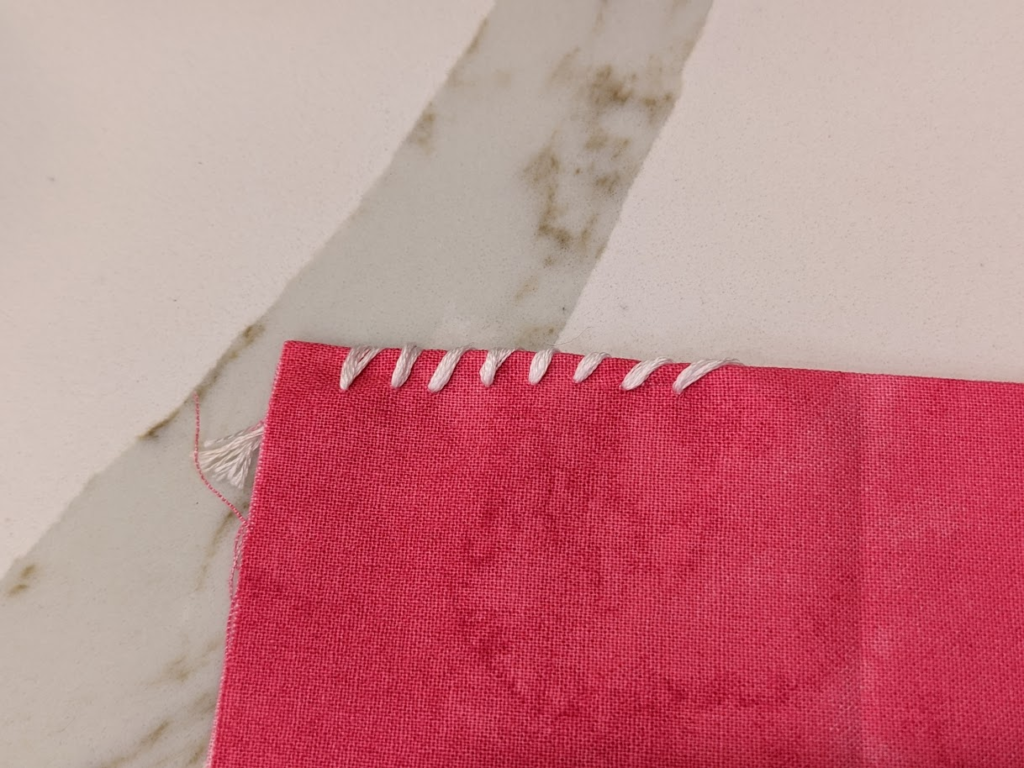
Blanket Stitch
If you want to add a decorative stitch to join two pieces of cloth or to finish your seam, the blanket stitch is a popular choice. It’s meant to be seen, so you’ll notice it frequently on clothing hems, blankets, and quilts. Be sure to pick a good thread color!
- Start by inserting your needle from the back of the fabric. If you’re joining two pieces of cloth, insert the needle between the two pieces. Pull the thread all the way through.
- Bring the needle and thread over the edge, all the way around, to the opposite side of the fabric. This will make a loop of thread over the side of the material.
- Push the needle into the fabric at the same point you began, on the opposite side of the cloth. Don’t pull the thread closed yet; leave an open loop.
- Bring your needle between the thread loop and fabric, then pull it through.
- Repeat the process about ¼” further along, working from the bottom to the top. Continue until you’ve reached the end.

Whipstitch
This is another good seaming stitch for hems. It’s very well hidden, quick, and easy to do.
- Poke your needle through from the inside of the hem up to the front of the fabric.
- Travel just a short distance (¼” – ½”) and bring the needle and thread over and around to insert the needle from the back to the front again.
- Continue to the end.
Catch Stitch
This stitch isn’t easily spotted from the front. It’s especially good for hems or if you need to overlap fabrics or insert a lining, especially on heavy cloth.
- Begin by holding two pieces of fabric together, with the wrong side facing out and one edge lower than the other. Next, insert the needle between the two sides, up through the top piece of cloth. Pull all the way through.
- Bring the needle above the hemline to the bottom (and longer) part of the fabric, slightly to the right, creating a diagonal stitch. Using the tip of the needle, pick up two or three threads of the material above the edge of the hem, toward the left. Pull the thread taut. Be careful not to pull too tight, or the hem will pucker.
- Bring the needle back down below the hemline on a diagonal to the right. Then, push the needle horizontally into the back of the top piece of fabric and out again after about ½”.
- Repeat the steps until completed.
Hand Sew a Button
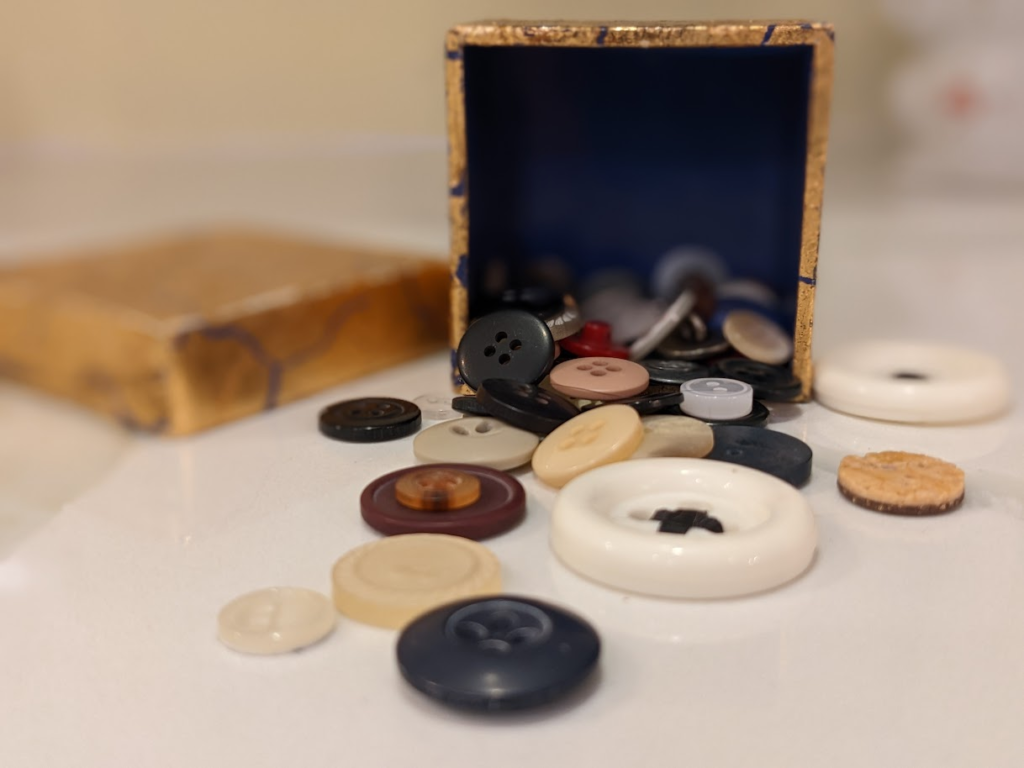
You can’t use your sewing machine for this! It is ridiculously simple to sew a button by hand. And the best part is it only takes a couple of minutes.
- Cut about 24” of thread for one button.
- Hold the button in place, with a pin or toothpick underneath its center. You don’t want to sew the button on so tightly that you can’t fit it through the buttonhole, so this will help give you that wiggle room you need.
- Starting from the back, sew an X through the button holes. Repeat the X multiple times.
- On the last round, push the needle through the cloth but not through the buttonhole.
- Wind the thread around the base a couple of times, and pass the needle through this base twice.
- Then bring the needle back down to the back of the fabric again. Tie the thread off.
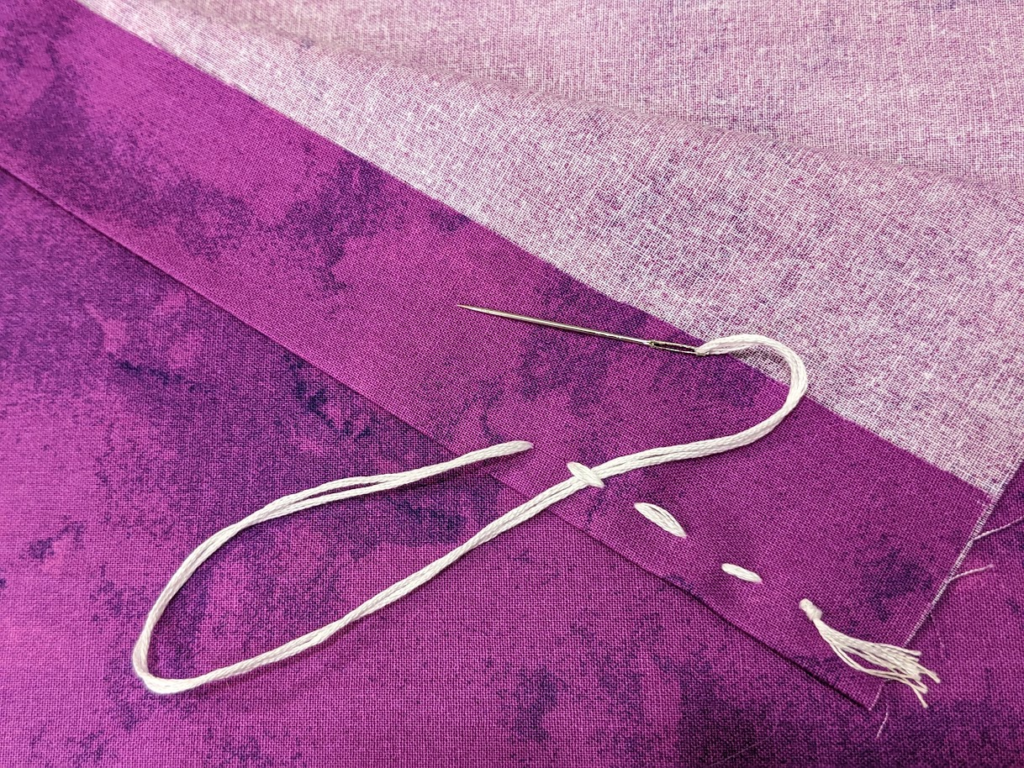
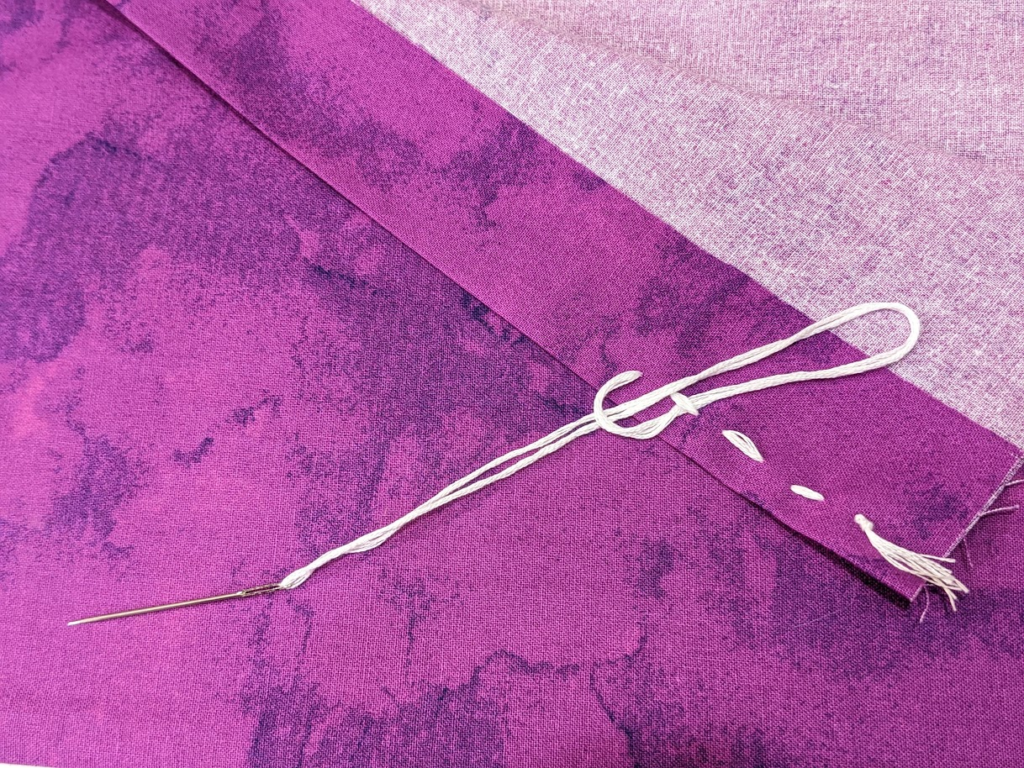
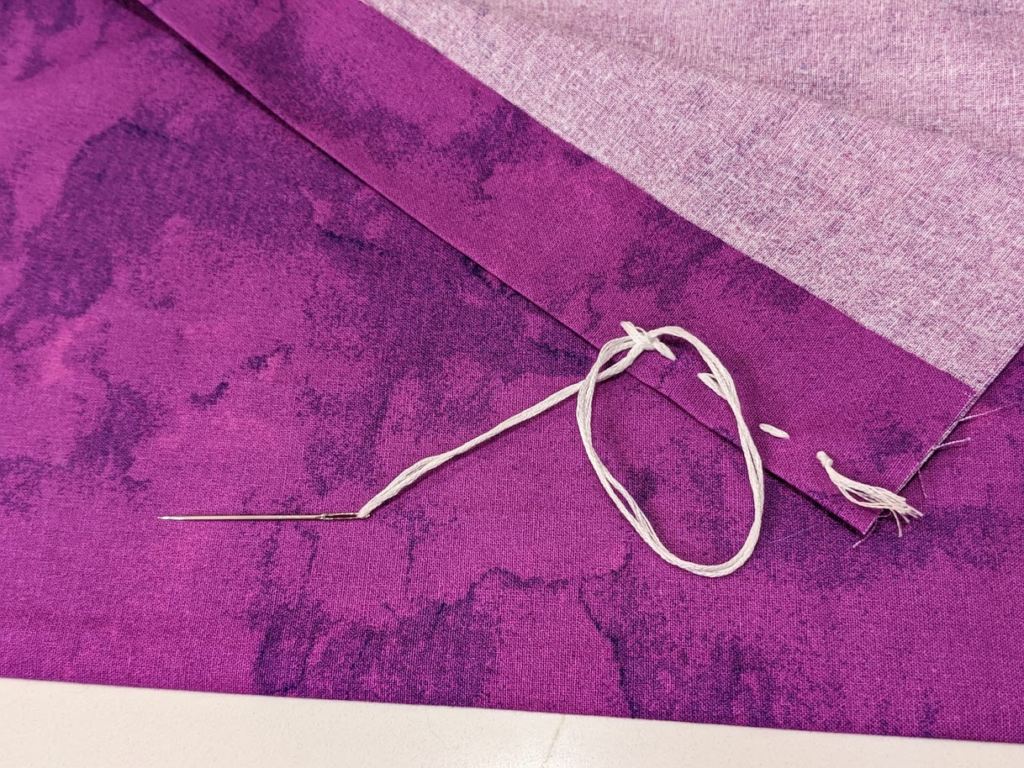
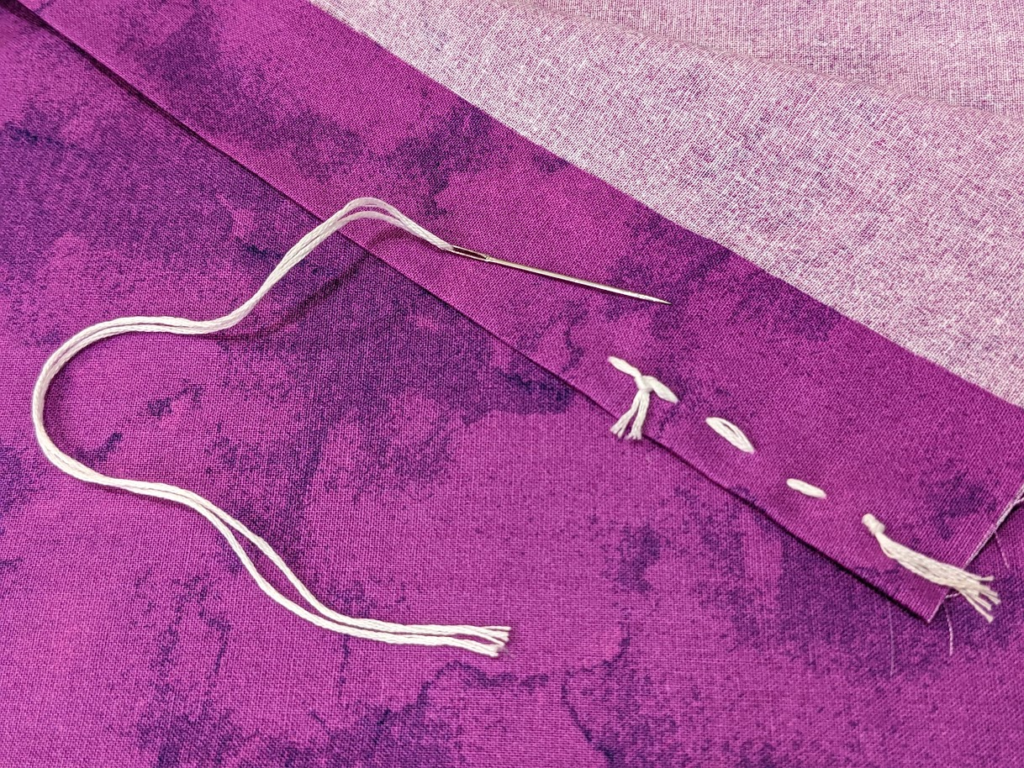
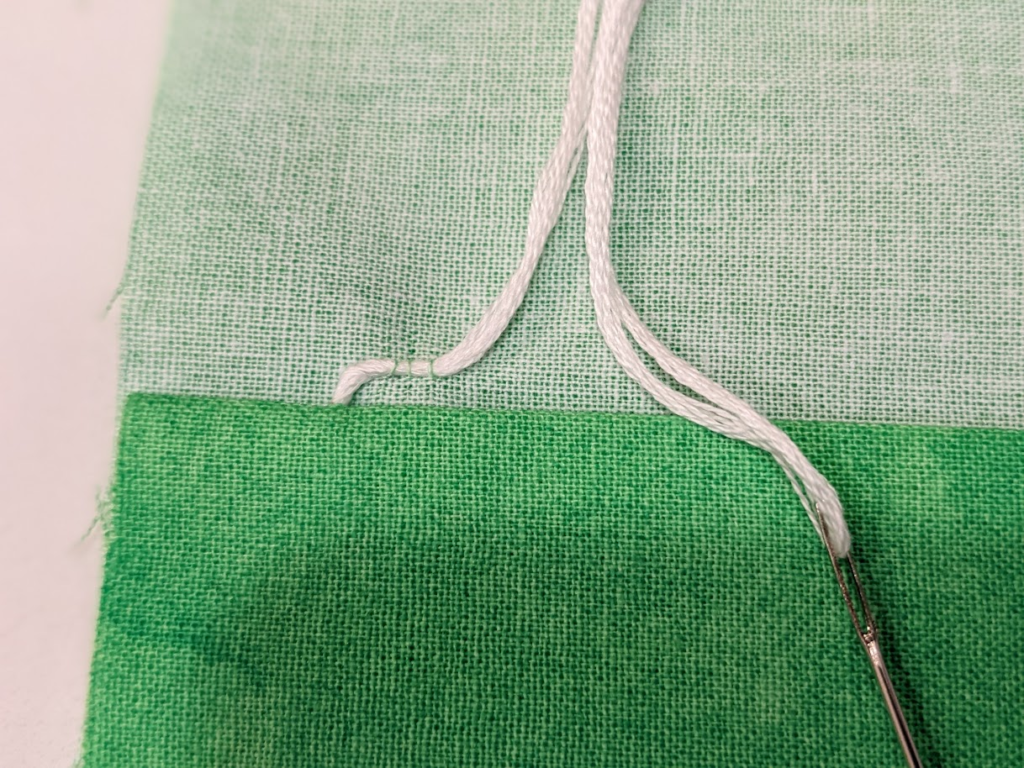
Tying Your Knot
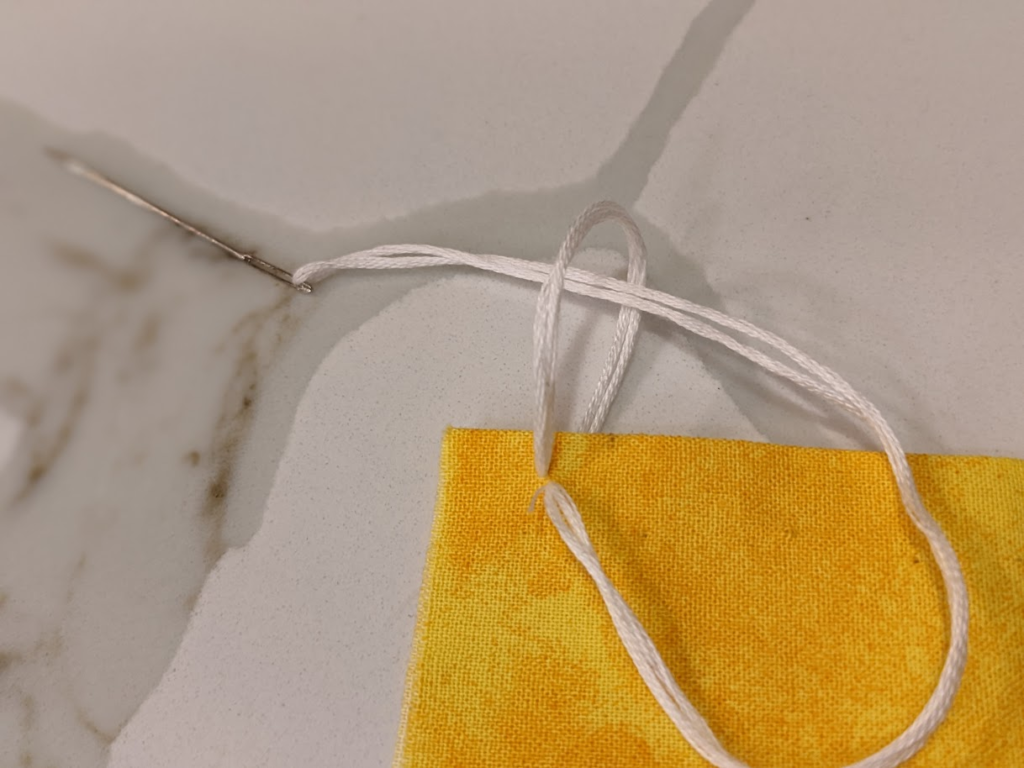
You could always just cut the thread and tie the two ends together against the back of your cloth, or you could try this clever and easy way of wrapping up your sewing.
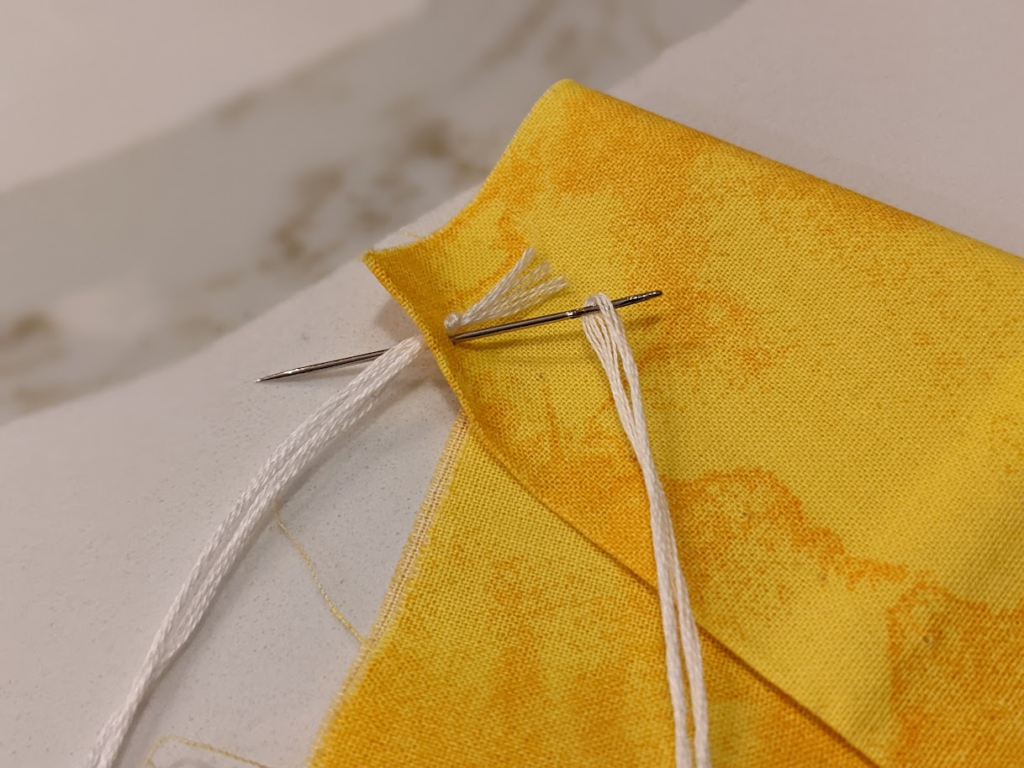
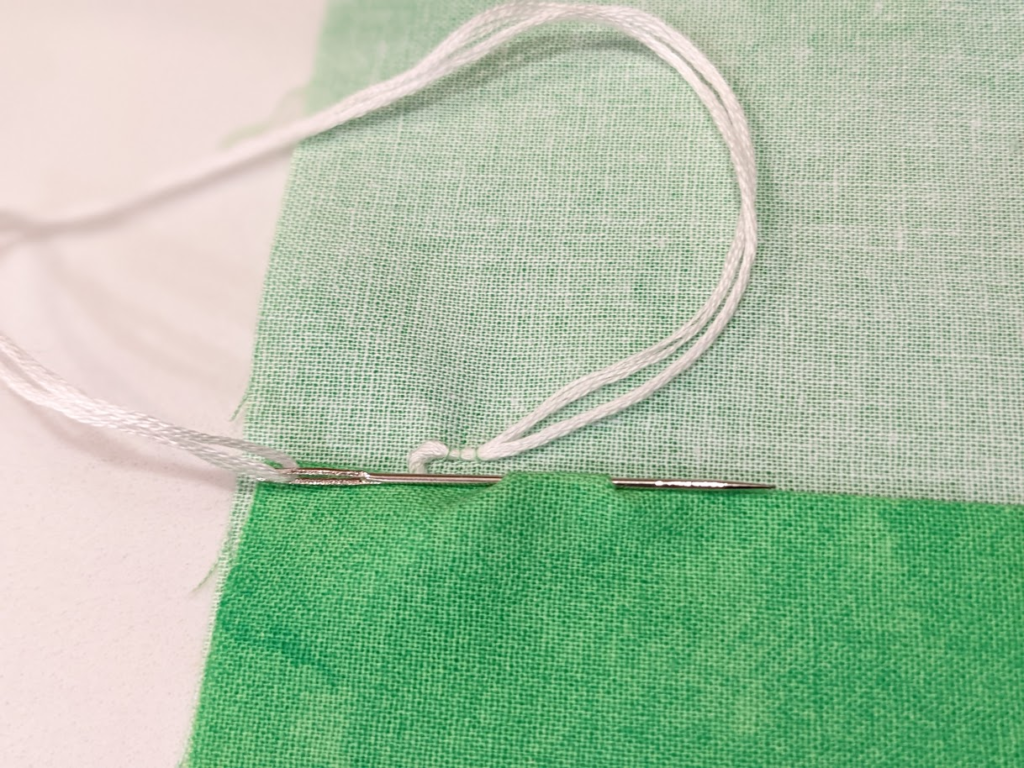
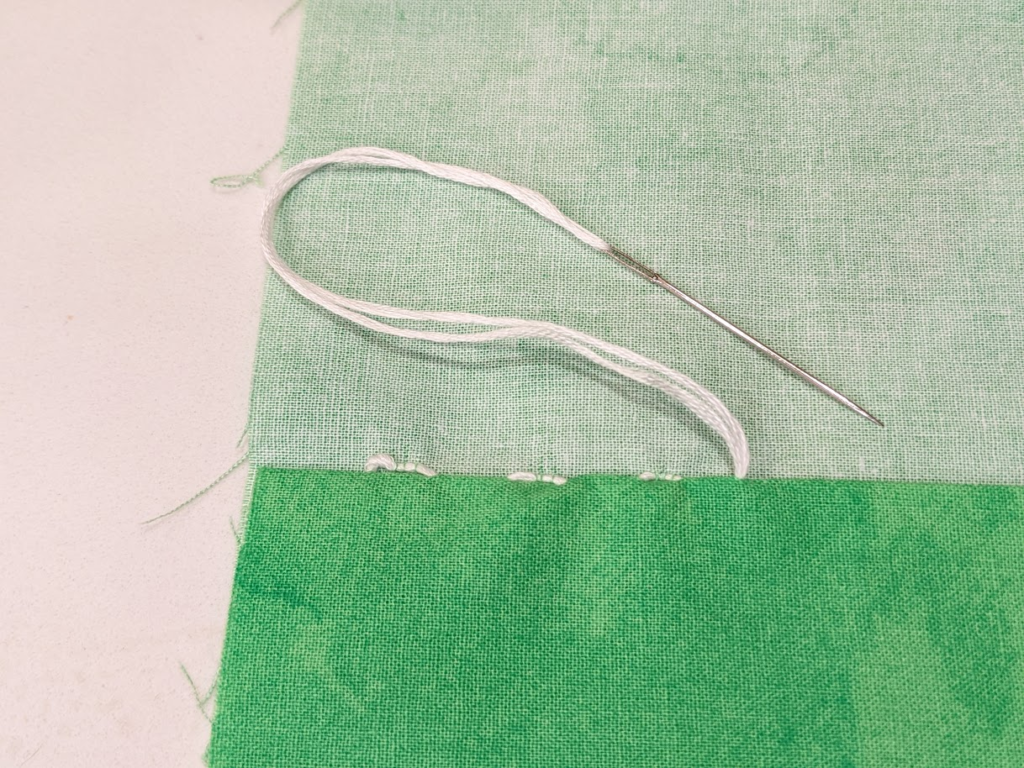
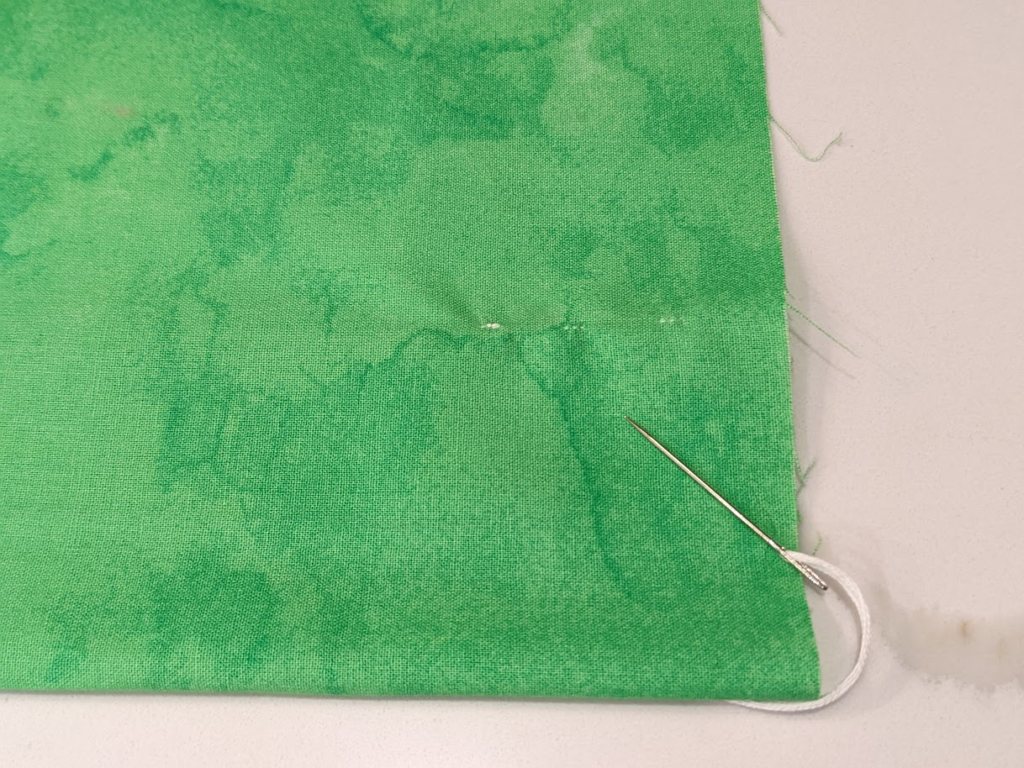
On the wrong side of your fabric, slide the needle under the final stitch, but before you pull the thread taut, bring the needle through the loop of the thread. After you’ve pulled the thread firmly, pass the needle through that stitch you’ve just formed, but once again, insert the needle and thread through the loop and pull.
Pull the thread tight, but not so tight it puckers or dimples. Then cut your thread. Voila!