Have you always marveled at the things that those super talented people can make with their hands, then despaired, believing you could never do that? I’ve met so many people who tell me they always wanted to learn how to knit, but they never bothered because they thought they weren’t “crafty.”
Pssst…guess what? You can! It isn’t about talent, craftiness, or even a magic touch. You just need to learn the techniques they know, and you can make anything! Yes, really!
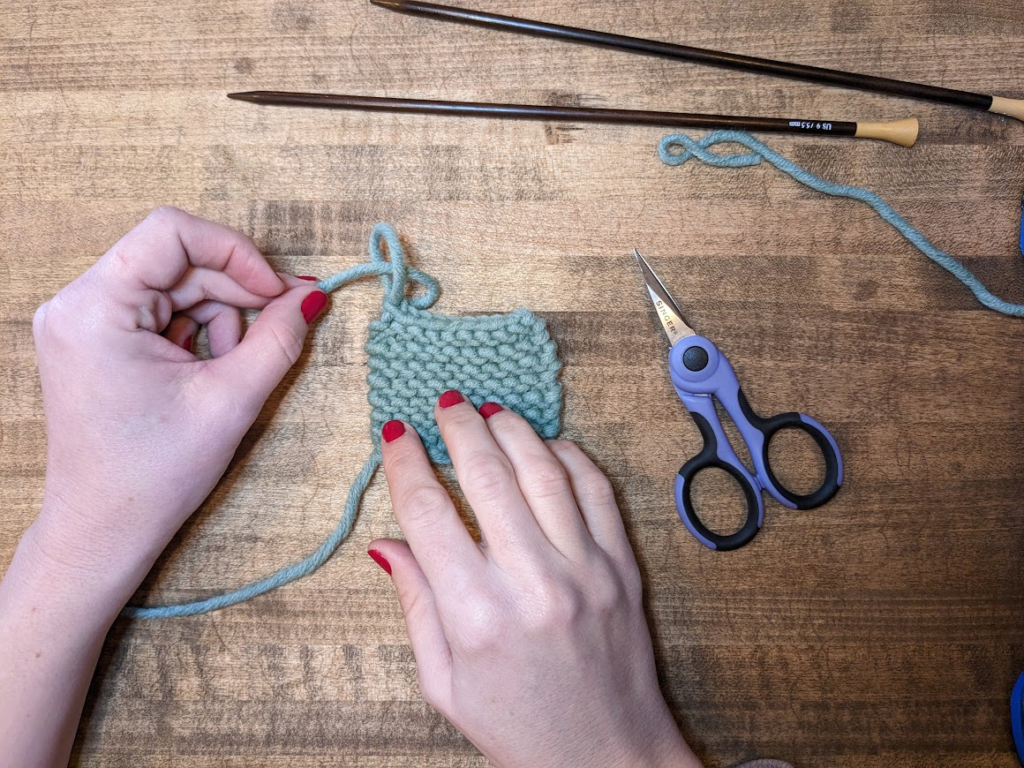
So, come on, grab your supplies and follow along!
PRO-TIP: Studying the pictures closely and following the yarn is very enlightening!
Tips for Learning How to Knit
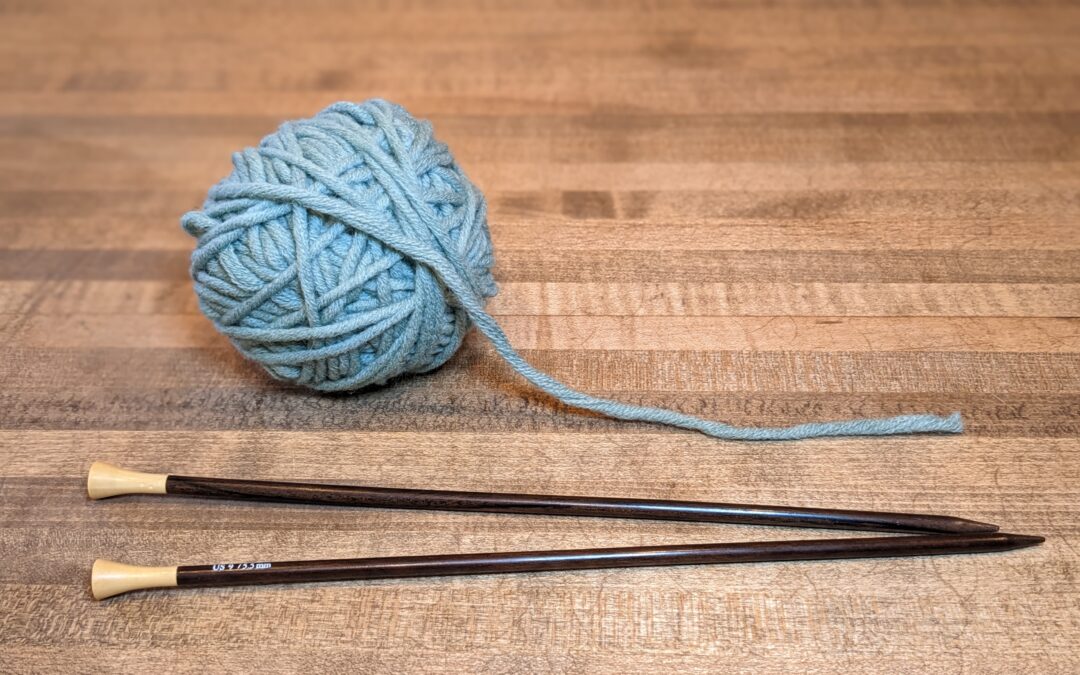
The first part of learning how to knit is having the right supplies. Gather your essential knitting supplies, so you are ready to go!
Needles and Yarn
Before you pick up just any old needles and yarn, I highly suggest that you make sure you’re working with the best beginner knitting needles and the best types of yarn for beginners to work with. For instance, it would be very difficult to learn how to knit on needles that are very small or with yarn that splits easily.
Practice, Practice, Practice!
Perhaps the best piece of advice that I can give you as you learn to knit is to keep practicing before you dive into a pattern. I know you’re incredibly eager to make your first project, but I promise you that it will go a heck of a lot smoother if you’ve first taken the time to perfect your technique.
As I was learning, I worked on one step at a time, not moving on until I had fully learned how to confidently do each stitch. That meant that I spent a few days doing nothing but knit stitches. I studied the anatomy of my stitches to see how they came together, which was the first step for me in learning how to read my knitting.
Once I was able to complete row upon row without dropping, twisting, or adding stitches, I moved on to learning how to purl. I did the same thing here.
Yes, you’ll really be chomping at the bit to jump into your first pattern, but you’ll be incredibly confident once you do get started. And, of course, there will be techniques and terms you’re bound to encounter that are unfamiliar to you, but at least you’ll have a very solid foundation.
Holding Your Needles
You’ll need to decide the most comfortable way for you to hold your needles. This can make all the difference in how confident you feel when working with your yarn. It can also affect how quickly you move through your stitches, but that isn’t something to worry about just now. That comes with practice.
There are two main forms for holding your knitting needles. The underhand method has you holding your needles similarly to how you hold a pencil, gripping them between your thumb and forefinger.
If that isn’t comfortable, try the overhand method. When knitting this way, you start by holding your needles with your palms down as though grasping a knife and a fork.
However, you aren’t restricted to either of these; there’s no “right” or “wrong” way to hold your knitting needles. These are just guidelines that may help you find your way in. Play around with the needles in your hands and find a grip that you’re comfortable with.
Continental vs. English Style
There are two popular methods for knitting that pertain to how you hold your yarn and which hand you keep your working yarn in.
When you knit English style, you hold the yarn in your right hand and wrap the yarn around the tip of your needle. You regulate your tension with your right hand, as well.
For the Continental method, you hold your working yarn in your left hand and pull it into your stitch with the tip of your needle. Slip the yarn through your left fingers to help you with the tension when working the Continental style of knitting.
Which is Better?
Both ways of holding your yarn are acceptable. You can practice working your yarn in each of these ways, but again, you may find a mish-mash of the two that work for you.
I’m never a great example of how to hold your yarn since I work in a modified English style. I taught myself how to knit out of a book, so I was never shown how to hold my yarn and needles. But it works for me! So I say, “You do you.”
Cast On
Casting on is how you get the yarn set up on your needles to begin your project. It establishes the first row of loops to build off of.
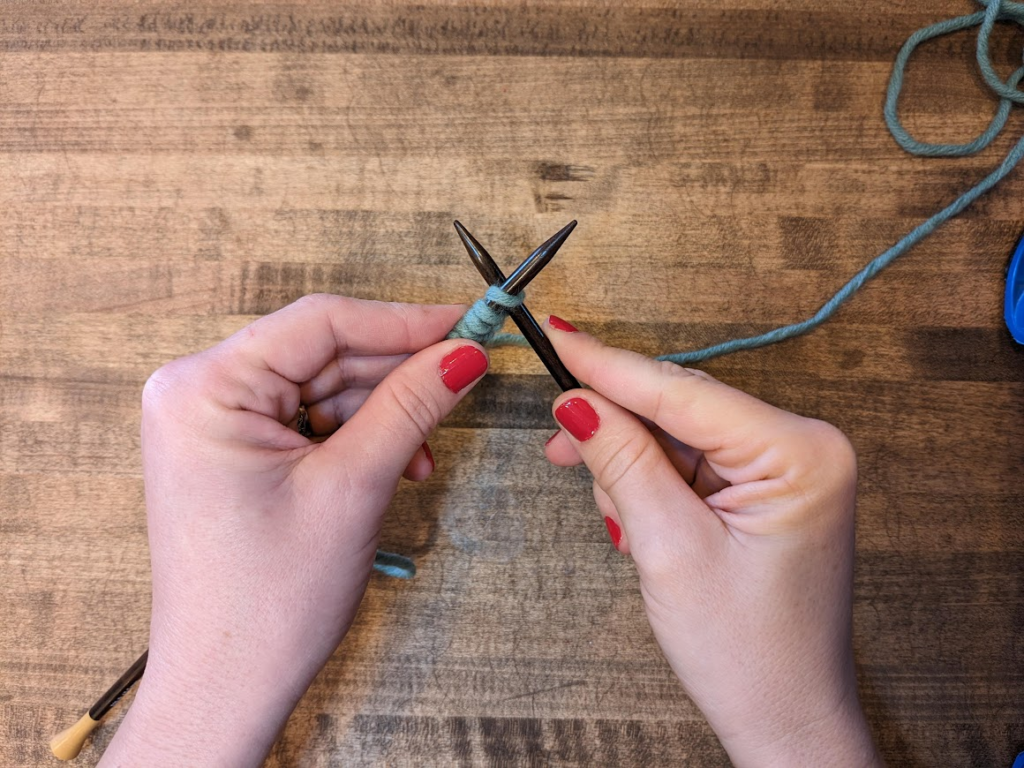
There are dozens of ways to cast on. Each one has a different elasticity to it and a different feel. Most of the time, you can choose whichever method you like best.
We will start with the slip knot cast on.
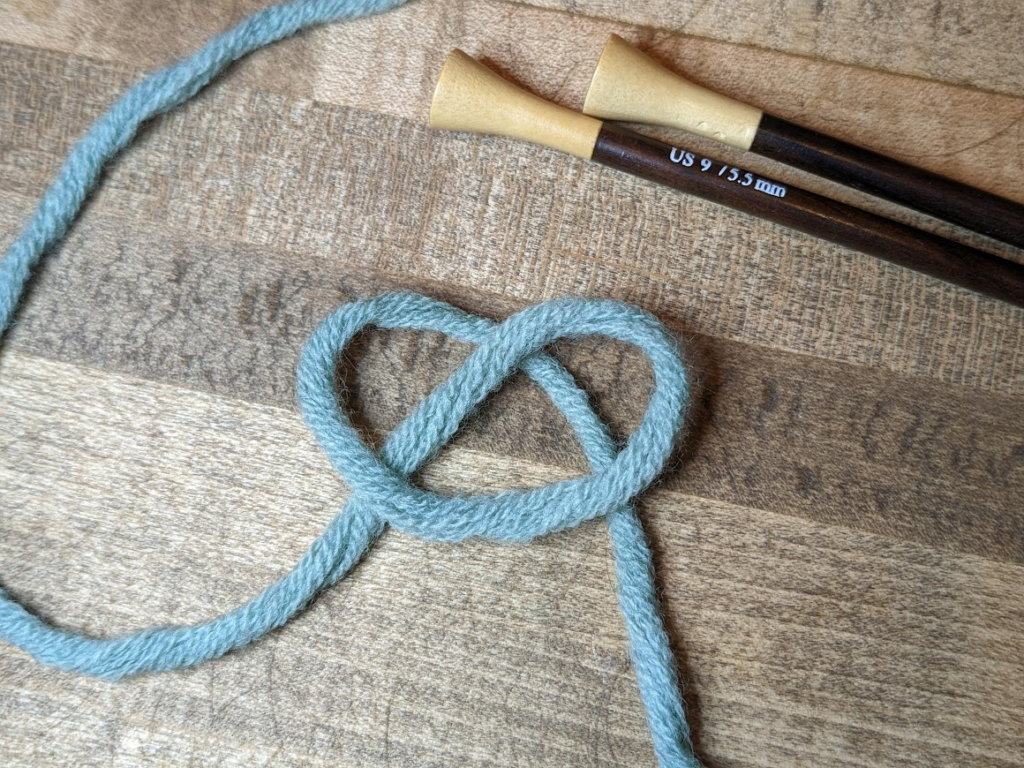
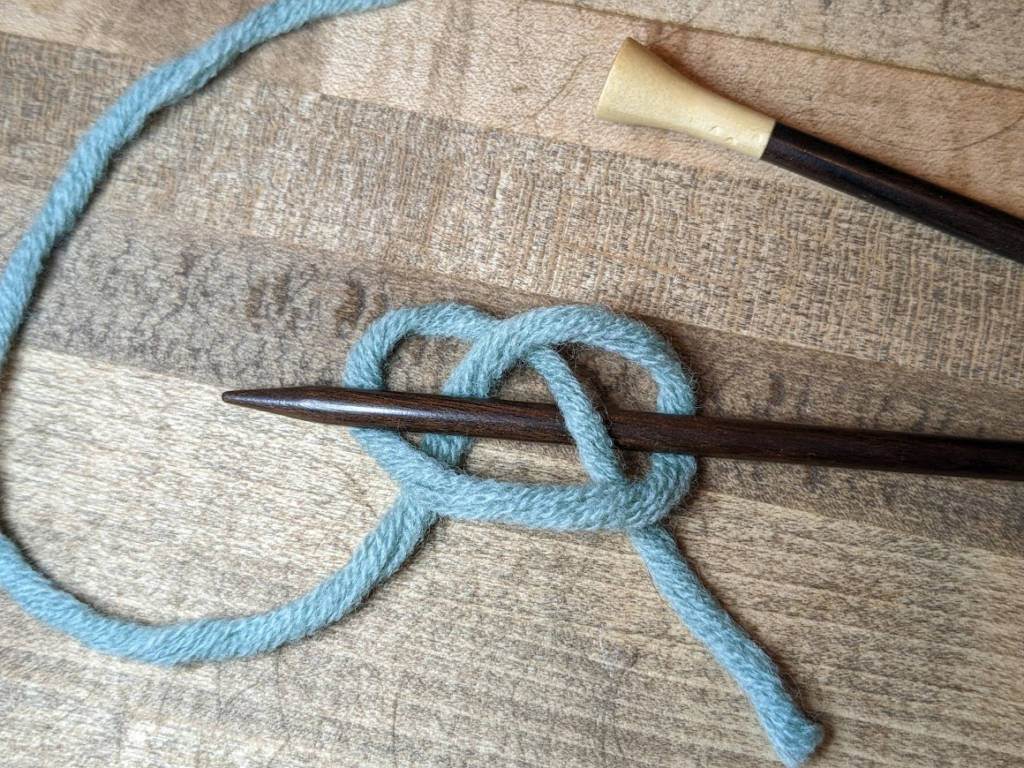
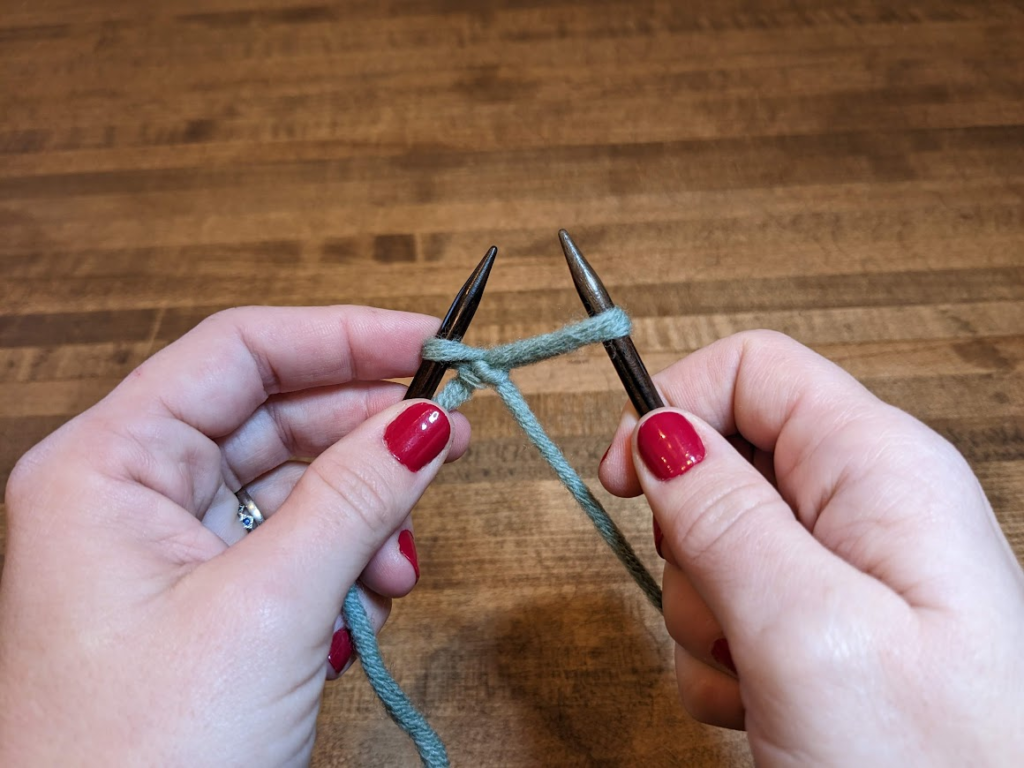
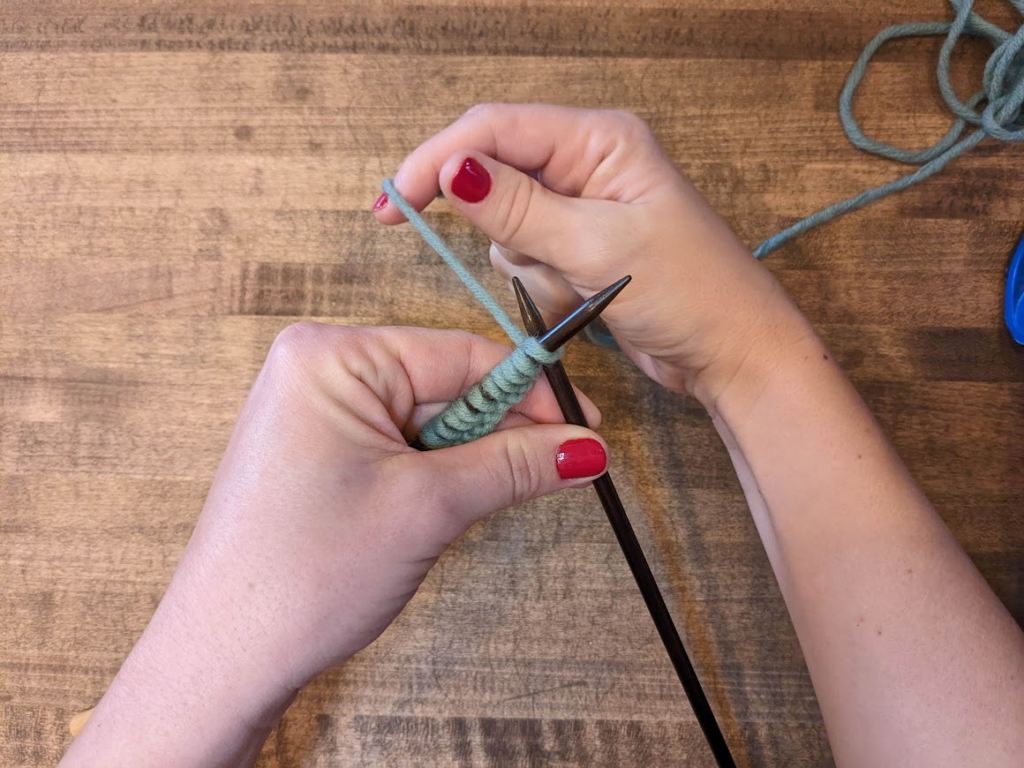
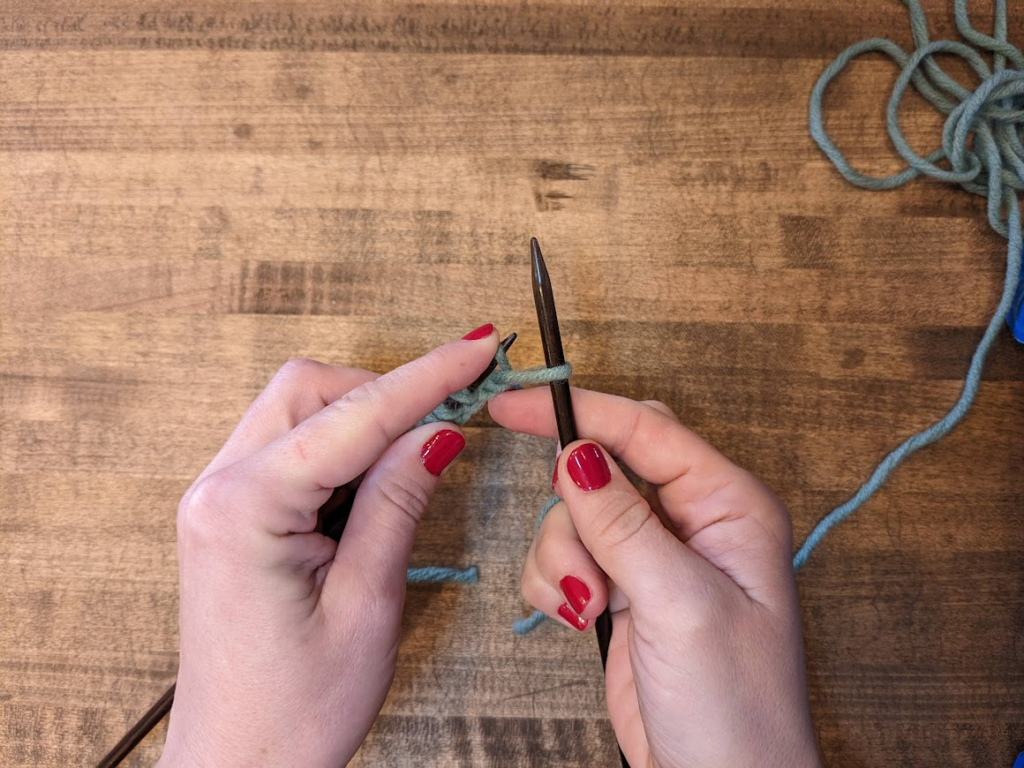
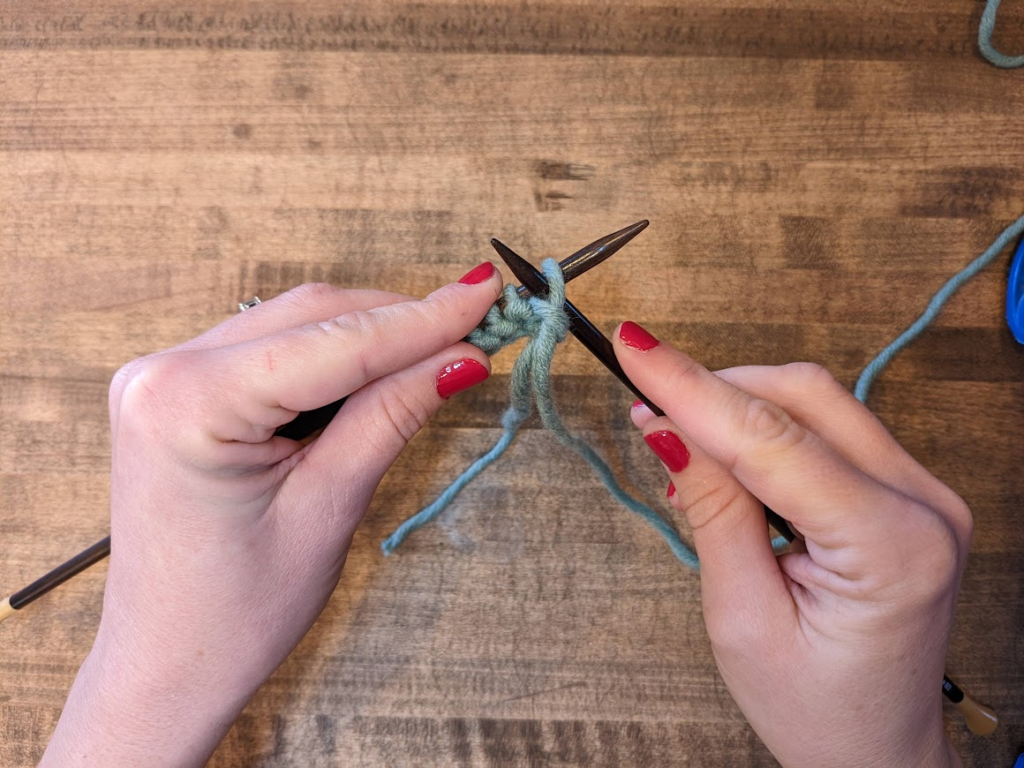
Step 1. Create a pretzel with the end of your yarn. Slide the tip of your knitting needle underneath just the piece that is entirely under the pretzel loop. Pull both ends of the yarn together to form a slip knot around your needle.
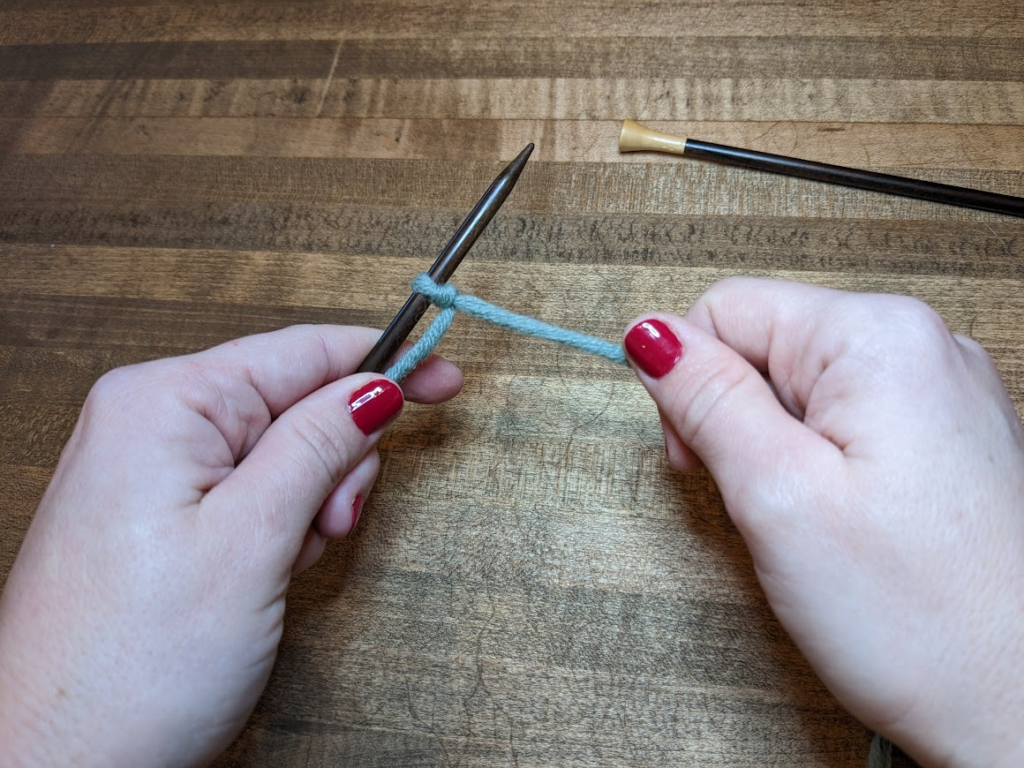
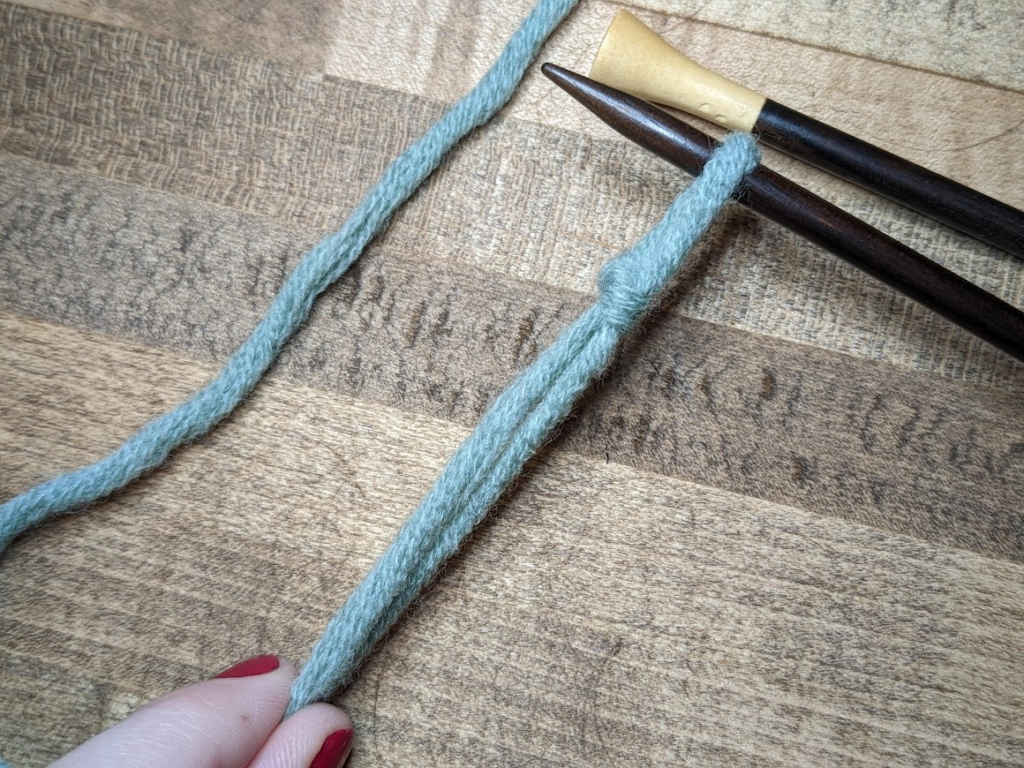
Step 2. Pull the knot taut (but not tight!) against the needle. Hold the needle in your left hand with the tail of the yarn tucked in your hand or against the side of the needle. This helps keep it out of your way.
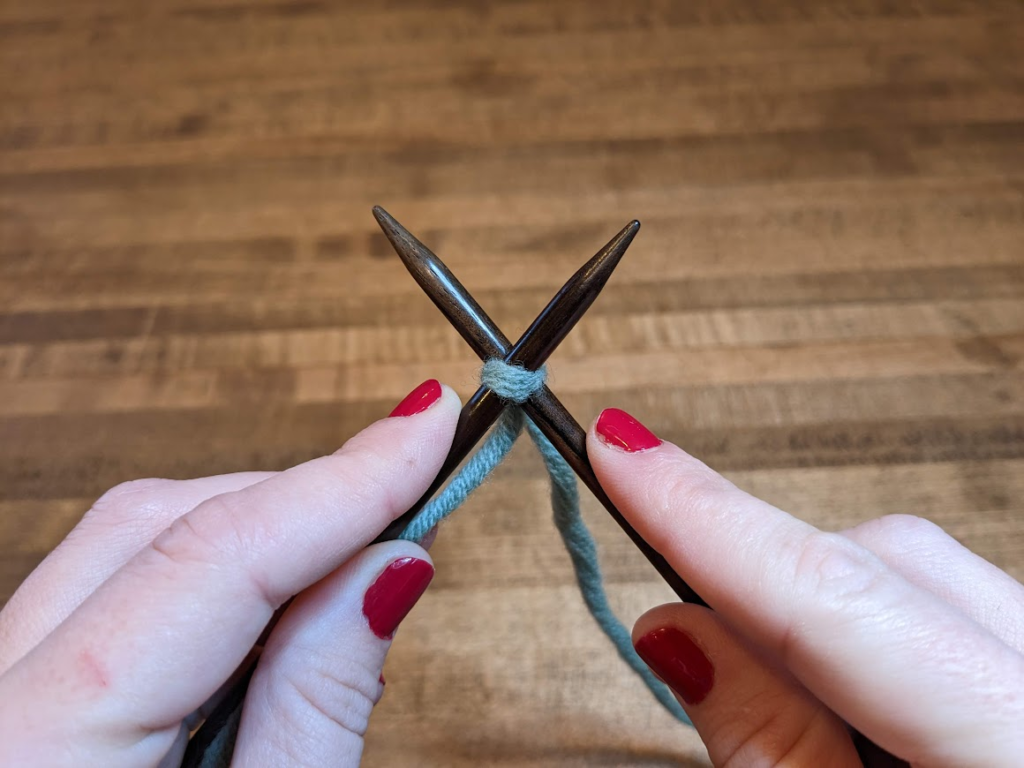
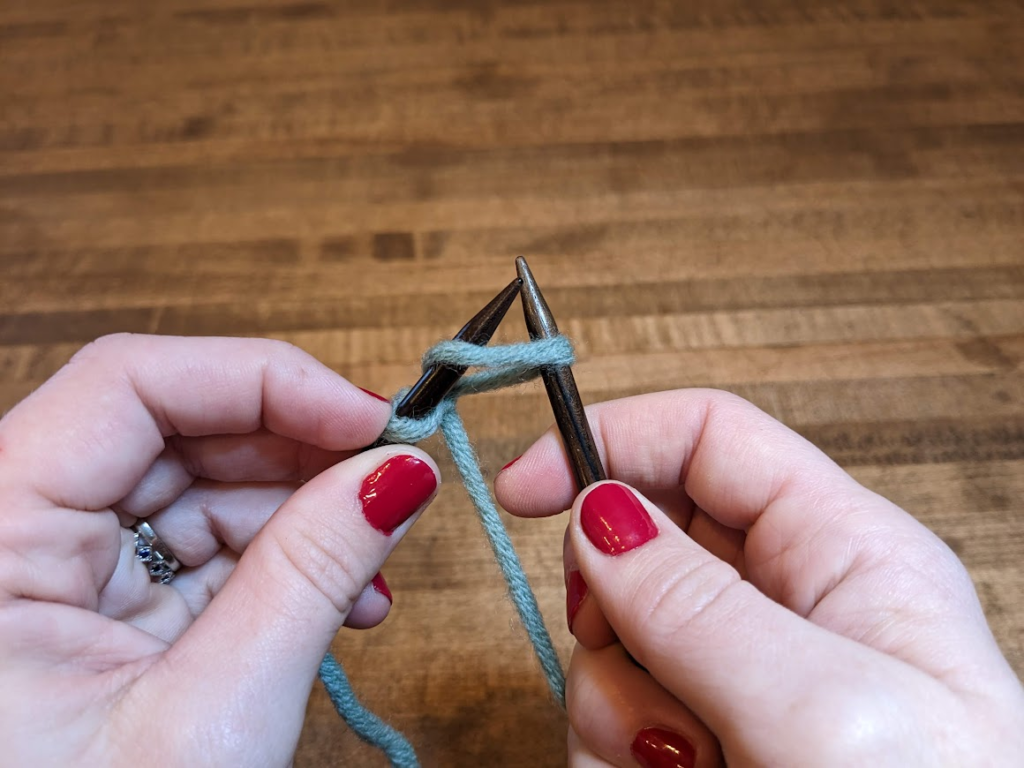
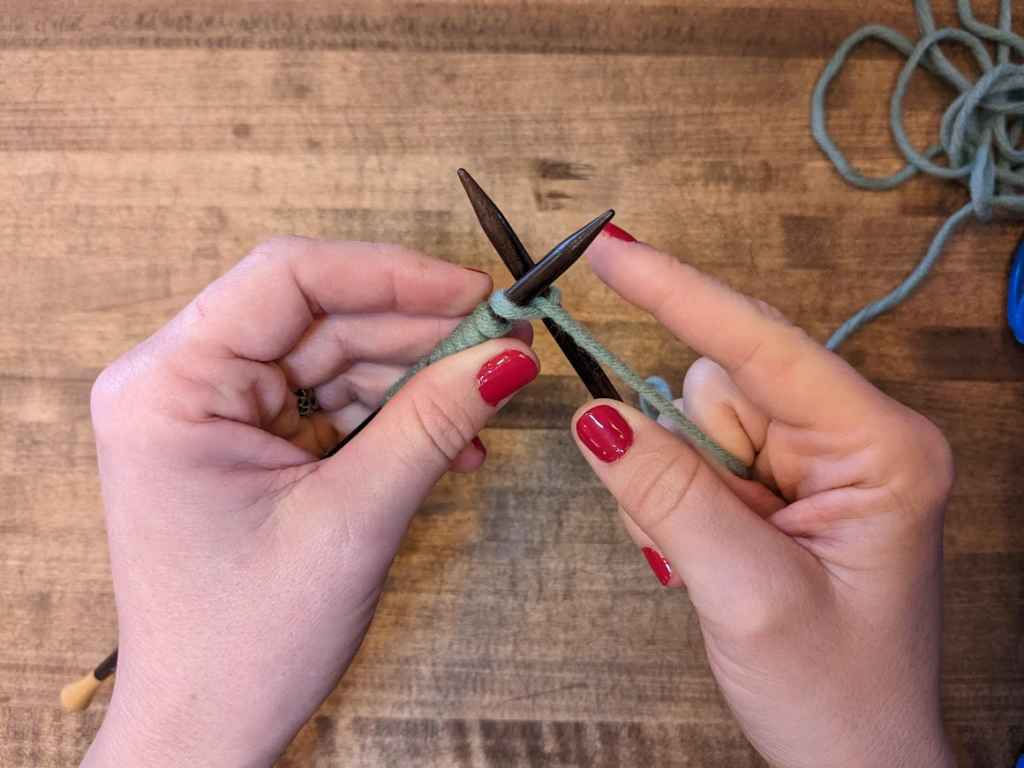
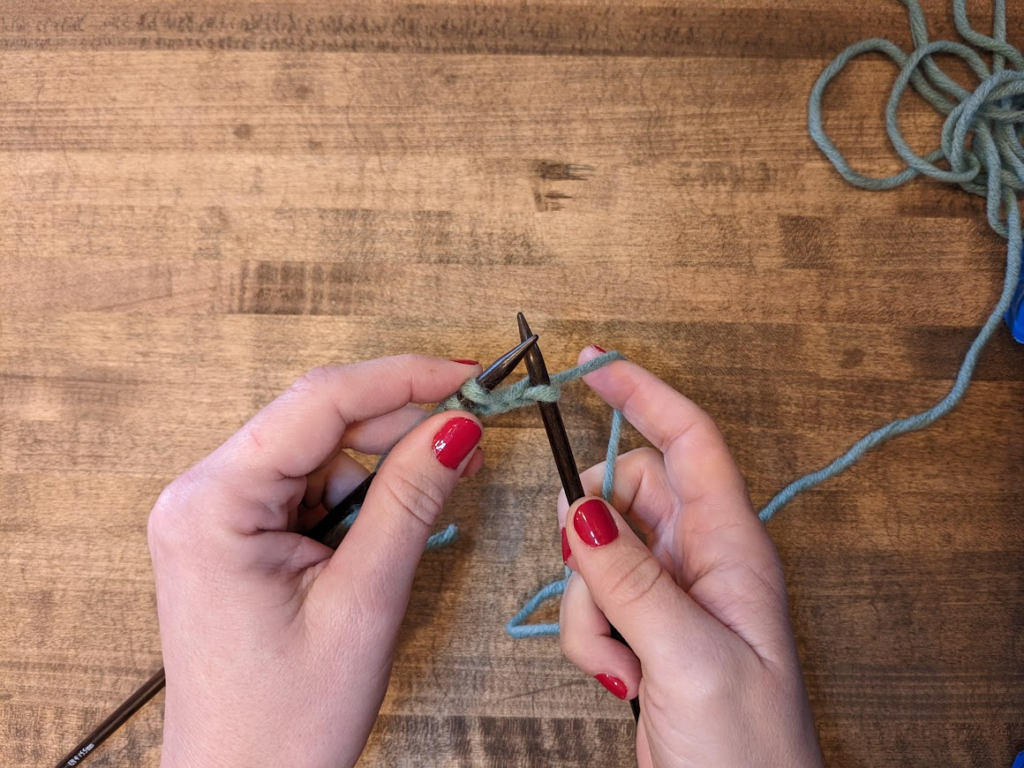
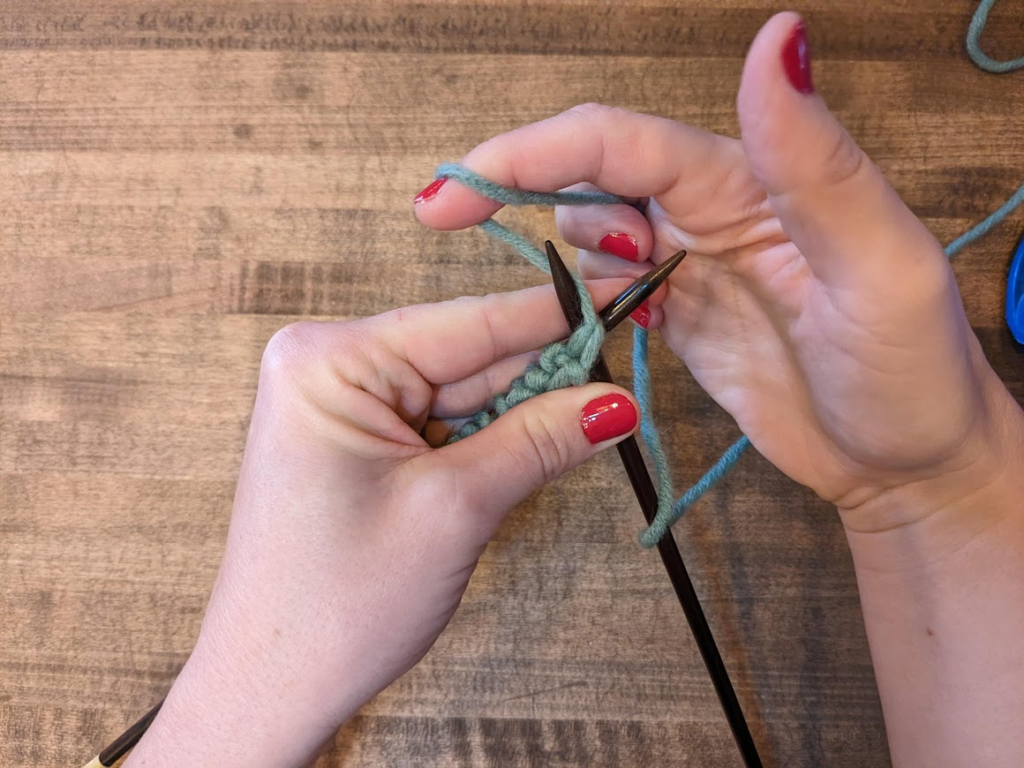
Step 3. Insert the tip of your right needle into the top stitch on your left needle, from underneath and in the back, right to left. Your needles should cross, with the right needle on the bottom.
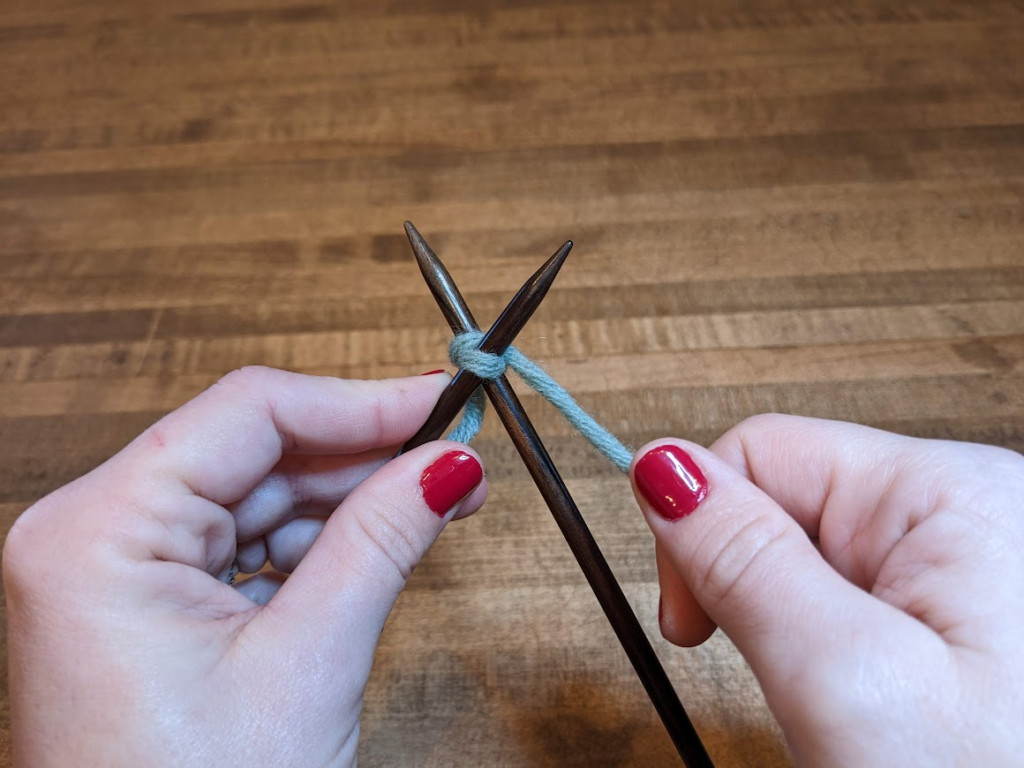
Step 4. Wrap the working yarn behind the right needle, bringing it up and then down between your crossed needles from back to front.

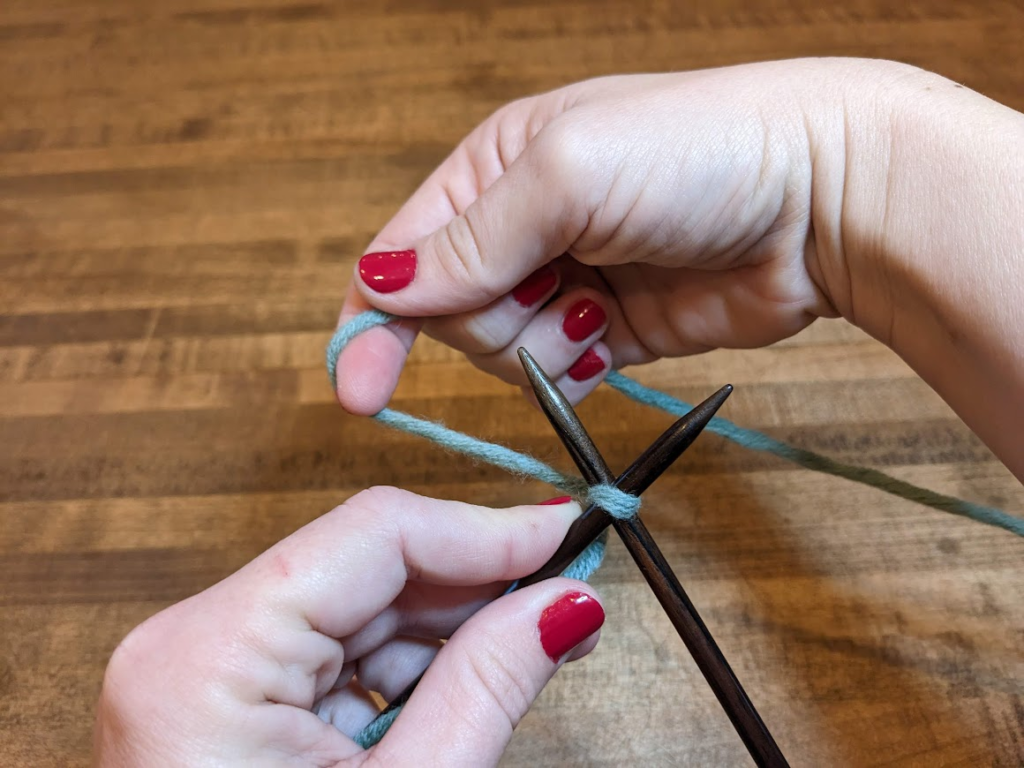
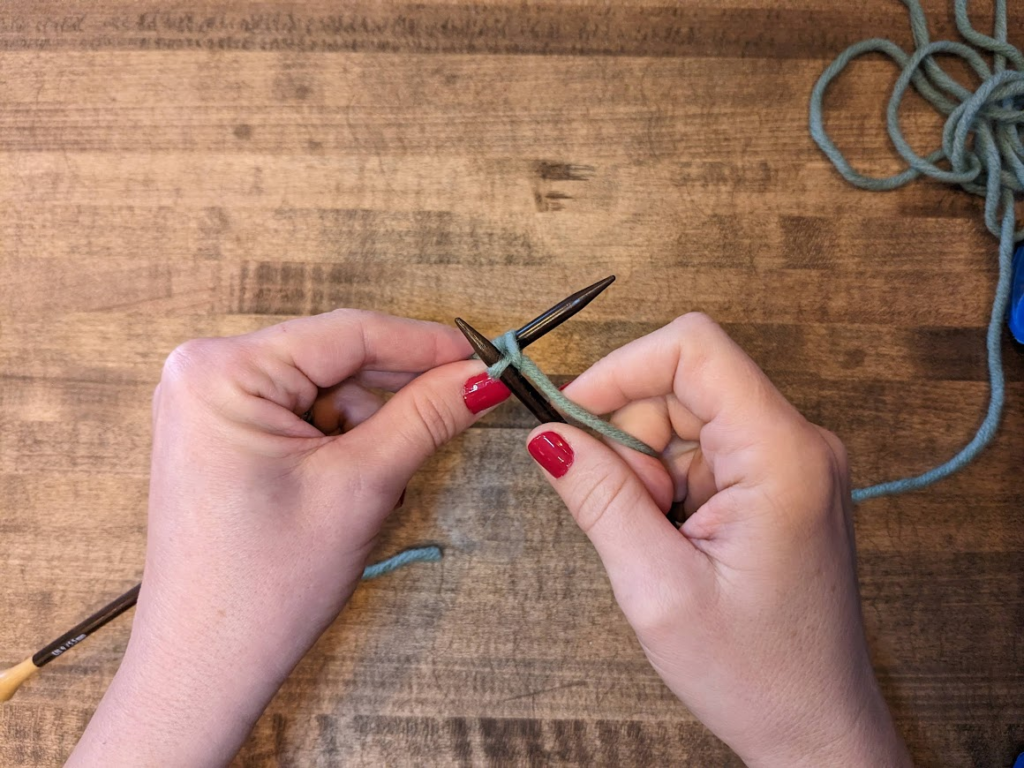
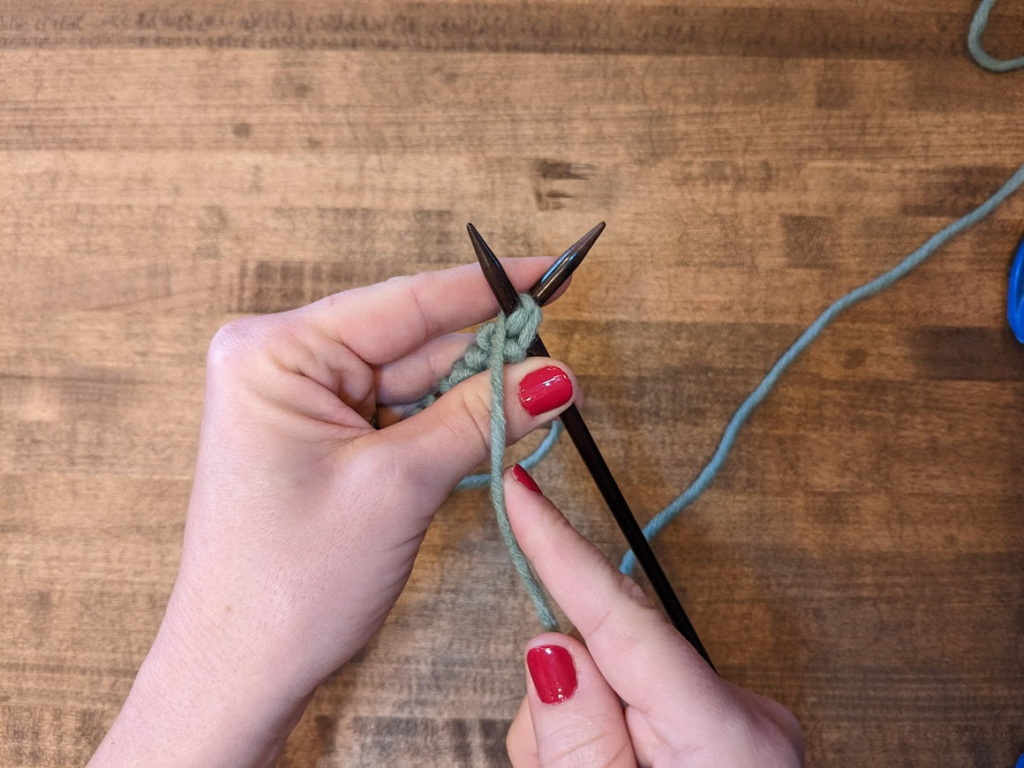
Step 5. Slide the right needle down and out the front of the loop, bringing the working yarn with it.
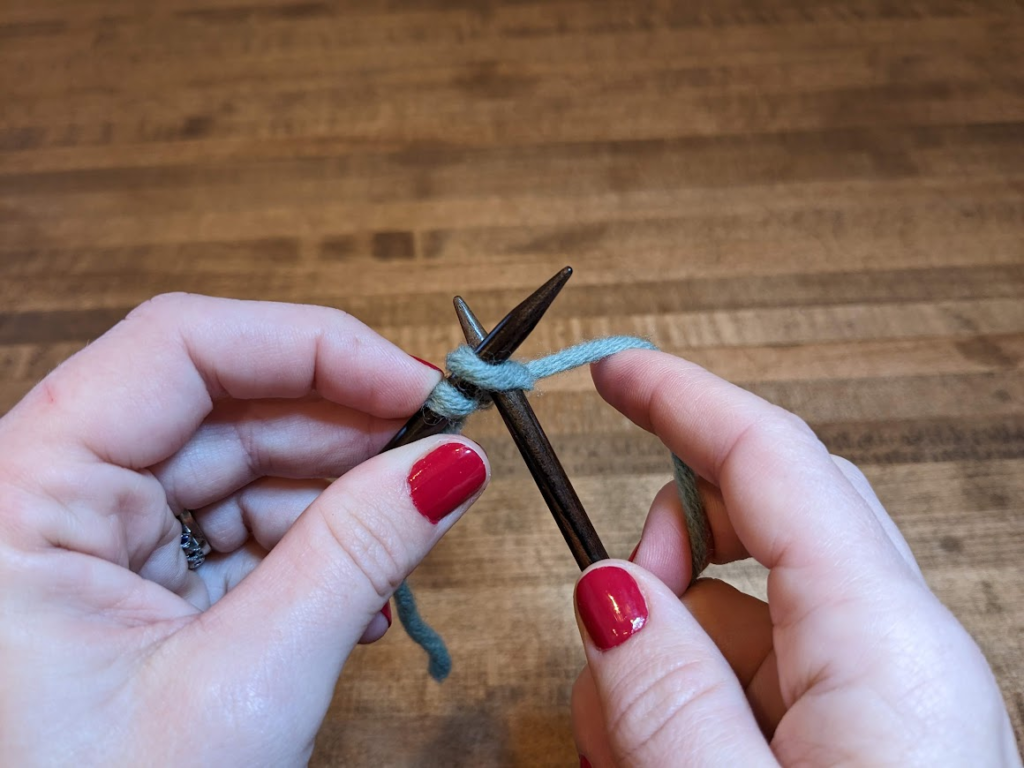
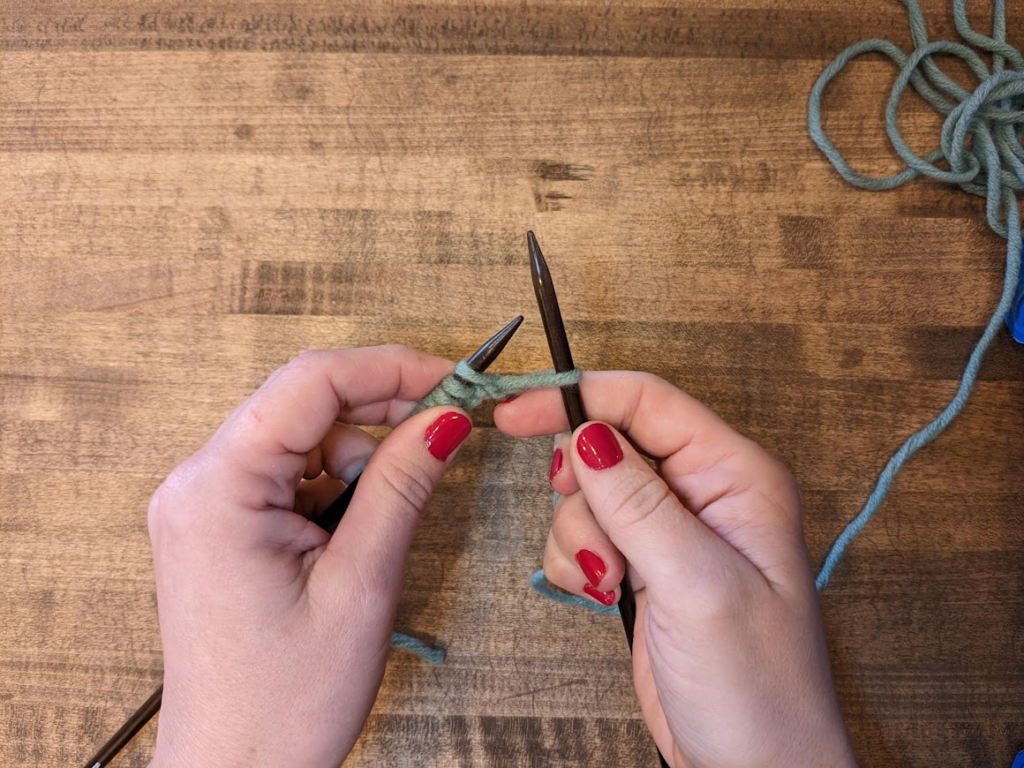
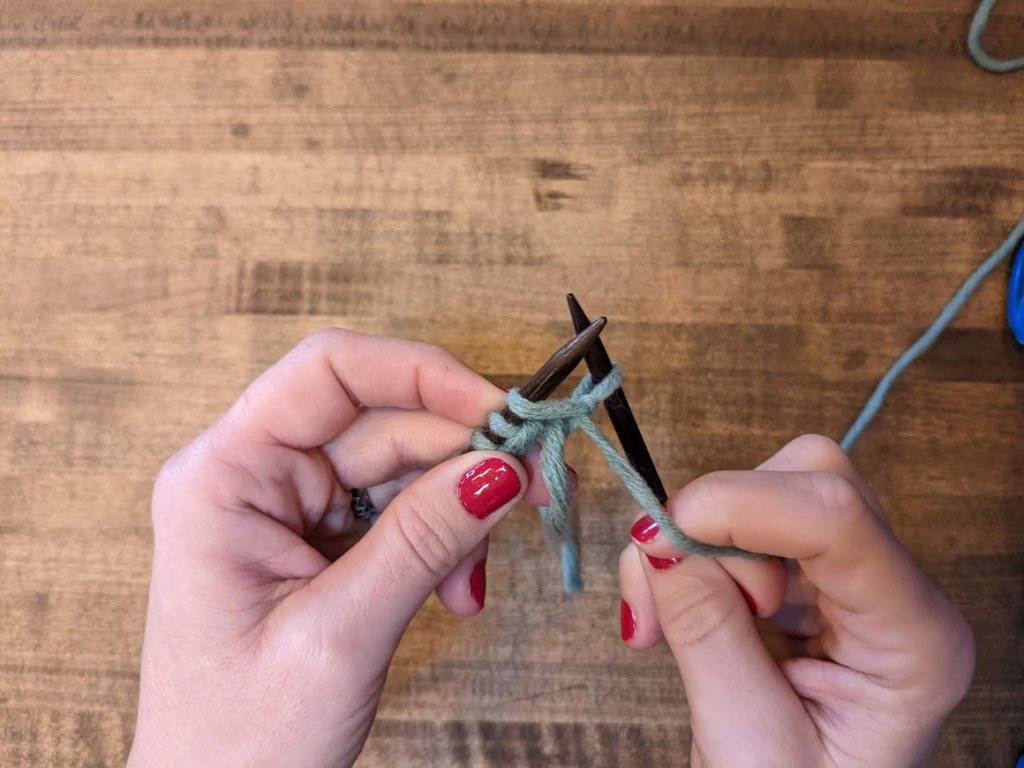
Step 6. Dip your left needle under the front of the loop you just made on your right needle. Cross the left over the right needle, and begin back at step 4, repeating until you have the desired number of stitches on your left needle. To finish, simply slide right needle out of yarn loop once you’ve transferred it to the left one.
Knit Stitch
Now it’s time for the big show – the knit stitch! Knit stitches are the fundamental building blocks of your knitting. You’ll likely use this stitch more than any other.
HELPFUL HINT: Your working yarn (that is, the yarn connected to your skein of yarn) will always be on your right side.
Step 1. Hold your needle with the cast on stitches in your left hand, with the working yarn at the top back and facing toward your right. Your empty needle belongs in your right hand.
Step 2. Insert the tip of your right needle into the top stitch on your left needle, from underneath and in the back, right to left. Your needles should cross.
Step 3. Wrap the working yarn behind the right needle, bringing it up and in between your crossed needles from back to front.
Step 4. Slide the right needle down and out the front of the loop, bringing the working yarn with it.
Step 5. Slip the loop off your left needle.
You’ve created a knit stitch on your right needle!

Repeat steps 2-5 for each stitch on your left needle until they have all been moved over to your right needle.
Turning Your Work
Once you’ve completed your row, all your stitches will be on your right needle. This means it’s time to switch hands and turn your work; you will always knit from the left needle onto the right one.
So, take your needle with stitches on it from your right hand, and transfer it to your left hand. The stitches should be facing inward and your working yarn at the back. Hold the now-empty needle in your right hand.
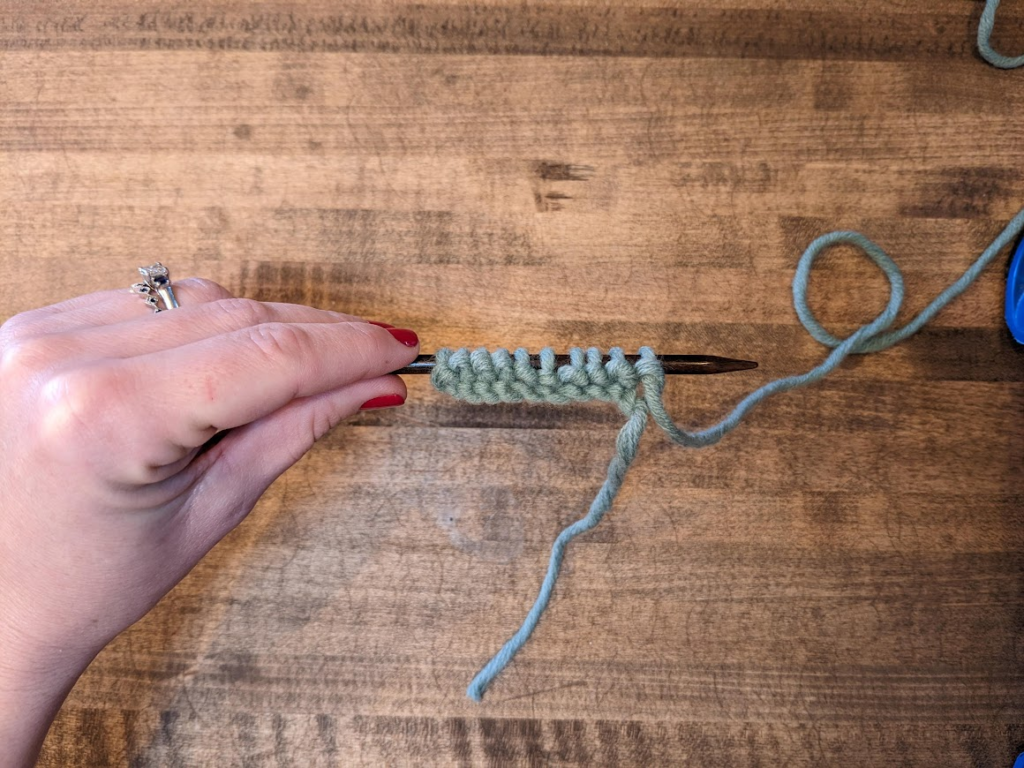
At this point, you can keep practicing knit stitches back and forth for each row. This will create a type of stitching called garter stitch. The way you put knit and purl stitches together create many different types of stitches.
Ready to try purl now?
Purl Stitch
You’ve heard the mantra knit one, purl two. Well, here’s the second most important thing you need to learn for knitting: the purl stitch. To start, make sure your working yarn is in the front of the needle.
Step 1. With your right needle, insert the tip into the first loop on your left needle, but this time from the top down toward the left.
Step 2. The active yarn will be pointed down, so grab that and wrap it around your right needle counterclockwise. Bring it down between your crossed needles.
Step 3. Slide your right needle down to bring it back and out of the loop, picking up the working yarn and drawing it with you as the needle comes out. Slip the loop off your left needle.

You have now purled a stitch onto your right needle!
Continue until you’ve moved all the stitches from your left needle onto your right needle.
Turn work and continue practicing purling.
Guess what type of stitch you’ll be creating when you practice purling each row? Yep, it’s a garter stitch again!

Bind Off
Ok, you’ve finished up, so now what? Time to get your work off your needle without letting it unravel. For this step, we’ll bind off or cast off.
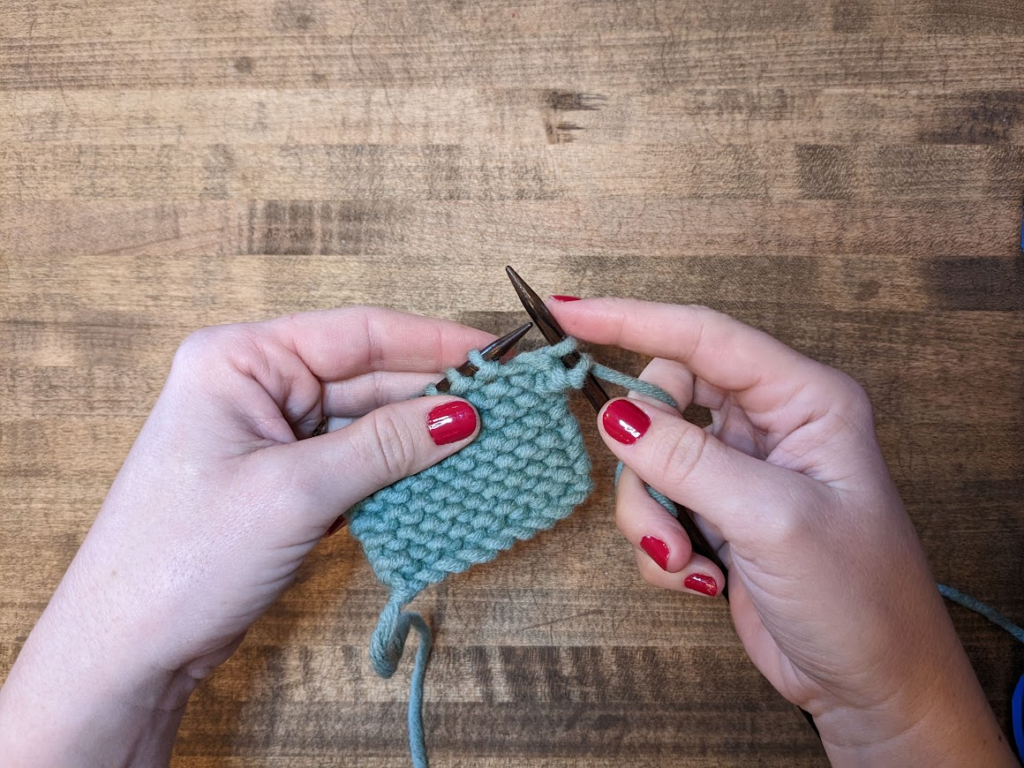
Step 1. Work the first two stitches as usual. This means that if you’ve been knitting, knit the first two stitches; if you’ve been purling, purl them.
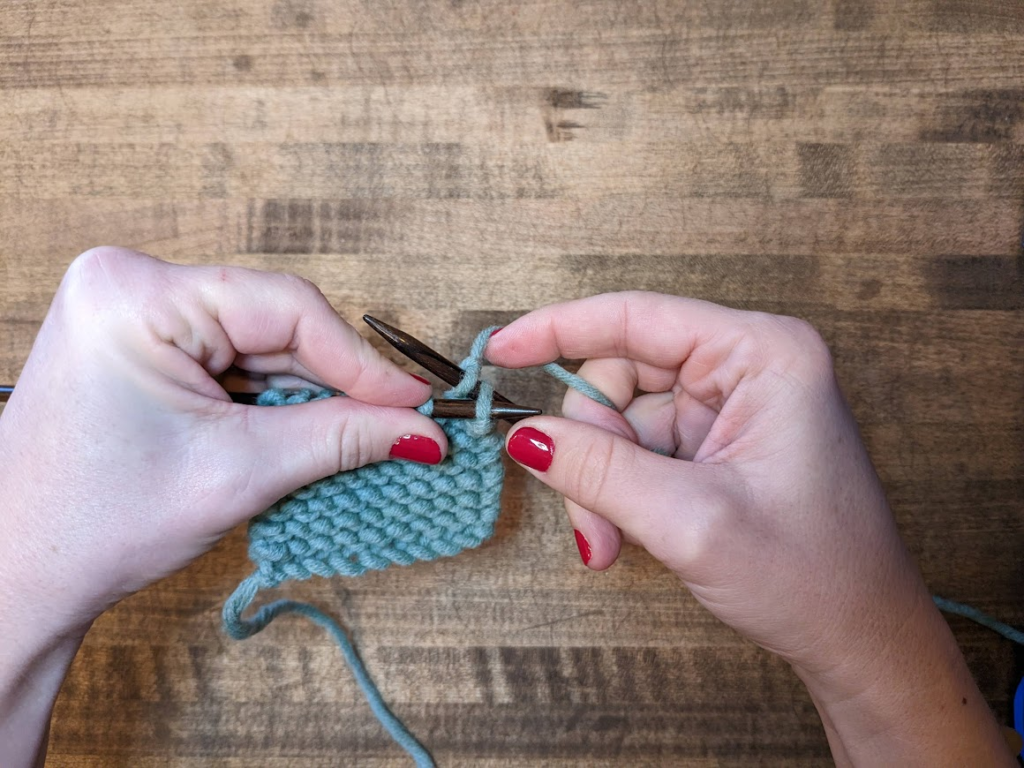
Step 2. Pause there. Here’s where it gets tricky: insert the tip of your left needle into the loop of the first stitch you worked onto your right needle. This means skipping over the one you just worked.
Step 3. Lift that loop over the other stitch and pull it off the needle entirely. Don’t worry, your work won’t fall apart; the loop you just pulled off is held in place by the stitch you pulled it over.
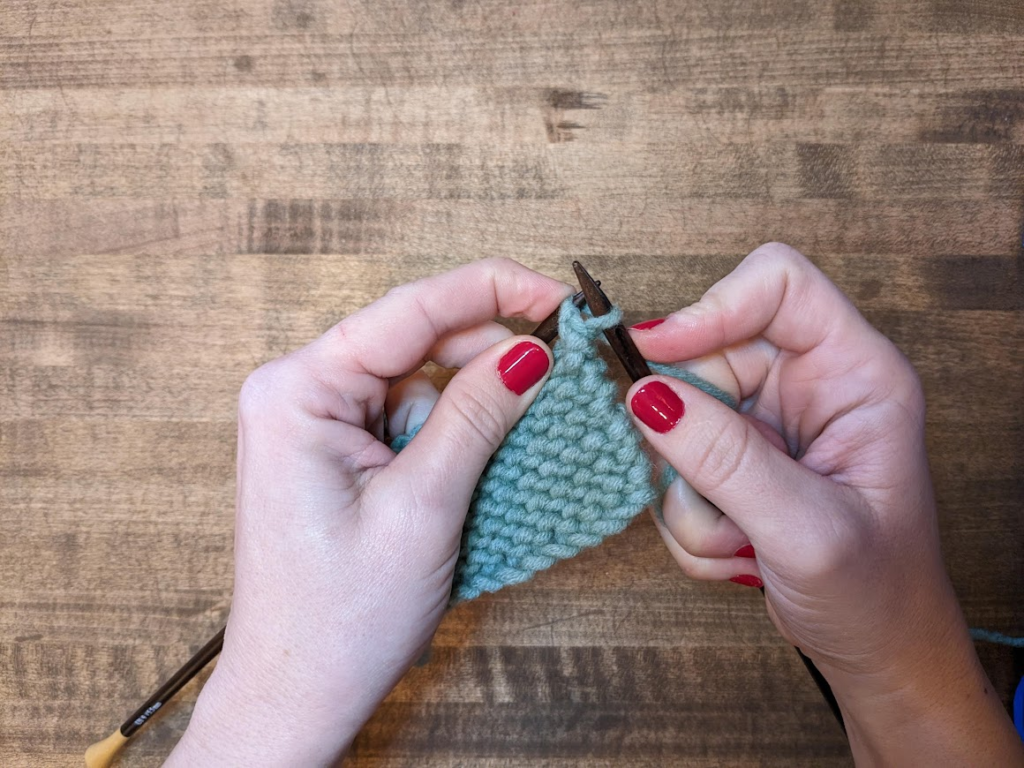
Step 4. Knit or purl one more stitch. You will once again have two stitches on your right needle. Repeat steps 2-4 until you only have one stitch left on your right needle and an empty left needle.

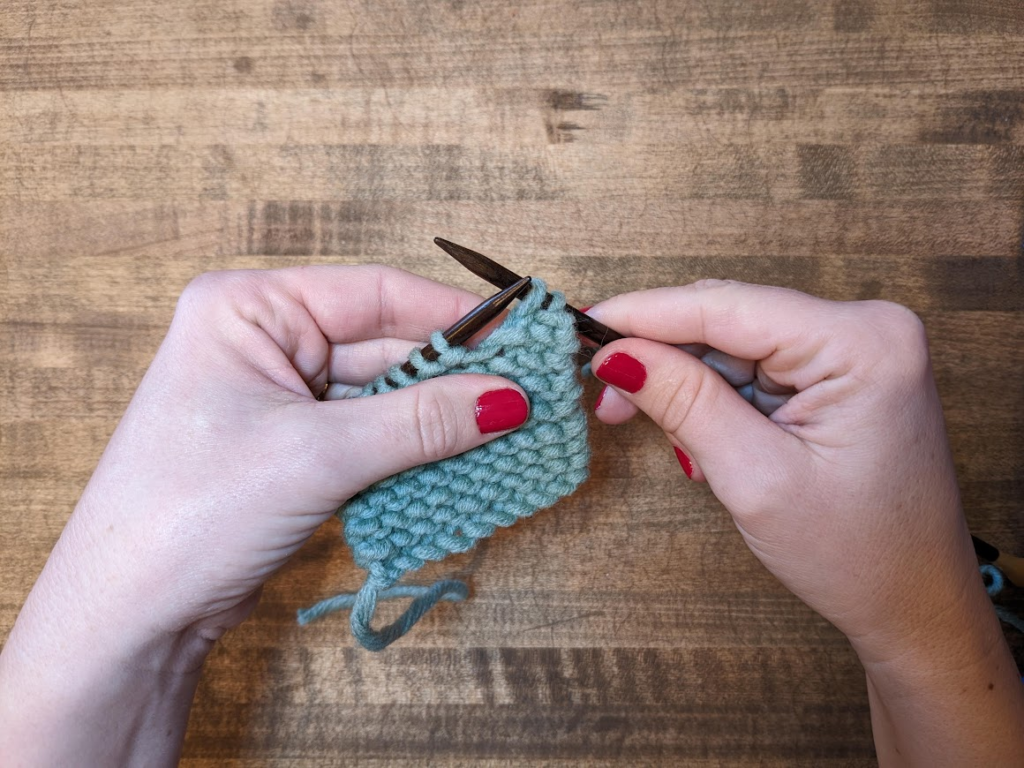
Step 5. Snip your working yarn. Pull the stitch open wide, and thread the tail of your working yarn through the loop, pulling tightly to tie it off.
You Did It! Next Steps
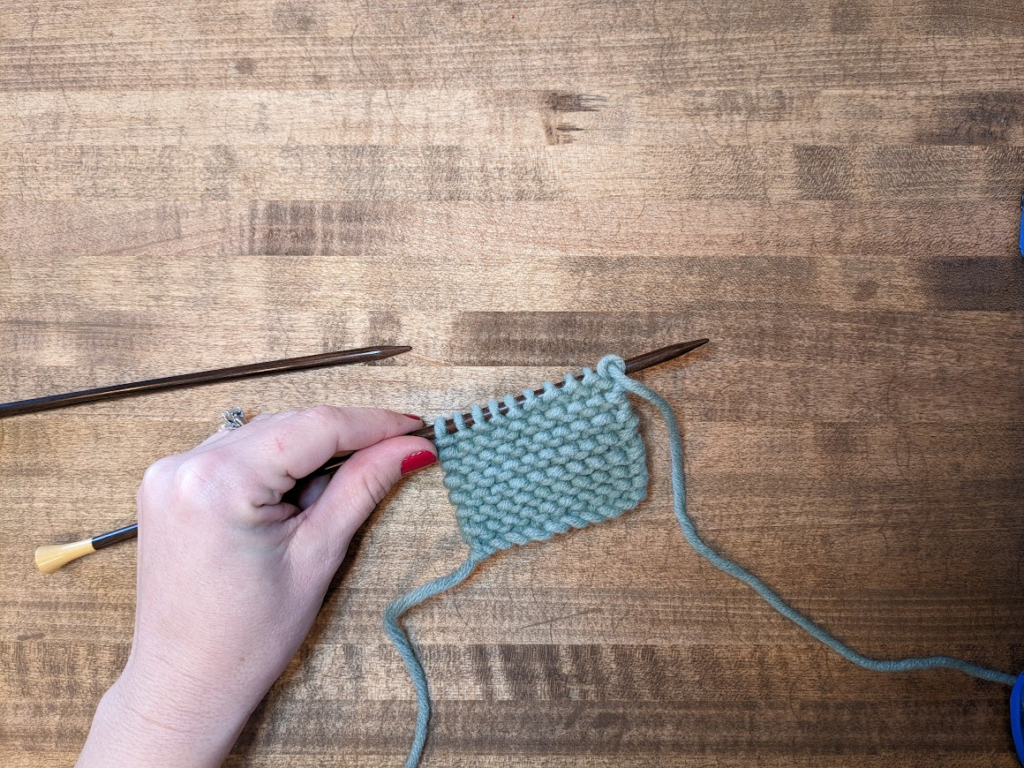
Now that you’ve conquered knit stitches and purl stitches, work on combining them. Practice a swatch of knitting one row and purling the next. Working alternating knit and purl rows gives you a beautiful stockinette stitch.
Next, you can practice knitting one stitch, purling the next stitch, and continuing in that manner to create a rib stitch. But we’ll practice those in more detail later.
Ready to try your first project? I’ll bet you are!
Here’s a very simple scarf pattern for you.
Simple Scarf
- Cast on 30 St. (This can be variable, based on how wide you want your scarf to be. Feel free to experiment!)
- Knit across.
- Turn work.
- Continue to knit across for every row, turning work as you finish.
- When the scarf is as long as you want, bind off.
Voila! Your very first scarf — congratulations!
Now I want to hear from you! Comment below and tell me how it went. Better yet — post pics of your first projects, please!
Trackbacks/Pingbacks